10 Smart Roof Leak Fix Guide Safety Hacks for Fast Repairs
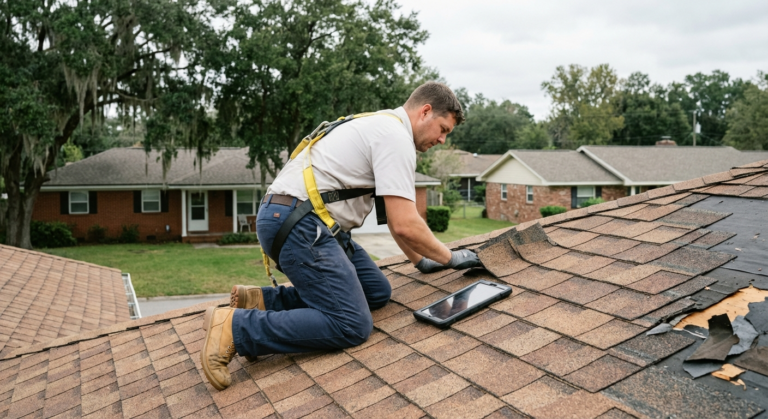
Let me tell you about the day I almost fell off my roof trying to fix a leak during a drizzle. I thought I was being smart — “it’s just a light rain, I can see exactly where the water’s coming in!” Spoiler: I was not being smart. I was being reckless. I slipped on the wet shingles, caught myself on the gutter (which bent pretty badly), and came down the ladder with nothing fixed and a bruised ego.
That day changed how I approach every single roof repair. Safety isn’t just a checkbox — it’s what stands between you and an ER visit. So here are the 10 safety hacks I’ve learned, some the hard way, that make roof leak repairs faster and a lot less terrifying.
1. Always Do a “Dry Run” Before You Ever Climb Up
Before grabbing your tools and heading up the ladder, spend five minutes planning your route on the roof. Look at the slope, figure out where you’ll step, and identify where the leak area actually is.
I used to just scramble up and figure it out as I went. Bad idea. You waste time, you step in the wrong spots, and you’re moving around more than necessary — which is exactly when accidents happen.
Stand at ground level, use binoculars if you have them, and map out your path. Check for soft spots, moss patches, or debris before you put your weight anywhere near them.
Quick tip: Google Earth or your phone’s satellite view can actually give you a decent overhead picture of your roof layout before you go up. Sounds overkill, but it’s saved me more than once.
2. The “Three-Point Contact” Rule Is Non-Negotiable
This one comes straight from professional roofers. Three points of contact — two feet and one hand, or two hands and one foot — must be maintained at all times when climbing.
The moment you break that rule to reach for something or shift materials, you’re one unexpected gust of wind away from a fall.
I started keeping a small tool belt or apron on me so both hands are free while climbing. No more carrying a caulking gun in one hand while gripping the ladder with the other. Everything goes in the belt, and I keep both hands on the ladder.
It feels slow at first. But slow is smooth, and smooth is safe.
3. Roof Anchors Are Worth Every Penny
A fall arrest system — basically a rope tied to a roof anchor with a harness — sounds excessive for a DIY repair. Until you factor in that falls from roofs send tens of thousands of people to hospitals every year.
Roof anchors screw into the decking and ridge, and you can pick up a basic kit for around $40–$80. Pair it with a decent harness and a rope grab, and you’ve got serious protection for under $150 total.
I installed a permanent anchor near my chimney after my near-miss. Now it’s just part of my routine — clip in, fix the leak, unclip, done. The anchor gets a small patch of roofing caulk over the screw after each use to keep it sealed.
Don’t skip this if your roof has any pitch steeper than a 4:12 slope. It’s not paranoia, it’s math.
4. Never Repair a Wet or Frost-Covered Roof
Obvious, right? You’d be surprised how many people (myself included, once) try to sneak up during a break in the rain to “just check something real quick.”
Wet shingles, even asphalt ones, become incredibly slippery. And morning frost is almost invisible but absolutely deadly under your boots.
The rule I follow now: if it rained within the last two hours, I wait. If the temperature was below freezing overnight, I wait until at least mid-morning and check the surface with a gloved hand before putting weight on it.
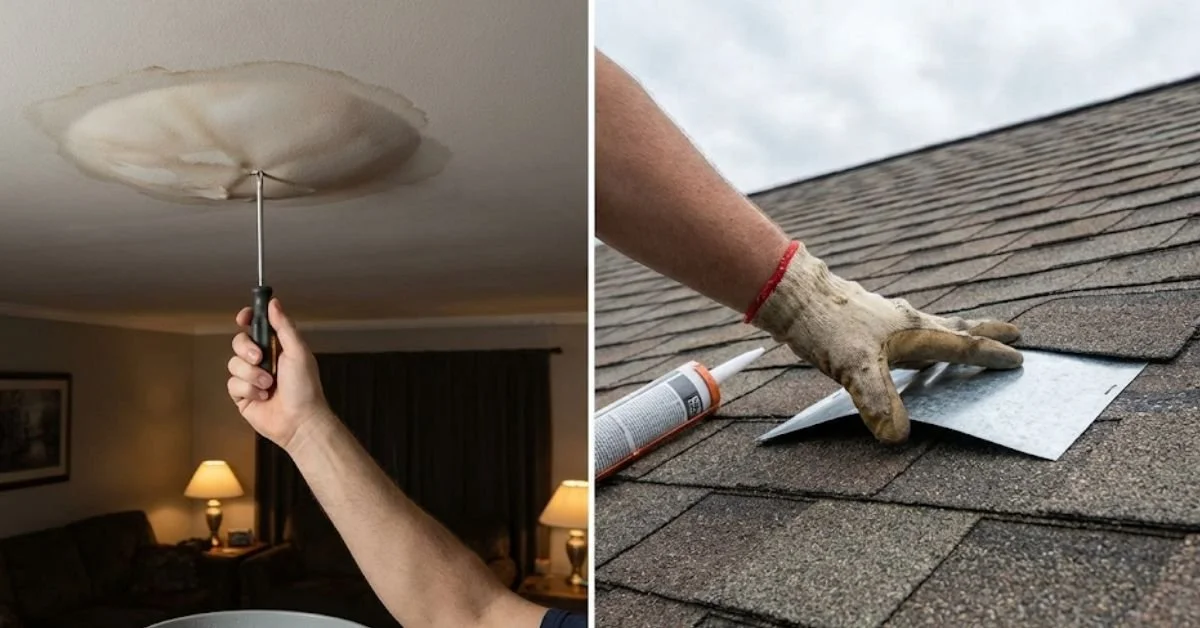
For urgent leaks where you can’t wait, there’s a safer option — check out these 8 fast roof leak fix guide repair tricks that saved my roof for interior temporary fixes that buy you time without getting on a dangerous surface.
5. Use the Right Footwear (This Is Huge)
I wore old running shoes my first time up. They have decent grip on pavement. On a shingle roof? Basically ice skates.
Roofing shoes or boots need rubber soles with a soft compound — think something close to a rock climbing shoe in terms of how it grips. Brands like Cougar Paws make dedicated roofing boots with a replaceable pad system, and they’re genuinely worth it if you do more than one or two repairs a year.
At minimum, use clean, rubber-soled work boots. No leather soles, no sneakers with worn treads, absolutely no sandals (yes, I’ve seen it).
Here’s a simple grip comparison based on common footwear choices:
| Footwear Type | Roof Grip Rating | Notes |
|---|---|---|
| Dedicated roofing boots | ⭐⭐⭐⭐⭐ | Best grip, purpose-built |
| Rubber-soled work boots | ⭐⭐⭐⭐ | Good for most repairs |
| Running/athletic shoes | ⭐⭐ | Unpredictable, avoid |
| Leather-soled boots | ⭐ | Dangerously slippery |
| Sandals/flip-flops | 0 | Absolutely not |
6. Set Up a Proper Staging Area at Ground Level
One of the biggest safety mistakes people make is making multiple trips up and down the ladder. Every trip is a risk. The more you climb, the more chances something goes wrong.
Before I go up now, I lay everything out on a tarp at the base of the ladder — caulk gun, roofing cement, patching fabric, putty knife, utility knife, brush, and extra screws. I do one inventory check, then I load my tool belt with what I’ll actually need.
If I’m doing a larger repair, I’ll use a bucket with a rope so someone on the ground can hand materials up. That way I stay anchored in one spot rather than wandering around the roof looking for things.
It sounds like extra prep work, but it cuts your actual roof time in half and dramatically reduces your exposure.
7. Tell Someone You’re Going Up — Every Single Time
This feels unnecessary until it isn’t. If you slip and fall, you want someone to know you were up there. If you get stuck (it happens — I once had a gutter section shift and block my descent path), you want someone nearby.
My rule: I always tell my wife or text a neighbor before going up. Quick message — “Fixing the roof, back down in 30 minutes.” If I’m not back, someone checks.
It’s also useful having a ground person to watch for debris falling, keep kids and pets clear of the area, and hand you things using that bucket-and-rope system I mentioned.
Roof work is not the place for solo heroics.
8. Inspect Your Ladder Before Every Single Use
A wobbly ladder is a silent killer. Most people grab the ladder from the garage and go. They don’t check the feet, the rungs, or whether it’s rated for their weight plus their tools.
Here’s my quick ladder check — takes about 60 seconds:
Step 1: Check the non-slip feet — are they worn down or missing? Replace them, they cost a couple of dollars.
Step 2: Test each rung by pushing down firmly before trusting your weight to it.
Step 3: Make sure the ladder extends at least three feet above the roofline. This gives you something to grip when transitioning onto and off the roof — the most dangerous part of the whole operation.
Step 4: Set the base at a 75-degree angle (roughly one foot out for every four feet of height). Use a ladder leveler on uneven ground — don’t just jam rocks under one leg.
Step 5: Secure the top of the ladder to the fascia or gutter bracket so it can’t shift sideways while you’re up.
For more on preparation before repairs, these 6 essential roof leak fix guide basics before the rainy season cover a lot of the same prep principles in more detail.
9. Know the Warning Signs That Mean “Call a Pro Instead”
Part of staying safe is knowing when a repair is beyond your skill level or equipment. I learned this one after spending four hours on a repair that a roofer fixed in 45 minutes — because he had the right tools and knew exactly what he was looking at.
Here’s when to put down the caulk gun and call someone:
- The leak is near the ridge line or valley — these are complex areas with tricky flashing
- You’re seeing widespread soft spots or spongy decking when you walk
- The leak has multiple entry points that aren’t obvious
- Your roof pitch is steeper than a 6:12 slope and you don’t have professional fall protection
- The repair area is near electrical equipment (TV antennas, solar panels, HVAC units)
There’s no shame in it. A professional repair is cheaper than a hospital visit and usually cheaper than the water damage that builds up from an improperly fixed leak.
If you’re still in the “I can handle this” zone and want to prep properly, these 7 essential roof leak fix guide safety checks before you start are a great pre-repair checklist.
10. Have an Emergency Exit Plan Before You Need One
This one sounds dramatic but it’s genuinely practical. Before you start any repair, ask yourself — if something goes wrong right now, what do I do?
If your ladder shifts and falls, do you know where the next accessible point is? If a storm rolls in faster than expected, where’s the fastest safe path down? If you twist an ankle and need to get off the roof without full mobility, what’s your plan?
I keep a mental map of my exit route updated every time I move to a different part of the roof. The goal is to never be more than 20–30 feet from a safe descent point.
Also, keep your phone in your tool belt or a pocket — not in the car, not on the ground. If something happens, you need to be able to call for help from wherever you are.
Common Mistakes That Make Roof Repairs Way More Dangerous
A few things I see (and have done) that turn a manageable repair into a dangerous situation:
Working alone without telling anyone — covered above, but worth repeating. This single habit change dramatically improves your safety margin.
Rushing because rain is coming — urgency makes you sloppy. If a storm is two hours out, it’s often better to set up interior protection (buckets, tarps) and do the real repair after.
Overloading your ladder — your weight, your tool belt, and materials all add up. Know your ladder’s load rating.
Skipping the harness because “it’s a small job” — small jobs on steep roofs have sent plenty of people to the hospital.
Using the wrong materials in a hurry — roofing cement isn’t a universal fix. Using the wrong product can mean the repair fails in the next rain and you’re back up there again. These 5 proven roof leak fix guide repair hacks that actually work break down which materials actually hold up for different leak types.
A Quick Safety Gear Checklist Before You Go Up
Here’s what I keep ready before any roof repair, regardless of how small:
| Item | Purpose | Approximate Cost |
|---|---|---|
| Roofing harness + anchor | Fall protection | $80–$150 |
| Roof-specific boots | Grip and stability | $60–$130 |
| Tool belt or apron | Hands-free climbing | $20–$40 |
| Safety glasses | Debris protection | $10–$20 |
| Work gloves | Grip + cut protection | $15–$25 |
| Stabilized extension ladder | Safe roof access | $150–$300 |
| Charged mobile phone | Emergency communication | Already own |
| Ground spotter (a person) | Backup support | Free |
Final Thoughts
Roof repair is genuinely something most homeowners can handle — the actual fixing part isn’t that complicated once you know what you’re looking for. The part that gets people in trouble is treating it casually.
The leaks don’t care that you’re in a hurry. The roof doesn’t care that it’s “just a small patch.” Gravity works the same on a 6-foot roof as it does on a 30-foot one.
Build these habits into every repair, even the quick ones, and you’ll find that the repairs actually go faster — because you’re not scrambling around nervously, you’re moving deliberately and confidently with everything you need.
Stay safe up there.
Also worth reading before your next repair: 8 Essential Roof Leak Fix Guide Safety Rules Before Climbing a Roof — a solid breakdown of the foundational rules every DIYer should have memorized before touching a ladder.
About the Author