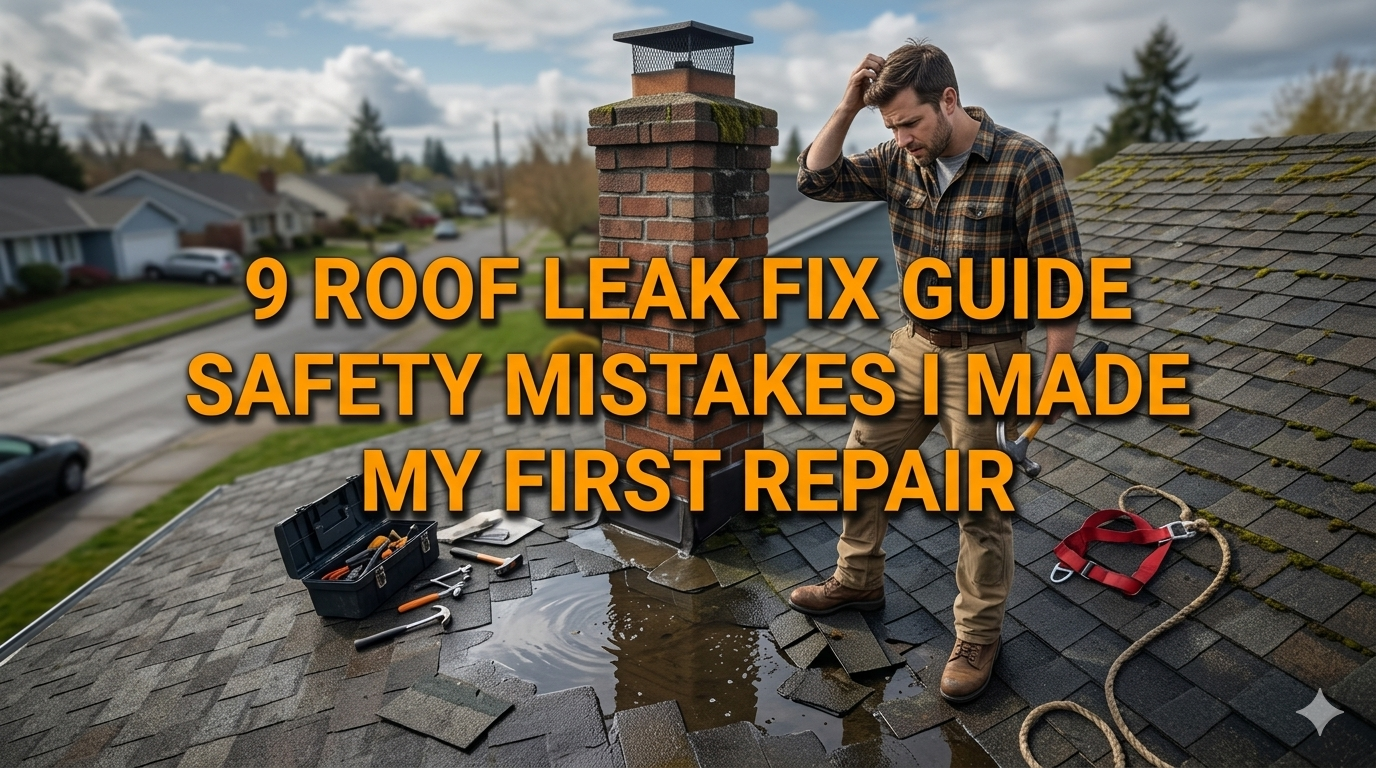
9 Roof Leak Fix Guide Safety Mistakes I Made My First Repair
Meta Description: Roof leak fix mistakes can be very costly to you so follow this guide. Mistakes made the first repair: 9 lessons to find out when doing work yourself
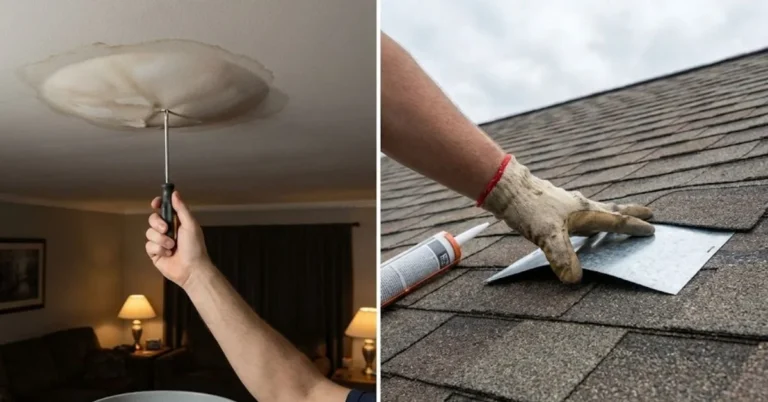
How to Fix a Roof Leak Safety Mistakes I Made My First Repair
The first time I crawled onto my roof to repair a leak, I assumed it would be easy. You grab your caulk gun, fill in the space, good to go. I was wrong — badly wrong.
That one fix became a three-hour debacle that left me with a sprained ankle, a damaged pair of shoes and a leak that got worse before it got better. I made nearly every mistake a beginner can make.
This roof leak problem guide is here so you don’t do what I did. Whether you’re facing a small drip after a rainstorm or have a larger issue near your chimney or vent pipes, safety needs to come first. No repair is worth a visit to the E.R.
Here’s a breakdown of the 9 biggest (and most common) safety mistakes I made — and what you should do instead.
Mistake No. 1: I Passed on the Pre-Climb Safety Check
I should’ve done a complete safety check before I even touched a ladder. I didn’t. I carried the tallest ladder I had from my garage, propped it against the gutter and climbed up.
What I didn’t notice:
- The ground beneath the ladder legs was soft dirt
- There was a small crack on one side rail
- There was no spotter aiding me below
The ladder moved to the left about two feet as I was halfway up. I managed to catch myself, but it was like a horror.
What You Should Do Instead
Always check your ladder before using it. Inspect each rung, both rails and the feet. Look for rubber grips on the feet. Rest the ladder on firm, level ground — never soil, gravel or grass without proper anchoring.
Follow the 4-to-1 rule: For every 4 feet of ladder height, place the base 1 foot away from the wall.
| Ladder Height | Base Distance from Wall |
|---|---|
| 8 feet | 2 feet |
| 12 feet | 3 feet |
| 16 feet | 4 feet |
| 20 feet | 5 feet |
Have someone hold the base while you climb it. It’s not an option — it’s a necessity.

Mistake No. 2: I Wore the Wrong Shoes
I was wearing old sneakers with heavy soles. They looked fine to me. But as soon as I got on the shingles, I could tell they had no grip. I slipped pretty much right away and managed to latch onto the ridge just before I fell.
Rubber soles on a sloped surface are like socks on a tile floor. It’s dangerous.
Which Shoes Should You Wear When Working on a Roof
You need shoes with:
- Padded rubber soles that grip asphalt shingles
- No heels, no rigid toe boxes — flat bottoms
- Ankle support for prevention of sprain
You want work boots for roofing or soft-soled rubber boots. Some roofers swear by rubber-soled sneakers — but only if the soles are thick and new, not worn down.
Never wear flip-flops, dress shoes or hard plastic soled shoes on a roof. Ever.
Mistake #3: I Got On The Roof Without Checking Weather
When I climbed up, it was cloudy. I thought that was OK — no direct sun, no rain. But 20 minutes in, a light drizzle began.
Wet shingles are incredibly slippery. I rushed to collect my things and half stumbled down. My caulk was worthless because it doesn’t stick to a wet surface, anyway.
Guidelines for Roof Repairs According to Weather
Only go on a roof when:
- The sky is clear and dry
- Rain is not expected for at least 4–6 hours
- Temperatures are above freezing
- Wind speeds are under 20 mph
Check a weather app the night before and the morning of your repair. Even morning dew can render shingles dangerously slick until late morning.
Mistake No. 4: I Had No Safety Net and Worked Alone
This one still bothers me. I had no harness, no rope, no anchor point — nothing. If I fell and got hurt, there was nobody to call.
Roofing professionals use personal fall arrest systems (PFAS). These are a harness, a lanyard, and a roof anchor. They aren’t only for large commercial work. This equipment should be available to anyone on a pitched roof.
Fall Protection 101
Here’s a basic overview of what fall protection gear looks like:
| Equipment | Purpose |
|---|---|
| Roof anchor | Attaches to roof structure, acts as tie-off point |
| Safety harness | Wraps around your body to catch a fall |
| Lanyard | Connects harness to anchor |
| Roof jacks + planks | Create flat standing platform on the slope |
Most tool rental shops have harness and anchor kits that can be rented for about $30–$50 per day. It’s worth every penny.
Mistake #5: I Neglected the Roof Pitch
From the ground my roof appears gently sloped. When I was literally standing on it? It was almost like the side of a mountain.
Roof pitch is an angle represented as rise-over-run. A 4:12 pitch means the roof rises 4 inches for every 12 inches horizontally. That’s manageable for most DIYers. But I didn’t know that my back section had a 7:12 pitch, which is quite steep.
At 7:12, your body always wants to slide. Every step is a real effort to keep everything upright.
How to Measure Roof Pitch Before You Get on It
Use a pitch gauge or a level and tape measure:
- Place a 12-inch level flat on top of the roof
- Measure from the point on the roof surface directly below the 12-inch mark
- That number is your pitch
Pitch Guide for DIY Safety:
| Roof Pitch | Safety Level for DIY |
|---|---|
| 3:12 or less | Easy — low risk |
| 4:12 to 6:12 | Moderate — use caution |
| 7:12 to 9:12 | High — fall protection required |
| 10:12 and above | Extreme — hire a pro |
Know your pitch before you climb — not after.
Mistake No. 6: I Packed Too Much Stuff Up With Me
I used to lug around a bucket with tools, a caulking gun, roofing cement, extra shingles, a utility knife and a flashlight — all at once. I barely had a free hand to grasp anything.
Carrying too much weight, especially one-handed, throws off your balance. On an incline, that imbalance is dangerous.
The Right Way to Bring Materials Up
Wear a tool belt or apron instead of using a bucket. Free your hands for climbing and balance.
Better yet, use this system:
- First trip: Go up in only your safety equipment
- Second trip (or rope bucket): Take tools up with a rope and bucket — one person on the ground loads it, you hoist it
This sounds slow, but it is a lot safer. On a roof, free hands save lives.
Furthermore, prepare your tools before heading up. You don’t want to be looking for your utility knife while hunched over on an incline.
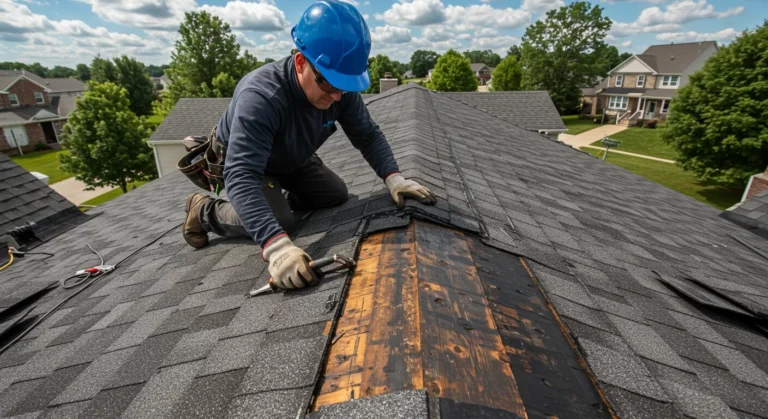
Mistake No. 7: I Failed to Heed the Structural Warning Signs
Once I was up there, I could tell a section of the sheathing (the wood that sits under the shingles) felt spongy underfoot. I figured it was just a soft spot and continued walking on it.
Big mistake.
That “soft spot” turned out to be rotted wood — a red flag that the roof had been leaking for some time in that area. If the wood had given way, I could have fallen through the roof.
How to Know if Your Roof is Safe to Walk On
Before crossing any section, look and feel for:
- Spongy or bouncy areas underfoot
- Visible sagging from ground level
- Dark staining on the shingles (sign of long-term moisture)
- Shingles that are cracking or missing in patches
If you come across any of these, stop. Don’t walk there. Call a roofing contractor to assess the structural integrity before doing anything else.
A roof leak repair guide isn’t just about fixing shingles — it’s about the safety of the surface you’re walking on.
Mistake No. 8: I Had No Proper Exit Plan
When I completed my repair, I found that I had crept further down the slope than expected. My ladder was now about 10 feet to my right, and I had to crab-walk sideways across a 7:12 pitch to get there.
That sideways shuffle was the most dangerous part of my whole day.
Before You Go Up, Map Out Your Route
Before climbing, think through:
- Where will I start my work?
- What is my walking path to and from the work area?
- Does my ladder sit in such a way that I can reach it without crossing a steep section?
Draw a quick mental map. Position your ladder near the work area. If you need to cross a steep section, install roof jacks (also known as roof brackets) to create a walking platform.
Roof jacks are metal brackets that nail into the roof and hold a plank. They form a ledge you can safely stand on.
You can purchase a set for about $15–$25 each, and you really only need two or three for most repairs.
Mistake No. 9: I Didn’t Know When to Quit and Call a Pro
This is perhaps the biggest lesson of all.
My leak was around a pipe boot flashing. I thought it was just a caulk job. But when I went up there, I found cracked flashing, two damaged shingles and signs of rot in the decking underneath.
I patched what I could see. Three weeks later, the leak returned — worse. A contractor ultimately discovered that the flashing had been installed incorrectly years prior. The entire section needed replacing.
I lost two afternoons, spent $40 on materials, and the problem wasn’t fixed anyway.
For a deeper breakdown of what each repair scenario involves, visit Roof Leak Fix Guide — a helpful resource covering everything from flashing repairs to full shingle replacement.
When You Need a Professional Roofer
| Situation | DIY or Pro? |
|---|---|
| Simple cracked caulk around flashing | DIY |
| Missing or broken shingles (flat section) | DIY with care |
| Rotted decking or sheathing | Pro |
| Flashing that’s improperly installed | Pro |
| Leak near chimney or skylights | Pro |
| Roof pitch above 7:12 | Pro |
| Large or widespread water damage | Pro |
There’s no shame in reaching out to a pro. Wrong roof repairs lead to mold buildup, structural damage and costs ten times higher than the original repair.
A Quick Visual: The Roof Safety Checklist
Run through this list before every repair:
✅ Pre-Climb Safety Checklist
- [ ] Ladder checked and on level ground
- [ ] Proper footwear — rubber-soled, flat
- [ ] Weather checked — clear and dry
- [ ] Safety harness and anchor in place
- [ ] Roof pitch measured and within DIY range
- [ ] Tools organized in a belt or apron
- [ ] Soft or spongy spots identified and avoided
- [ ] Exit route planned
- [ ] Spotter on the ground
- [ ] Know when to quit and call a pro
Print this out. Tape it to your garage wall. Use it every time.
How to Actually Repair a Roof Leak Safely (The Short Version)
Once you’ve ensured safety, here’s the basic roof leak repair guide procedure:
Step 1 – Locate the Source Leaks seldom drip directly below their source. Water moves along rafters or sheathing. Follow the roof uphill from where water is visible on the interior.
Step 2 – Check Flashing First Most leaks are caused by failed flashing — the metal strips that surround chimneys, vents, skylights and valleys. Check for cracks, gaps or rust. According to the Insurance Information Institute, water damage from roof failures is one of the most common homeowner insurance claims — making early detection critical.
Step 3 – Inspect Shingles Check for cracked, curled or missing shingles. Check for exposed nail heads.
Step 4 – Apply the Fix
- For cracked caulk: clean the area, apply roofing caulk, smooth it out
- For missing shingles: insert new shingles, nail them, and seal the edges
- For cracked flashing: put roofing cement under the edges, seal cracks
Step 5 – Check It Use a garden hose to run water over the repaired area. Check inside for drips. Wait, watch, and re-check.
FAQs About Roof Leak Fix Guide Safety
Q: Can I fix all roof leaks myself or must I always hire someone?
Minor, relatively easy repairs — replacing one or two shingles or re-caulking around a vent pipe, for instance — can be safely accomplished by a cautious DIYer. Any work involving structural damage, steep pitches or complex flashing should be left to a pro.
Q: What is the main reason roofs leak?
Failed flashing is the number one culprit. Flashing is the metal seal around roof penetrations, such as chimneys, vents and skylights. It swells and shrinks with temperature changes, later cracking or separating.
Q: Is it safe to walk on any type of roof?
Tile and slate roofs are really fragile and slippery. Walking on them can shatter the tiles and cause new leaks. Metal roofs are really slippery when wet. Asphalt shingle roofs have the best walkability — but they still require appropriate footwear and a fall protection plan.
Q: How can I tell if my homeowner’s insurance will cover my roof damage?
Most policies cover sudden, accidental damage (such as storm damage). They generally do not cover gradual wear and tear or neglected maintenance. Before you start repairing, call your insurance agent — and photographing the damage before doing anything is always a smart move.
Q: When is the best time of year to repair a roof leak?
Late spring to early fall provides ideal conditions — dry weather, mild temperatures and long daylight hours. Avoid winter repairs unless it’s an emergency. Cold temperatures make shingles brittle and caulk does not bond well below 40°F (4°C).
Q: If I fall on the roof, what should I do?
Try to flatten your body out to slow the slide. Grab onto anything stable — a ridge, a vent stack, roof brackets. Once stopped, don’t panic. Move slowly toward your ladder. Call for help right away if you’ve been injured or can’t move to safety. This is why having a ground spotter makes such a difference.
Conclusion — Learn From My Mistakes
Each of the mistakes on this list cost me — time, pain, money or all three. The guide for fixing roof leaks that would have been most helpful to me had nothing to do with applying roofing cement. It was about how to do it safely.
Here’s the short version of all of it:
- Always check your ladder before you even start climbing
- Wear the correct footwear — every time
- Never go up in bad weather or wet conditions
- Wear a harness if you are on a steep pitch
- Find out your roof pitch before walking on it
- Keep your hands free while climbing
- Look for soft or decaying spots in the decking
- Plan your route before moving anywhere
- Know your limitations and reach out to a pro when necessary
Roof repairs are absolutely something you can do yourself — when you take the height, the surface and the risks into account. Take your time. Go slow. Stay safe up there.
And if you’re ever unsure, the best roof leak fix guide you’ll ever follow is the one that keeps you off the ground floor of a hospital and on the ground floor of your home.