5 Easy Roof Leak Fix Guide Fixing Lessons From My First Leak
5 easy roof leak fix guide fixing lessons from my first leak
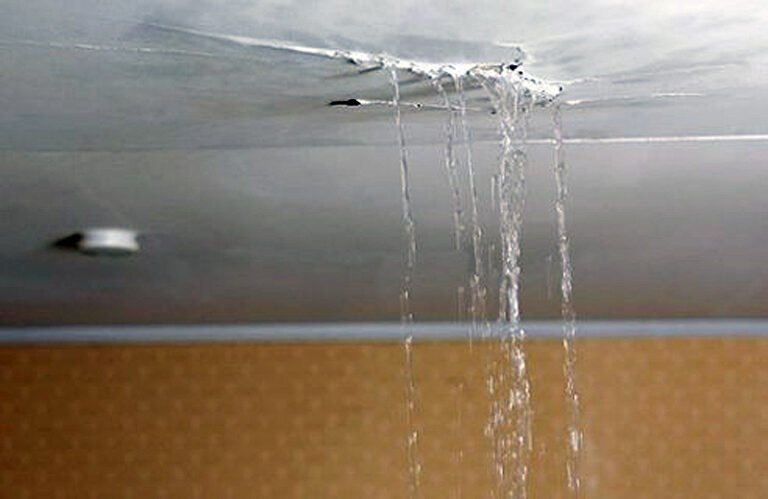
It started with a stain that didn’t belong there. At first, I told myself it was nothing—a shadow, maybe, or an old mark I’d never noticed. But over the next few days, that faint discoloration on the ceiling slowly deepened into something undeniable. It grew darker, softer at the edges, like a bruise spreading across plaster. Then came the drip. Not constant. Just enough to make you uneasy.
That was my first real encounter with a roof leak. I had no experience, no tools beyond a basic toolkit, and no plan. What I did have was urgency. Water has a way of forcing decisions.
Looking back, I didn’t just fix a leak. I learned a handful of practical, almost humbling lessons—things no manual really emphasizes, but that matter when you’re standing on a ladder, staring at a problem above your head.
This is not just a guide. It’s a record of what went wrong, what worked, and what I wish I had known earlier.
lesson one: finding the real source is harder than it looks
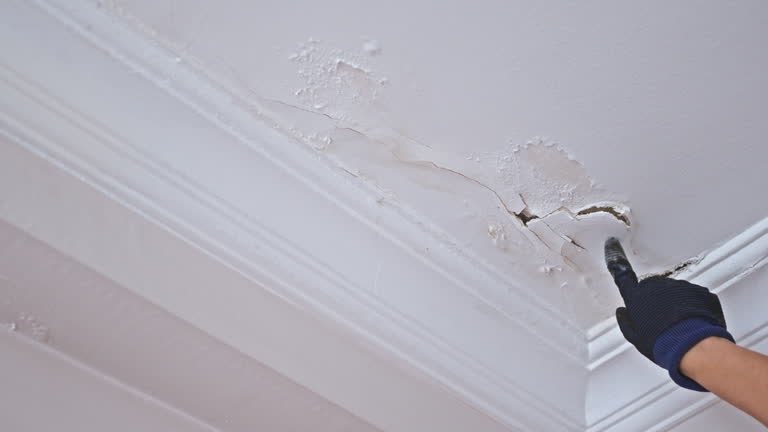
The first instinct when you see water dripping from the ceiling is to assume that’s where the leak is. That’s exactly what I did. I marked the spot, moved furniture, placed a bucket underneath, and felt somewhat in control.
But water doesn’t work like that. It travels. It seeps along beams, follows insulation, and appears far from where it actually enters. My first mistake was thinking vertically—roof above, leak below—when the truth is far more complicated.
I went up to the roof with that assumption and started inspecting the area directly above the stain. Everything looked fine. No obvious cracks, no missing shingles, nothing dramatic. I came back down, confused.
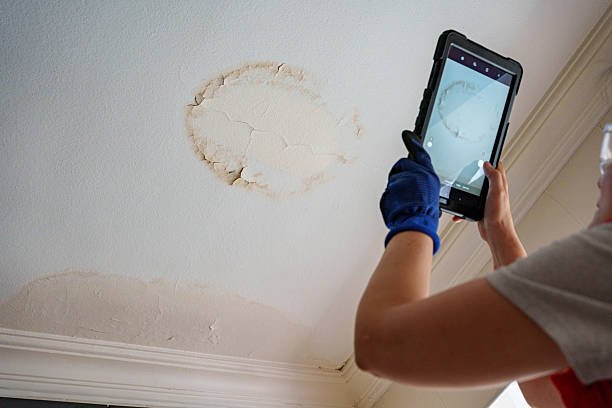
The real breakthrough came when I noticed something subtle: the stain wasn’t centered. It leaned slightly toward one side of the room. That small detail pushed me to expand my search area.
Back on the roof, I moved a few feet in that direction and finally saw it—a slightly lifted shingle, barely noticeable, but enough to let water in during heavy rain. It wasn’t dramatic damage. It was quiet, almost polite, but effective.
That moment changed how I approached the entire process. I stopped looking for obvious destruction and started looking for small inconsistencies. A bent edge. A nail that wasn’t flush. A patch that didn’t match.
If there’s one takeaway here, it’s this: the visible damage inside your home is just a clue, not the answer. The real work begins when you question what you see.
lesson two: temporary fixes are not failures
Once I identified the probable entry point, I felt a surge of confidence. I grabbed some sealant, pressed the shingle back down, and applied what I thought was a solid fix.
And for a day or two, it worked. No drips. No spreading stain. I thought I had solved it.
Then it rained again.
The leak came back, not as strong, but enough to remind me that I had only slowed it down. At first, I felt frustrated, like I had failed. But in hindsight, that temporary fix did something important—it bought me time.
Roof repairs don’t always happen under ideal conditions. Weather, tools, materials, and experience all play a role. Sometimes, your first job isn’t to solve the problem permanently. It’s to control it.
I went back up with a different mindset. Instead of aiming for perfection, I focused on containment. I used a tarp this time, securing it tightly over the affected area, extending it well beyond the suspected leak zone. It wasn’t pretty, but it was effective.
Inside the house, I added a plastic sheet above the ceiling area in the attic space to redirect any water into a controlled path. Buckets were placed strategically, not reactively.
This layered approach—roof-level control and interior management—gave me breathing room. It allowed me to wait for better weather, gather proper materials, and think through a more permanent solution.
Temporary fixes are often dismissed, but they play a crucial role. They reduce damage, lower stress, and create space for better decisions. There’s nothing careless about buying yourself time when dealing with water.
lesson three: tools matter more than you think
Before this experience, I underestimated tools. I thought effort and intention were enough. If something needed fixing, I’d figure it out with whatever I had.
That belief didn’t last long on a sloped roof.
My first attempt involved a standard ladder that felt slightly too short, a worn-out caulking gun, and a pair of shoes that had no business being on a roof. Every movement felt uncertain. I was more focused on not slipping than on doing the job properly.
It wasn’t just uncomfortable—it was inefficient and unsafe.
After that attempt, I paused and reassessed. I invested in a few basics: a sturdier ladder with better reach, non-slip footwear, a proper roofing hammer, and a high-quality sealant gun. Nothing extravagant, just the right tools for the task.
The difference was immediate. I moved with more confidence. My hands were steadier. The work itself became more precise.
There’s also a psychological shift that comes with proper tools. You stop improvising and start executing. You trust your setup, which frees your mind to focus on the details that matter.
Even something as simple as a good flashlight made a difference when inspecting the attic. Shadows can hide problems, and poor visibility leads to missed clues.
This lesson extended beyond roofing. It reshaped how I approach any repair. The right tools don’t just make the job easier—they make it possible to do it well.
lesson four: patience beats panic every time
When water starts entering your home, it’s easy to panic. Every drop feels urgent. Every minute feels like damage is spreading.
I felt that pressure intensely during the first few days. I rushed decisions, skipped steps, and tried to solve everything at once. In doing so, I made avoidable mistakes.
One example stands out. During my second repair attempt, I applied sealant too quickly, without properly cleaning the surface. Dust and moisture were still present, which meant the seal didn’t bond as it should have. It held briefly, then failed.
That failure wasn’t due to lack of effort. It was due to lack of patience.
On my next attempt, I slowed down. I cleaned the area thoroughly, waited for it to dry completely, and applied the sealant carefully, following the contours of the shingle rather than forcing it.
It took longer. It felt less urgent. But it worked.
Patience also played a role in observation. Instead of reacting to every drip, I started watching patterns. When did the leak occur? Was it only during heavy rain? Did wind direction matter?
These observations helped me understand the problem more deeply. It wasn’t just a hole—it was a system reacting to conditions.
By stepping back, I moved from reaction to strategy. That shift made all the difference.

lesson five: maintenance is easier than repair
After finally resolving the leak, I found myself looking at the rest of the roof differently. What had once been out of sight was now impossible to ignore.
I started noticing small things: a shingle that looked slightly worn, a patch of debris collecting in a corner, a gutter that wasn’t draining as smoothly as it should.
None of these were immediate problems. But they were potential ones.
That’s when the final lesson became clear. Fixing a leak is hard. Preventing one is much easier.
I began a simple routine. Nothing elaborate—just periodic checks after heavy weather, clearing debris when needed, and keeping an eye on areas that had shown vulnerability.
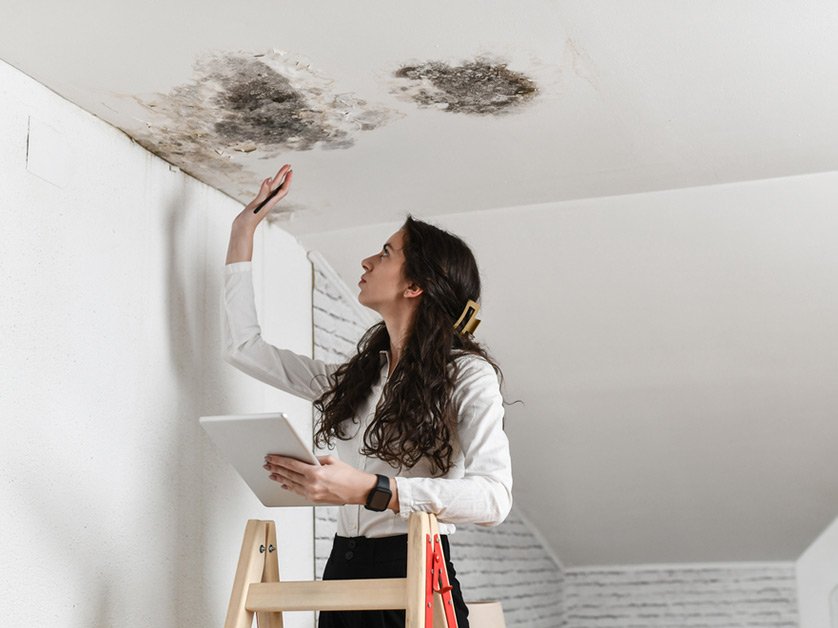
I also made it a habit to inspect the attic occasionally. It’s a quiet space, but it tells the truth. Any sign of moisture, any unusual smell, any change in insulation texture—it all matters.
This proactive approach didn’t just protect the roof. It reduced stress. Instead of reacting to emergencies, I felt in control of the situation.
Maintenance isn’t exciting. It doesn’t come with the urgency of a leak or the satisfaction of a fix. But it’s the reason you don’t have to go through the same experience again.
closing thoughts
That first leak taught me more than I expected. It wasn’t just about sealing a gap or replacing a shingle. It was about observation, preparation, and mindset.
There’s something grounding about working on your own home, especially when the stakes are real. You learn quickly. You adapt. You make mistakes and then learn not to repeat them.
If you’re dealing with a roof leak for the first time, know this: you don’t need to have all the answers immediately. You just need to start paying attention—to the details, to the patterns, to the small things that don’t seem important until they are.
And when you do fix it, take a moment to appreciate the quiet that follows. No drips. No stains spreading. Just a ceiling that looks the way it should.
That silence is earned.
frequently asked questions
- how do i know if a roof leak is serious?
A roof leak becomes serious when it persists, spreads, or starts affecting structural elements like wood beams or insulation. If you notice sagging ceilings, mold growth, or continuous dripping even after light rain, it’s a sign the issue needs immediate attention.
- can i fix a roof leak myself without professional help?
Yes, small leaks can often be fixed with basic tools and materials if you can safely access the roof and identify the source. However, larger or complex leaks, especially those involving structural damage, are better handled by professionals.
- what is the best temporary fix for a roof leak?
A securely placed tarp over the affected area is one of the most effective temporary fixes. Inside the house, using plastic sheeting and buckets to control water flow can minimize damage until a permanent repair is possible.
- how long does a roof leak repair usually last?
It depends on the quality of the repair and materials used. A well-done repair can last for years, while a quick patch may only hold for a short time. Proper surface preparation and good materials significantly increase durability.
- should i replace shingles or just seal them?
If shingles are damaged, cracked, or missing, replacement is usually the better option. Sealing works for minor issues like small gaps or lifted edges, but it’s not a long-term solution for significant wear.
- how often should i inspect my roof to prevent leaks?
It’s a good idea to inspect your roof at least twice a year and after major storms. Regular checks help you catch small issues early, reducing the chances of unexpected leaks.