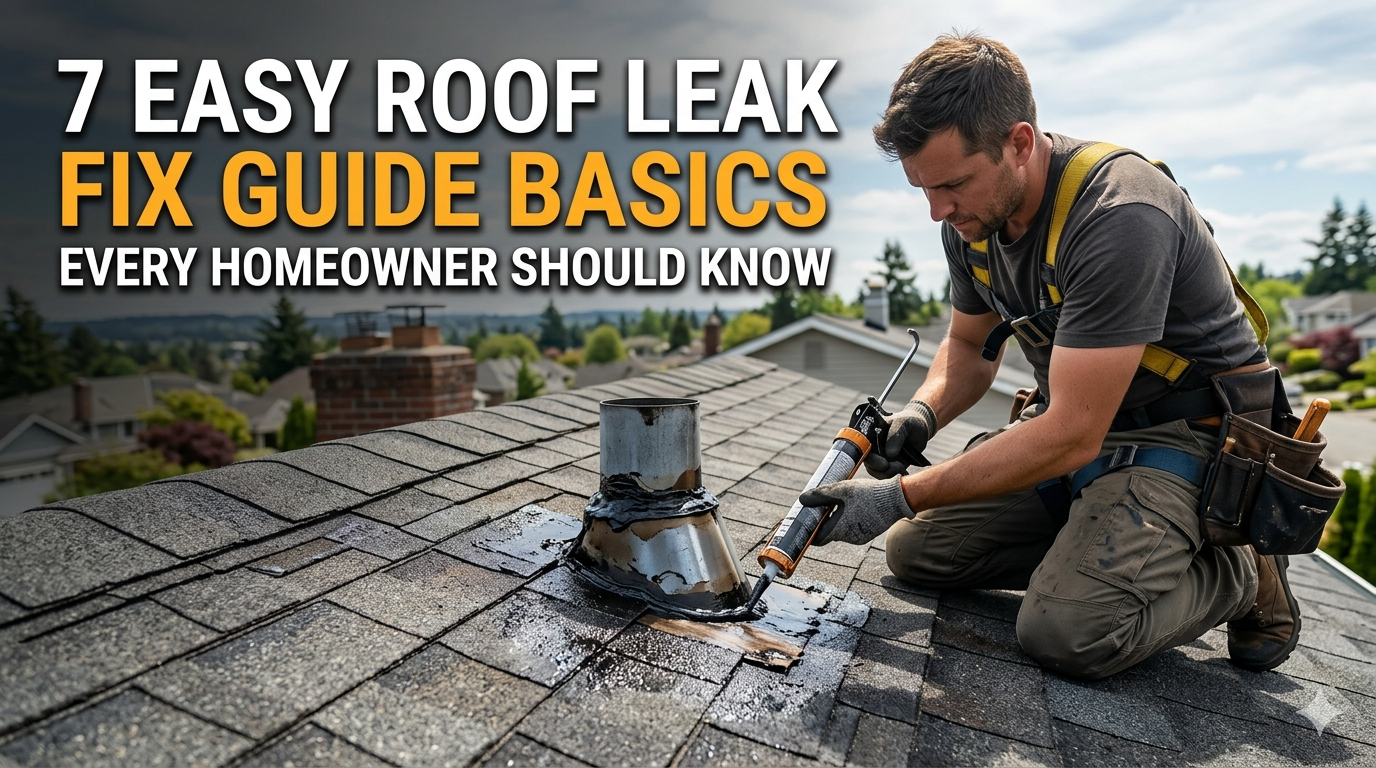
7 Easy Roof Leak Fix Guide Basics Every Homeowner Should Know
The Definitive Guide to Easy Roof Leak Fixes: Everything a Homeowner Should Know
Meta Description: Your guide to fixing a roof leak — learn the 7 simple steps every homeowner must know to stop a leak, protect your home and avoid an expensive repair.
Your Roof Is Talking — Are You Listening?
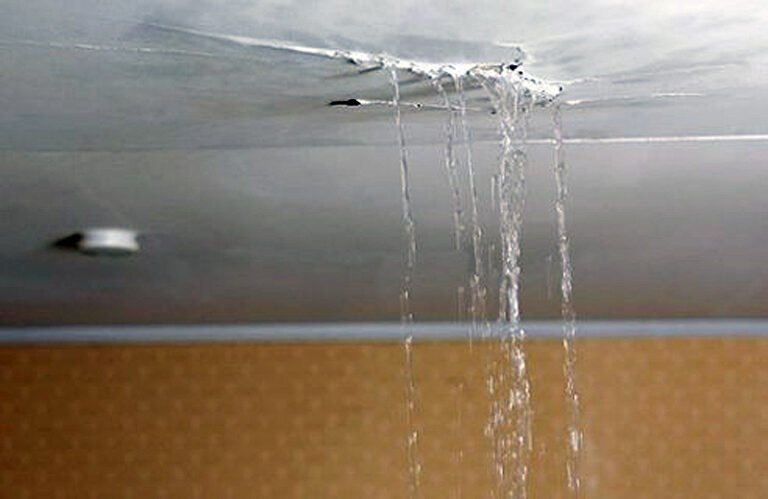
A small water stain on your ceiling may not seem like a big deal. But leave it alone long enough, and that little stain becomes a waterlogged mess, ruined insulation, mold growth and a repair bill that could reach into the thousands.
The good news? The vast majority of roof leaks are not as frightening as they appear.
With some basic tools and the right knowledge, you can handle many common roof issues on your own — or at least know what’s happening before you call a professional.
This roof leak repair guide details 7 basics every homeowner should be aware of. Whether your roof is new or has survived 20 winters, these tips will help you respond quickly, stay safe and protect the biggest investment in your life.
Let’s get into it.
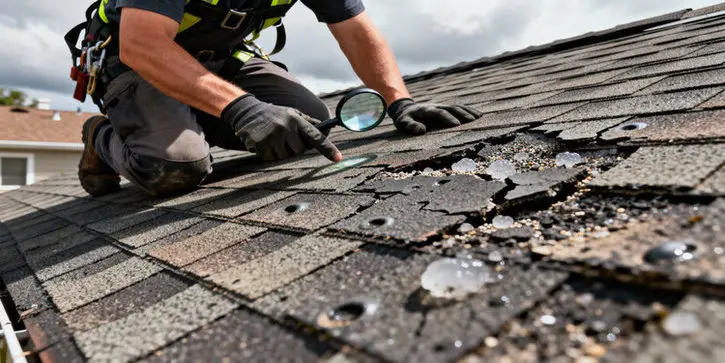
1. Learn the Warning Signs Before Water Is on Your Floor
The common error among most homeowners is waiting until water is actually dripping through the ceiling. At that point, the damage has already been accumulating for weeks — sometimes months.
Your roof will give you warning signs way before a full leakage.
Signs You Should Never Ignore
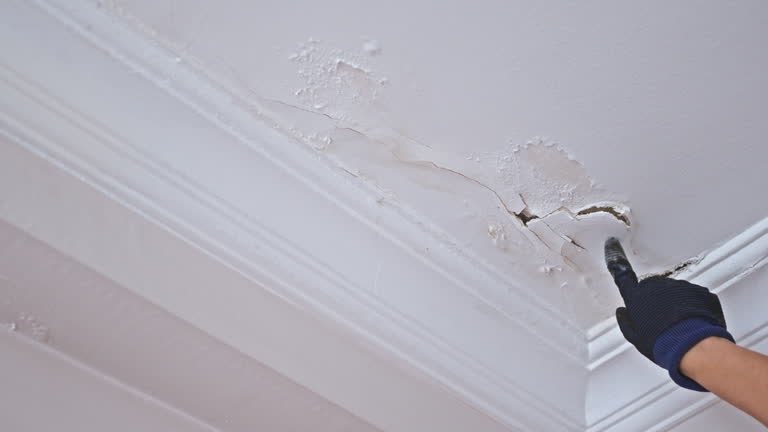
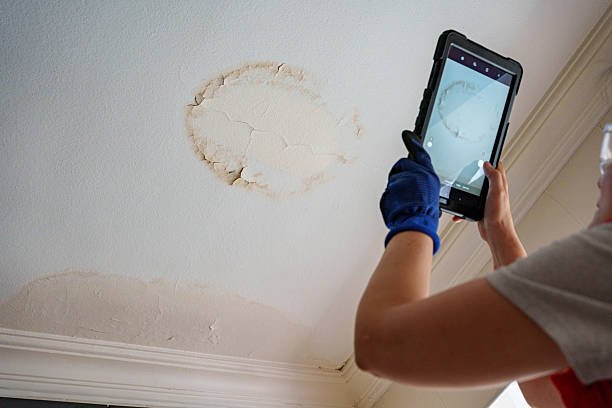
- Water stains on ceilings or walls — These appear as brown or yellow rings. By the time you see them, they’re usually dry.
- Peeling paint close to the roofline — Moisture gets caught beneath paint and it bubbles or peels.
- Musty odors in the attic — This typically indicates mold is already developing from concealed moisture.
- Curling or missing shingles — This is a big red flag and can be seen from the ground.
- Granules in your gutters — Asphalt shingles will shed granules when they’re old.
- Sagging ceiling areas — This means water has been sitting in one place for a long time.
The sooner you catch these signs, the easier and less expensive the fix will be.
A Simple Inspection Schedule That Works
| When to Check | What to Look For |
|---|---|
| After major storms | Missing, cracked or shifted shingles |
| Every spring | Winter damage, moss or debris buildup |
| Every fall | Clogged gutters, loose flashing |
| Once a year | Full attic moisture inspection |
Set a reminder on your phone. The right 15 minutes twice a year can save you thousands.
2. It’s Rare That a Leak Comes From Where You Think
Here’s something that most people don’t know: where the water drips in a house is nearly never where the leak originated at the roof.
Water is sneaky. It comes in at one place, runs along roof beams or insulation or pipes and then drips down somewhere completely different.
How to Track Down a Leak Like a Pro
Step 1 — Start in the attic. Get a flashlight and go up there during the daytime or right after a rainstorm. Look for damp insulation, water trails or dark stains on wood.
Step 2 — Follow the trail up. Water always travels downhill. So if you notice dampness in the attic, follow it up along the wood to where it might be coming in.
Step 3 — Look for light in the darkness. On a sunny day, turn off the attic lights and scan for gaps where sunlight comes through. Those are gaps — and water goes through the same entry points.
Step 4 — Mark the spot. Mark out what you find by using chalk or painter’s tape. It’s handy if you need to reference it later for a roofer or even go back and repair it yourself.
Common Leak Entry Points
| Location | Why It Leaks |
|---|---|
| Roof valleys | Two adjacent slopes form a water channel |
| Flashing around chimneys | Metal expands, contracts and cracks over time |
| Around skylights | The seals dry out and fail |
| Plumbing vent boots | Rubber collar dries out and cracks |
| Ridge cap shingles | Wind lifts them, leaving gaps |
| Fireplace caps | Flues can crack or leak |
Knowing these hot spots gives you a head start before even climbing a ladder.
3. It Is Better to Have the Right Tools Before You Get Started
Attempting to repair a roof leak without the proper tools is like preparing a meal without the right ingredients. You will make a mess and not fix the problem.
You don’t require a truckload of equipment. But a handful of important items are absolute game changers.
The Basic Roof Leak Fix Kit
Safety first:
- Non-slip work boots
- Safety harness or rope (for steep roofs)
- Safety goggles
- Work gloves
For finding and fixing leaks:
- Flashlight or headlamp
- Roofing nails and hammer
- Pry bar or flat bar
- Roofing caulk and caulk gun
- Roofing cement (also known as roofing tar)
- Replacement shingles (keep some extras from your last install)
- Flashing tape or self-adhesive roof patch
- Putty knife or trowel
For emergency situations:
- Heavy-duty plastic sheeting or tarp
- Duct tape (temporary fix only)
- A bucket and towels for inside the home
All of these things cost under $50 total at any hardware store. Having them in place means you can take action immediately when a problem arises — instead of scrambling in the rain.
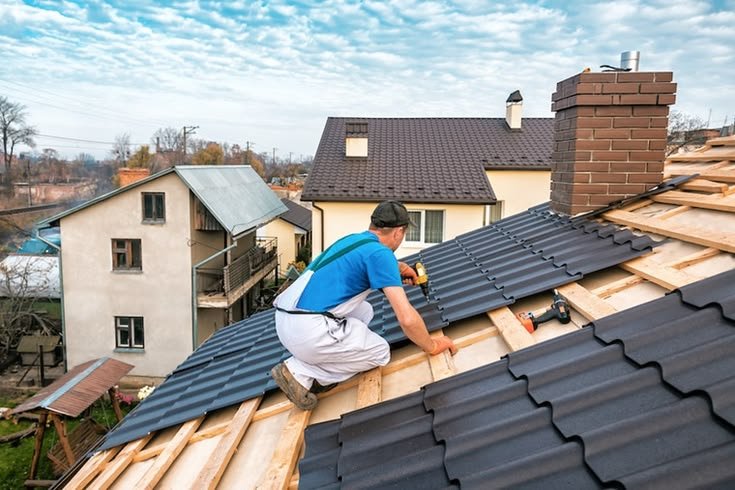
4. How to Repair the 5 Most Common Types of Roof Leaks (Step by Step)
Now we’re getting to the meat of this roof leak repair guide. Here’s a look at the most common leaks homeowners face — and how to remedy each one. For even more detailed repair walkthroughs, visit Roof Leak Fix Guide — a helpful resource built specifically for homeowners dealing with roof problems.
Fix #1 — Cracked or Missing Shingles
This is the most common cause of roof leaks, particularly after storms.
How to fix it:
- Get a pry bar under the damaged shingle and pop out the roofing nails.
- Carefully slide out the old shingle.
- Position the new shingle and nail it down with four roofing nails.
- Put a glob of roofing cement below the edges of the new shingle and push down.
- Seal the nail heads with roofing cement.
Once on the roof, this entire job takes around 20 minutes.
Fix #2 — Damaged Flashing
Flashing is the thin metal (often aluminum or galvanized steel) that seals edges around chimneys, vents and skylights. If it cracks or pulls away, water pours right in.
How to fix it:
- If the flashing is simply lifted or loosely secured, press it back into place.
- Re-seal by applying roofing caulk on all edges.
- If the flashing is cracked or corroded, use a pry bar to remove it entirely and install new flashing purchased at a hardware store.
- Apply roofing cement under the new flashing, press it down well and caulk all edges.
Fix #3 — Cracked Vent Boots
Plumbing vents rise through your roof and are sealed with a rubber boot. After five or ten years, that rubber cracks and allows water in.
How to fix it:
- Use a pry bar to gently lift the shingles adjacent to the vent.
- Take off the screws that hold the old boot.
- Pop the old boot off and put a new one in its place (they run $10–$15).
- Slide the new boot over the vent, screw it in and replace the shingles around it.
Fix #4 — Clogged or Damaged Gutters
Overfull or backed-up gutters can force water beneath the edge of your roof — a phenomenon known as “wicking.”
How to fix it:
- Clean gutters thoroughly — clearing out leaves, debris and sediment.
- Make sure gutters slope slightly toward downspouts (about a quarter inch per 10 feet).
- Check for cracks or holes and seal them with gutter sealant.
- Ensure that downspouts direct water at least 3 to 4 feet away from the foundation.
Fix #5 — Ice Dams (Cold Climates)
Ice dams occur when heat leaves your attic and melts snow on your roof. That water runs down and refreezes at the cold edge of your roof, forming a wall of ice that traps water beneath your shingles.
How to fix it (safely):
- Use a long-handled tool called a roof rake to pull snow off the roof from ground level.
- Apply calcium chloride ice melt in a stocking or tube along the dam — never rock salt, which can harm shingles.
- Improve attic insulation and ventilation to prevent heat from escaping in the first place. This is the true long-term fix.
5. Emergency Fixes That Buy You Time Until Proper Repairs Can Be Done
Sometimes a leak strikes at the most inopportune time — in the midst of a storm, over a holiday weekend, or when a roofer can’t arrive for several days. Emergency fixes are not permanent, but they prevent the damage from worsening.
Tarp Method — Most Reliable Emergency Fix
This is the best temporary fix for large or actively leaking areas.
- Wait for rain to stop and the roof surface to be safe to walk on.
- Lay out a heavy-duty plastic tarp and drape it over the section that’s leaking.
- Extend the tarp at least 4 feet beyond either side of the ridge.
- Secure the edges with sandbags, bricks or 2×4 boards — never nail through the tarp directly into the roof.
If placed correctly, a tarp can protect your home for weeks.
Roofing Cement Patch (For Small Areas)
For a minor crack, hole or lifted shingle:
- Wipe the area with a dry cloth.
- Use a putty knife to spread a generous amount of roofing cement.
- Press down well and smooth out the edges.
- Apply a second coat and allow to dry completely.
This approach is effective in dry conditions, but it is not permanent. Do not delay your permanent fix for more than 30 days.
Inside the Home
Until the roof is repaired, protect your interior:
- Place buckets under active drips.
- Cover floors and furniture with plastic sheeting.
- If water is pushing against the ceiling, poke a small hole with a screwdriver and let it drain into a bucket — this helps prevent larger ceiling damage.
6. What NOT to Do — Errors That Make the Problem Worse
Good intentions for a DIY repair can backfire if you miss important steps or use the wrong materials. These are the most common mistakes that homeowners make when dealing with roof leaks.
Mistake #1 — Caulking Over the Problem
Roofing caulk is a sealant, not a miracle cure. Many homeowners smear caulk over cracked shingles or lifted flashing and consider it fixed. The caulk might hold for a month or so, but the underlying problem — cracked shingles, corroded flashing, poor installation — remains and will create another leak.
Caulk is part of a proper fix, not the entire fix.
Mistake #2 — Walking on a Wet Roof
A wet roof is extremely slippery, even with rubber-soled boots. Roof falls are among the top causes of severe injury in home repair accidents.
Wait until the surface has completely dried before going up.
Mistake #3 — Using the Wrong Materials
Standard caulk from plumbing jobs, interior sealants or regular adhesives are not made for roofing applications. They decompose rapidly under UV rays, heat and rain. Always use products specifically labeled for roofing use.
Mistake #4 — Only Fixing the Obvious Spot
If you discover one leak, there are likely others nearby you haven’t found yet. Once on the roof, inspect the entire area around the repair — check all flashing, nearby shingles and seams.
Mistake #5 — Overlooking the Attic Afterward
Even after you repair the roof, moisture that remains in the attic may still cause damage. Once repaired, return to the attic and look for wet insulation, stained wood or mold. Replace any wet insulation and treat any mold with a proper mold-killing spray.
7. When to Call in an Expert — and How to Choose the Right One
Some roof leaks are simply beyond the capabilities of a DIYer. Knowing when to take a step back and call in a pro is just as important as knowing how to swing a hammer.
Signs You Need a Professional Roofer
- The leak area is quite large (over 10 square feet)
- There is visible sagging or structural damage
- Multiple leaks appear at the same time
- The roof is older than 20 years
- You discover mold in the attic walls or on the ceiling framing
- The issue requires major flashing replacement or chimney work
- You are not comfortable working at height
How to Find a Reputable Roofer
Not all roofing contractors are created equal. Here’s a quick checklist:
| What to Look For | Why It Matters |
|---|---|
| Licensed and insured | Protects you if a worker gets injured on your property |
| Local company with reviews | Easier to hold accountable, real track record |
| Written estimate | Keeps you from surprise charges down the road |
| Warranty on labor | Shows confidence in their work |
| No-pressure tactics | Legitimate contractors don’t rush you |
Make sure to get at least 3 quotes before you decide. Beware of door-to-door roofers who appear right after a storm — this is a common scam tactic in many areas.
How to Stop Roof Leaks Before They Start
The best roof leak fix guide includes information on how to keep leaks from happening in the first place. According to the National Roofing Contractors Association, regular roof inspections and maintenance are among the most effective ways to extend your roof’s lifespan and prevent costly water damage.
Year-Round Prevention Checklist
Spring:
- Clean gutters after winter
- Check shingles for lifting or cracks from ice and wind
- Inspect attic for winter moisture or mold buildup
Summer:
- Cut back overhanging tree limbs (they scratch and damage shingles)
- Check flashing around all penetrations
- Ensure appropriate attic ventilation to prevent heat buildup
Fall:
- Clean gutters again before leaves stack up
- Check roof before winter storms hit
- Inspect and reapply any exposed caulk or roofing cement
Winter:
- Clear your roof with a roof rake after heavy snowfall
- Watch for ice dam formation along roof edges
- Maintain attic insulation to help stop heat from escaping
Minor, regular maintenance adds years to your roof’s life — and prevents leaks from ever developing.
FAQs: Roof Leak Repair — Your Top Questions Answered
Q: How do I locate a roof leak if it’s not raining? Walk into your attic with a flashlight and check for water stains, dark streaks or wet insulation. Or you can have a helper spray down the roof with a garden hose in sections while you observe from inside the attic.
Q: Can I repair a roof leak myself, or do I always need to call a roofer? Small repairs — such as swapping out a shingle, resealing flashing or patching up a vent boot — are certainly in the DIY wheelhouse for most homeowners. Larger structural issues or whole-roof problems require a professional.
Q: How much does it cost to hire a professional to repair a roof leak? Small repairs usually cost between $150 and $400. Moderate repairs, such as flashing or multiple shingles, can be $400 to $1,000. Large repairs or partial re-roofing can run $1,500 to $5,000 or more, depending on where you live and the size of your roof.
Q: What’s the best product to use when sealing a roof leak fast? Roofing cement (also known as roofing tar) is the surest fast fix. Self-adhesive flashing tape is also excellent for sealing around joints and flashing. Both are sold at any hardware store for less than $20.
Q: How long can a temporary tarp stay on my roof? If properly secured, a heavy-duty tarp can keep the roof protected for 2 to 3 months. But always plan for a permanent repair as soon as possible — tarps break down in UV light and wind.
Q: Is a roof leak covered by my homeowner’s insurance? It depends on the cause. Damage from a storm, hail or a falling tree is usually covered. Ordinary wear and tear or lack of maintenance typically isn’t. Always take photos of damage and notify your insurance company as soon as possible.
Q: What is the best frequency to inspect my roof? At least twice a year — once in spring and once in fall. Also conduct a visual inspection following any major storm with high winds or heavy rain.
The First Step to Protecting Your Home Starts With Its Roof
A leaking roof does not have to end as a disaster. The trick is knowing what to look for, responding in a timely manner when you see trouble and using the right materials and methods for the job.
This roof leak fix guide gave you a legitimate, hands-on foundation — from recognizing the telltale signs to tracing leaks back to their source, all the way to making repairs or calling in reinforcements.
The most important thing? Don’t wait.
Water damage moves fast. A $30 tube of roofing cement today can save a $5,000 repair six months later. Stay ahead of the issue, keep up with seasonal maintenance, and your roof will continue to do what it’s supposed to — quietly and dependably — for years to come.
Your home is worth protecting. And now you know how to do it.