8 Proven Roof Leak Fix Guide Fixing Steps That Save Money
8 proven roof leak fix guide fixing steps that save money
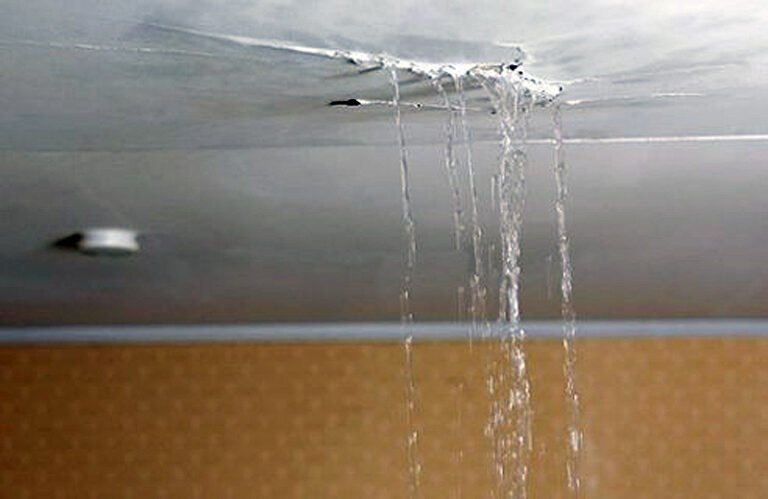
A roof leak rarely announces itself politely. It starts quietly—maybe a faint water stain in the corner of a ceiling, a slight musty smell after rain, or a drip you hear at night when everything else is silent. Most homeowners ignore the early signs, thinking it’s minor or temporary. But a leak, no matter how small, is never truly harmless. Left alone, it grows into a costly problem that eats away at insulation, weakens structures, and invites mold.
The good news is that not every leak requires a full roof replacement or an expensive contractor visit. Many issues can be identified and fixed with simple, practical steps that prioritize both effectiveness and cost savings. This guide is built around real-world experience—less theory, more action—and focuses on eight proven steps that help stop leaks while keeping your budget intact.
Before diving into the steps, it’s important to understand one thing: fixing a leak is rarely about one single action. It’s a sequence—finding the source, understanding the cause, applying the right fix, and ensuring it doesn’t come back. Each step builds on the previous one, and skipping any part can lead to temporary fixes that fail when you need them most.
step one: learning how to track the true source of the leak
One of the most common mistakes people make is fixing the wrong spot. Water has a habit of traveling before it drips, which means the visible damage inside your home might be far from the actual entry point on the roof.
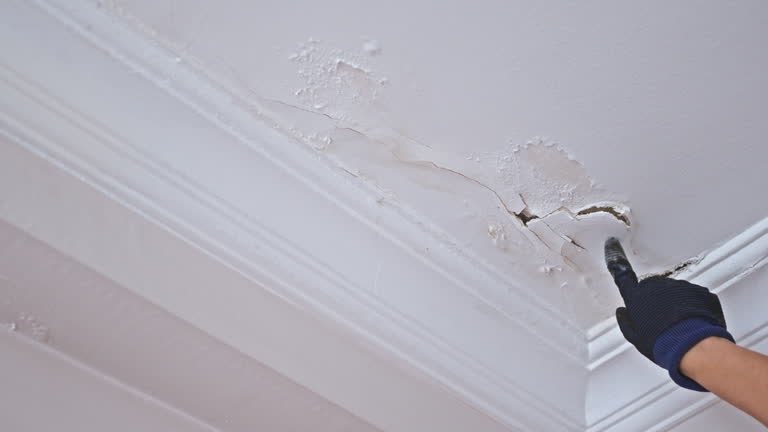
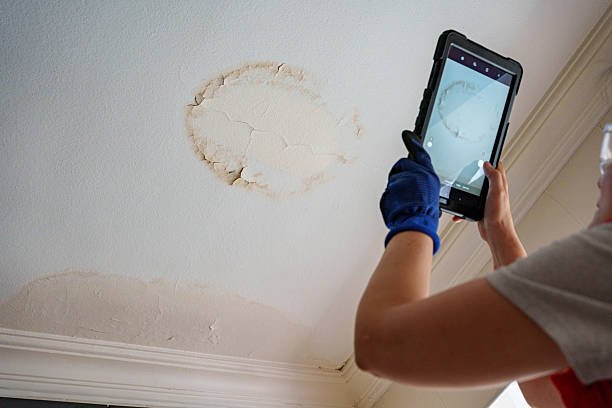
Start inside your house. Look for water stains, peeling paint, or damp patches. Then move to the attic if you have one. Use a flashlight and follow any signs of moisture, discoloration, or mold. Pay attention to beams and insulation—they often guide you toward the leak’s origin.
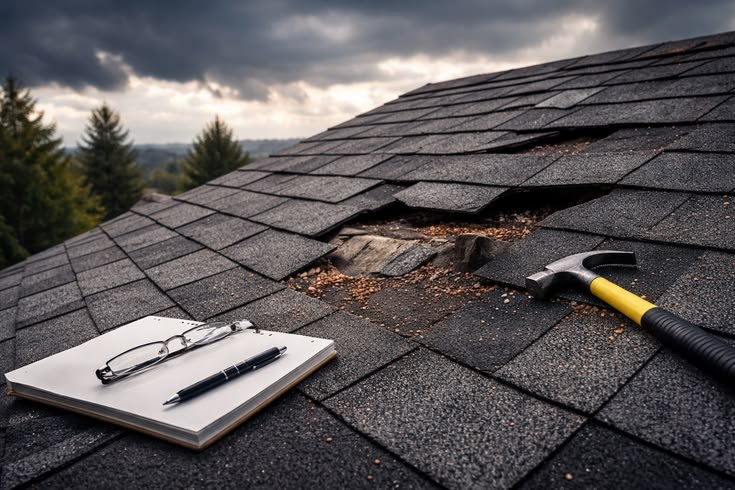
If it’s safe to do so, check the roof during daylight. Look for missing shingles, cracked flashing, or areas where debris has accumulated. If the leak only appears during rain, a simple trick is to have someone spray water on different sections of the roof while you watch from inside. This controlled method can help pinpoint the exact entry point without waiting for the next storm.
Finding the source accurately saves money because it prevents unnecessary repairs. Fixing a symptom instead of the cause often leads to repeated expenses.
step two: clearing debris and improving drainage
Leaves, dirt, and small branches might seem harmless, but they are one of the leading causes of roof leaks. When debris collects in valleys or around gutters, it traps water and slows drainage. Over time, this standing water seeps under shingles and finds its way inside.
Cleaning your roof doesn’t require fancy tools. A sturdy ladder, gloves, and a simple brush or blower are often enough. Focus on areas where debris naturally collects—valleys, around chimneys, and near roof edges.
Gutters deserve special attention. Clogged gutters cause water to back up, which can push moisture under roofing materials. Clear them out and ensure downspouts are directing water away from your home’s foundation.
This step is one of the easiest and most cost-effective ways to prevent leaks. Regular cleaning reduces pressure on your roof and minimizes the chances of water infiltration.
step three: repairing or replacing damaged shingles
Shingles are your roof’s first line of defense. When they crack, curl, or go missing, the underlying structure becomes vulnerable.
Inspect your roof carefully. Look for shingles that are out of place, broken, or worn down. Even a single missing shingle can allow water to seep through.
Replacing a shingle is straightforward. Lift the surrounding shingles gently, remove the nails holding the damaged one, and slide in a new shingle. Secure it with roofing nails and seal the edges with roofing cement.
If the damage is minor, you might not need a full replacement. Small cracks can often be sealed with roofing sealant, extending the life of the shingle without additional cost.
Handling shingle issues early prevents more serious damage, saving you from expensive repairs down the line.
step four: sealing flashing around vulnerable areas
Flashing is the thin metal installed around roof features like chimneys, vents, and skylights. Its job is to direct water away from seams and joints. When flashing fails, leaks often follow.
Check for rust, gaps, or loose sections. Pay close attention to corners and edges where water is most likely to collect.
If you notice small gaps, apply a waterproof sealant to close them. For more significant issues, you may need to replace sections of the flashing. This involves removing old material and installing new pieces securely, ensuring a tight fit.
Flashing repairs are often overlooked, yet they address some of the most common leak sources. Fixing them promptly can prevent water from entering through critical weak points.
step five: using roofing sealants wisely
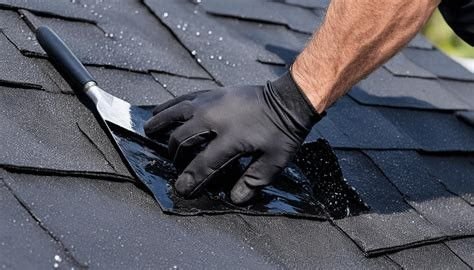
Sealants can be incredibly useful, but they must be applied correctly. They are best used for small cracks, nail holes, or seams that need reinforcement.
Choose a high-quality roofing sealant designed for your roof type. Apply it sparingly and precisely—too much can create uneven surfaces or trap moisture instead of blocking it.
Before applying sealant, clean and dry the area thoroughly. Dirt and moisture can reduce adhesion, making the repair less effective.
Sealants are not a substitute for structural repairs, but they are an excellent tool for minor fixes. Used properly, they can extend the life of your roof and delay the need for costly replacements.
step six: addressing roof ventilation issues
Poor ventilation is a hidden cause of many roofing problems. When heat and moisture build up in your attic, they can weaken roofing materials from the inside out.
Check if your attic feels excessively hot or humid. Look for signs of condensation or mold. Proper ventilation allows air to circulate, reducing moisture buildup and maintaining a balanced temperature.
Installing vents or improving airflow might seem like a bigger task, but it pays off in the long run. It not only prevents leaks but also improves energy efficiency and prolongs the lifespan of your roof.
Ignoring ventilation can lead to recurring issues, even after repairs. Addressing it ensures that your fixes last longer.
step seven: reinforcing roof valleys and edges
Roof valleys are where two slopes meet, and they naturally collect a large amount of water during rain. Edges, especially near gutters, are also vulnerable.
Inspect these areas for wear and tear. Look for signs of erosion, loose materials, or exposed underlayment.
Reinforcing valleys often involves adding an extra layer of protection, such as specialized underlayment or metal valley flashing. Edges can be strengthened with drip edges that guide water away from the roof structure.
These reinforcements might seem minor, but they play a crucial role in preventing leaks in high-risk areas.
step eight: creating a regular maintenance routine
The most effective way to save money on roof repairs is to prevent problems before they start. A simple maintenance routine can make a significant difference.
Inspect your roof at least twice a year—once before the rainy season and once after. Clean debris, check for damage, and address small issues immediately.
Keep an eye on your ceilings and attic for early warning signs. The sooner you catch a problem, the easier and cheaper it is to fix.
Maintenance doesn’t have to be time-consuming. Even a quick inspection can help you spot potential issues before they escalate.
why these steps actually save money
It’s easy to think that hiring a professional immediately is the safest option. While that’s true for major damage, many leaks start small and can be handled with basic tools and a bit of effort.
Each step in this guide focuses on prevention and early intervention. Instead of waiting for a leak to cause visible damage, you’re addressing the root causes before they become expensive problems.
By learning how your roof works and taking a proactive approach, you reduce the need for emergency repairs and extend the lifespan of your roofing materials.
common mistakes to avoid
Even with the best intentions, it’s possible to make mistakes that lead to bigger issues.
One common error is overusing sealant. It might seem like a quick fix, but it can trap water and worsen the problem.
Another mistake is ignoring safety. Always use proper equipment and avoid working on the roof in bad weather.
Finally, don’t overlook small signs. A tiny stain or drip can indicate a larger issue. Addressing it early is always more cost-effective.
practical tips from real experience
Sometimes, the smallest habits make the biggest difference.
Keep a simple log of inspections and repairs. It helps you track recurring issues and plan maintenance.
Use quality materials, even for small fixes. Cheap products often fail quickly, leading to repeated expenses.
Don’t rush repairs. Taking the time to do things properly ensures longer-lasting results.
when to call a professional
While many leaks can be fixed with basic steps, some situations require expert help.
If you notice structural damage, widespread leaks, or issues that you can’t safely access, it’s best to consult a professional.
Trying to handle complex problems without the right skills can lead to more damage and higher costs.
knowing your limits is part of saving money
Being proactive doesn’t mean doing everything yourself. It means understanding when to act and when to seek help.
By combining simple DIY fixes with professional support when needed, you create a balanced approach that protects both your home and your budget.
frequently asked questions
what is the quickest way to stop a roof leak temporarily
A temporary fix often involves placing a tarp over the affected area or using roofing sealant to block the entry point. While effective in emergencies, these solutions should be followed by a proper repair.
how can i tell if my roof leak is serious
Signs of a serious leak include widespread water stains, sagging ceilings, mold growth, or multiple leak points. If you notice any of these, it’s best to act quickly and consider professional help.
is it safe to repair a roof leak by myself
It can be safe if you take proper precautions, such as using a stable ladder and avoiding wet or windy conditions. However, steep roofs or extensive damage may require professional assistance.
how often should i inspect my roof for leaks
At least twice a year is recommended, along with additional checks after heavy storms. Regular inspections help catch problems early and reduce repair costs.
can clogged gutters really cause roof leaks
Yes, clogged gutters can lead to water buildup, which may seep under roofing materials and cause leaks. Keeping gutters clean is a simple and effective preventive measure.
do small leaks always get worse over time
In most cases, yes. Small leaks tend to expand as water continues to penetrate the roof structure. Addressing them early prevents more extensive and expensive damage.
In the end, a roof leak is not just a problem to fix—it’s a system to understand. When you approach it with patience, attention, and a willingness to act early, you turn what could be a costly issue into a manageable task. These eight proven steps are not just about stopping leaks; they are about building confidence in maintaining your home and protecting your investment for years to come.