5 Essential Roof Leak Fix Guide Safety Tips You Must Know
5 Essential Roof Leak Fix Guide Safety Tips You Must Know
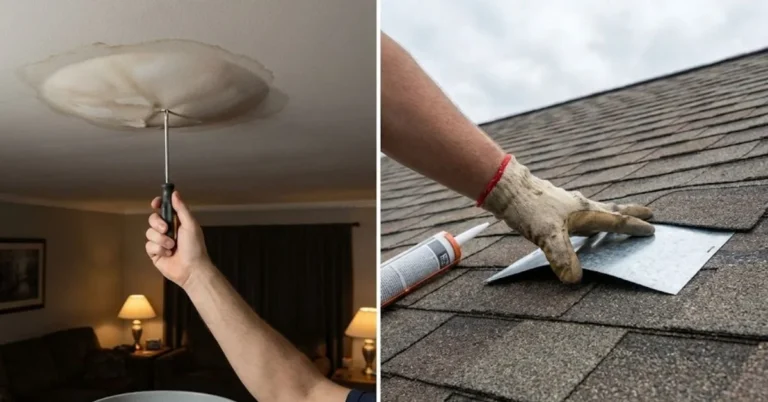
A leaking roof rarely announces itself politely. It shows up in the middle of the night with a soft drip, or after a heavy rainstorm when you notice a dark patch slowly spreading across the ceiling. At first, it might seem like a small inconvenience, something you can ignore for a few days. But roof leaks have a way of growing quietly, turning from minor annoyances into expensive structural problems.
What most people don’t realize is that fixing a roof leak is not just about stopping water. It’s about doing it safely. Climbing onto a roof, handling tools, working around moisture, and dealing with unstable surfaces can all pose serious risks. Many injuries happen not because people lack skill, but because they underestimate the importance of safety.
This guide is built around five essential safety tips that every homeowner or DIY enthusiast should understand before attempting to fix a roof leak. Along the way, you’ll find practical advice, real-life scenarios, and small details that often make the biggest difference.
understanding the nature of roof leaks before you climb
Before even thinking about stepping onto your roof, you need to understand what you’re dealing with. Roof leaks are often deceptive. The spot where water drips inside your home is not always directly beneath the actual leak. Water travels along beams, insulation, and other structures before it reveals itself.
Imagine seeing a stain on your ceiling near a corner of your room. Instinctively, you might think the leak is right above that spot. But in reality, it could be several feet away, higher up the roof slope, or even near a vent or chimney.
The first safety tip begins here: never rush into action without identifying the problem correctly.
Start your inspection from inside your home. Use a flashlight and carefully examine your attic if you have access. Look for damp insulation, moldy wood, or visible water trails. These clues will guide you to the source.
Why does this matter for safety? Because unnecessary climbing increases your risk. If you go up multiple times trying to locate the leak blindly, you’re exposing yourself to potential slips, fatigue, and mistakes.
A methodical approach reduces the number of trips you need to make and ensures that when you do climb, you’re prepared.
the importance of weather awareness and timing
One of the most overlooked safety factors in roof repair is timing. It might seem logical to fix a leak during rain since you can see where the water is coming from. However, this is one of the most dangerous decisions you can make.
Wet roofs are extremely slippery. Even asphalt shingles, which normally provide decent grip, can become hazardous when soaked. Add wind to the equation, and you’re dealing with unpredictable conditions.
The second essential safety tip is simple but critical: never attempt roof repairs during bad weather.
Wait for a clear, dry day. Ideally, choose a time when the roof has had several hours to dry completely. Early mornings can still have dew, so late morning or early afternoon is often safer.
There’s also the issue of visibility. Bright, natural light helps you spot damaged shingles, cracks, or holes more easily. Poor lighting increases the chances of missing something or making incorrect repairs.
Consider a scenario where someone climbs onto a damp roof during light rain, thinking it’s manageable. One small misstep can lead to a fall, and even a short fall from a roof can cause serious injury.
Patience is part of safety. Waiting for the right conditions is not a delay; it’s a protective measure.
using the right safety gear and tools
Many homeowners approach roof repairs with minimal equipment, thinking they’ll just “take a quick look” or “fix a small issue.” This mindset often leads to accidents.
The third safety tip revolves around proper gear and preparation.
At a minimum, you should have:
A sturdy ladder that extends at least three feet above the roof edge
Non-slip shoes with good traction
Work gloves to protect your hands
A safety harness if your roof is steep or high
Protective eyewear when dealing with debris or sealants
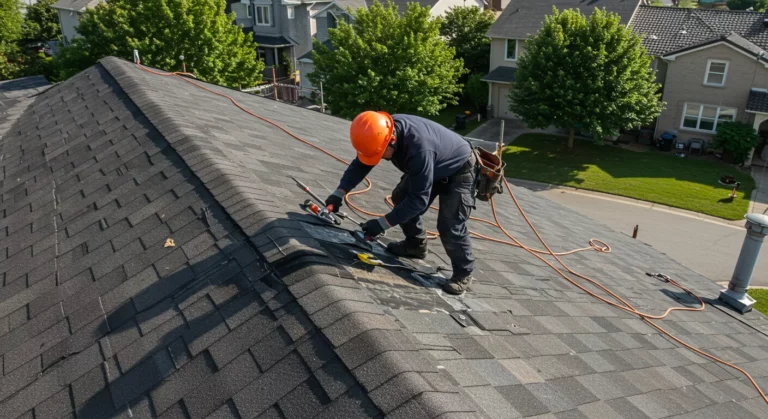
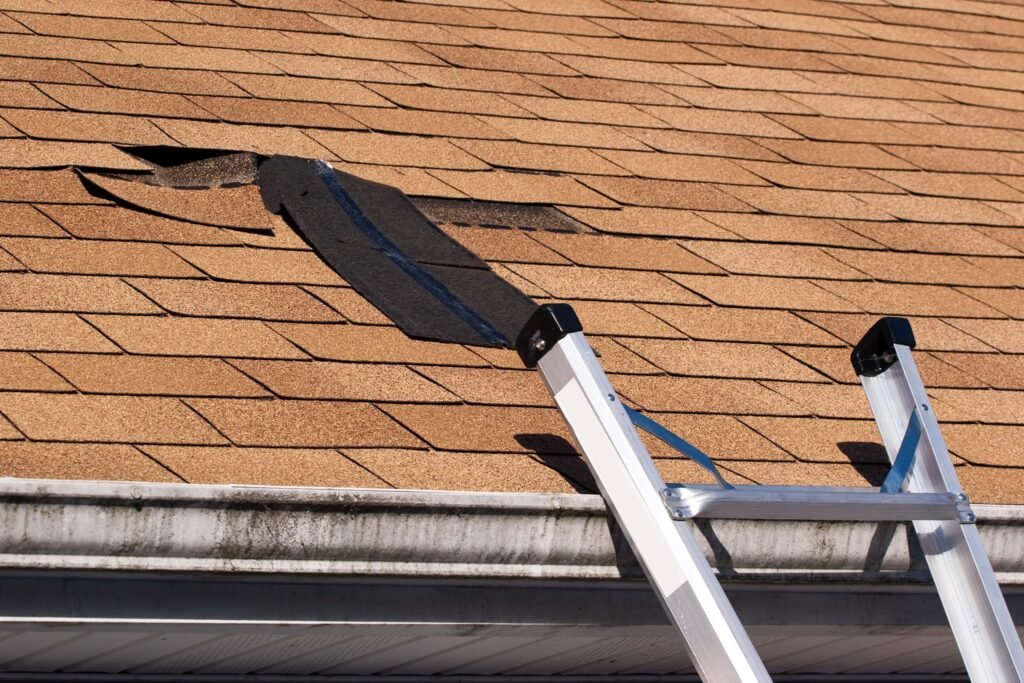
Your ladder deserves special attention. Place it on a stable, level surface and secure it if possible. The angle should not be too steep or too shallow. A poorly positioned ladder is one of the leading causes of falls during home repairs.
Think about the tools you’ll need before climbing up. Carrying tools while climbing can be risky, so use a tool belt or a bucket with a rope to pull items up after you’ve secured yourself.
Also, avoid overloading yourself. Trying to carry too many tools at once can throw off your balance.
There’s a subtle psychological factor here. When people feel rushed or underprepared, they tend to improvise. Improvisation on a roof is rarely safe.
preparing the roof surface and surroundings
Even on a dry day, your roof might not be entirely safe. Loose debris, moss, algae, or even fallen leaves can create slippery spots.
The fourth safety tip is about preparing your work environment before starting repairs.
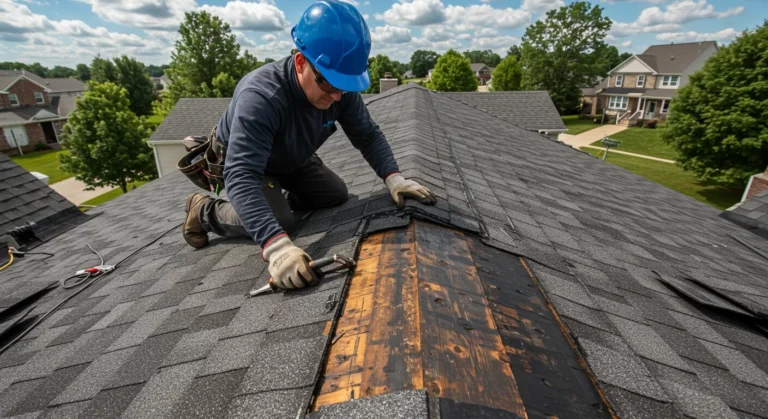
Take a few minutes to clear the area around the suspected leak. Remove debris carefully, using your hands or a small broom. Be cautious not to damage shingles in the process.
Check for loose or damaged shingles that might shift under your weight. Step only on areas that feel stable.
If your roof has a steep pitch, consider using roof brackets or planks to create a more secure standing surface. These small additions can significantly reduce the risk of slipping.
Another important detail is awareness of edges. It’s easy to become focused on the repair and lose track of your position on the roof. Always know where the edges are and maintain a safe distance.
Imagine working on a small crack near the center of your roof. You move slightly backward without looking, and suddenly you’re much closer to the edge than you realized. Situational awareness is a key part of safety.
taking a careful and controlled approach to repairs
Once you’ve located the leak and prepared your environment, it’s time to fix the problem. This is where many people let their guard down. They’ve made it onto the roof safely, and they assume the hardest part is over.
In reality, the repair process itself carries risks.
The fifth essential safety tip is to work slowly and deliberately.
Avoid sudden movements. Maintain three points of contact whenever possible—two feet and one hand, or two hands and one foot.
If you’re replacing shingles, carefully lift the damaged ones and remove nails using the appropriate tools. Keep your body balanced and avoid leaning too far in any direction.
When applying sealants or patches, be mindful of your footing. It’s easy to get distracted by the task and forget that you’re standing on an inclined surface.
Take breaks if needed. Fatigue can affect your balance and decision-making.
There’s also the question of knowing your limits. If the damage is extensive or if you feel unsure at any point, it’s safer to step back and consider professional help. There’s no harm in recognizing when a job is beyond your comfort level.
practical scenario: a simple leak repair with safety in mind
Let’s walk through a typical situation.
You notice a small water stain on your ceiling after a storm. Instead of immediately climbing onto the roof, you inspect your attic and trace the moisture to a specific area near a vent.
You wait for a clear day and gather your tools: a ladder, gloves, replacement shingles, roofing nails, and sealant.
You set up the ladder securely and climb up carefully, maintaining balance. Once on the roof, you clear away leaves and inspect the area. You find a cracked shingle near the vent.
Instead of rushing, you position yourself securely, remove the damaged shingle, and install a new one. You apply sealant around the vent for extra protection.
Throughout the process, you stay aware of your surroundings, move slowly, and avoid unnecessary risks.
This approach not only fixes the leak but also keeps you safe.
common mistakes that compromise safety
Even with the best intentions, people often make mistakes that increase risk.
One common mistake is working alone. Having someone nearby can be crucial in case of an emergency.
Another is ignoring minor hazards. A small patch of moss might not seem dangerous, but it can cause a slip at the worst moment.
Overconfidence is another factor. Just because you’ve done similar tasks before doesn’t mean every situation is the same.
Finally, rushing the job is a major issue. Whether it’s due to time pressure or frustration, rushing leads to poor decisions.
long-term safety and maintenance habits
Safety doesn’t end with fixing a leak. Regular maintenance can prevent future problems and reduce the need for risky repairs.
Inspect your roof periodically, especially after storms. Clean gutters to prevent water buildup. Trim overhanging branches that could damage shingles.
By staying proactive, you minimize the chances of dealing with emergencies that require immediate action.
There’s also a financial benefit. Preventive maintenance is usually much cheaper than major repairs.
the human side of roof repairs
Behind every repair task is a person making decisions, weighing risks, and trying to solve a problem. It’s easy to focus on techniques and tools, but mindset plays a significant role.
Approach roof repairs with respect for the risks involved. Confidence is good, but it should be balanced with caution.
Think of safety not as a set of rules, but as a habit. The more you practice safe behaviors, the more natural they become.
FAQs
- Is it safe to fix a roof leak by myself?
Yes, small and simple leaks can often be fixed by homeowners, but only if proper safety precautions are followed. If the roof is steep, high, or heavily damaged, it’s better to consult a professional. - What is the safest time of day to repair a roof?
Late morning to early afternoon is usually the safest time, as the roof is dry and visibility is good. Avoid early mornings with dew or evenings with fading light. - Do I really need a safety harness for minor repairs?
While not always required for very low or flat roofs, a safety harness is highly recommended for steep or high roofs. It adds an extra layer of protection. - How can I tell if a roof is too dangerous to walk on?
If the roof is very steep, slippery, or has significant structural damage, it may be unsafe. Trust your judgment—if it feels risky, it probably is. - What should I do if I can’t find the source of the leak?
Start by inspecting your attic for clues. If the source remains unclear, consider using a professional inspection to avoid unnecessary risk. - Can temporary fixes be safe and effective?
Yes, temporary fixes like sealants or patches can be safe if applied carefully. However, they should not replace proper long-term repairs.
In the end, fixing a roof leak is as much about awareness and preparation as it is about tools and materials. The difference between a successful repair and a dangerous situation often comes down to the choices you make before and during the task.