11 Roof Leak Fix Guide Basics Tips Experts Swear By
Meta Description: Roof leak fix guide basics every homeowner needs — discover 11 expert-approved tips to stop leaks fast, prevent damage, and protect your home year-round.
11 Basics to Fix Roof Leak Experts Swear By
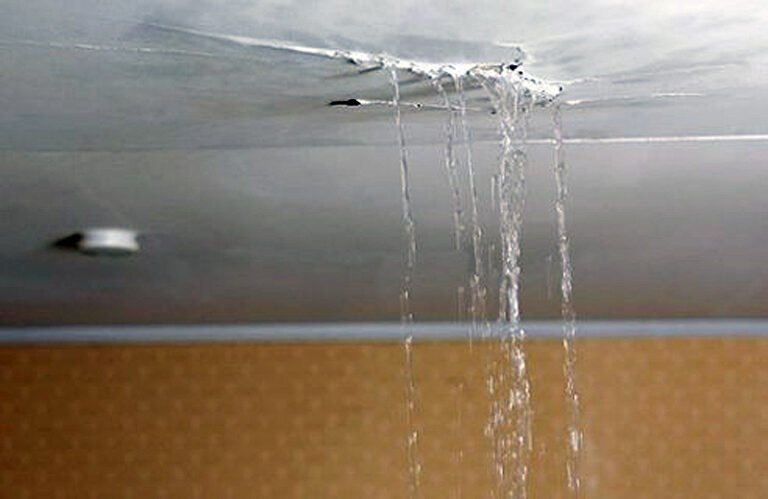
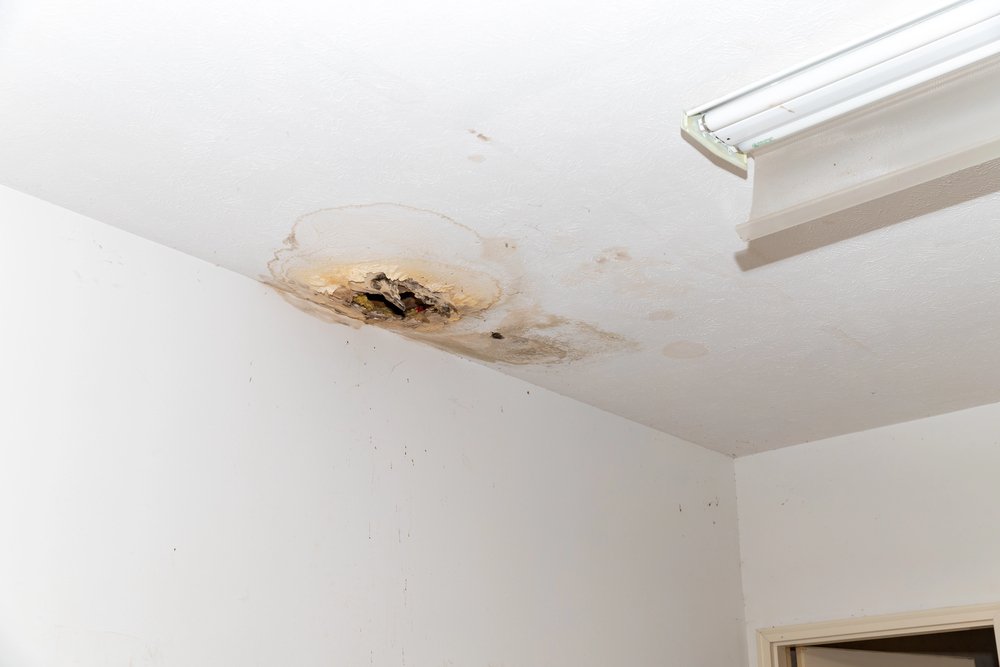
One of the most stressful things homeowners have to deal with is a leaking roof. Water running down the ceiling, stains creeping up the walls and mold to worry about — it’s a nightmare.
The good news? Most roof leaks can be repaired if you know how.
This roof leak fix guide features 11 practical and proven tips that roofing pros depend on day after day. These basics will help you act quickly and intelligently, whether at the first sign of a pesky drip or in the face of a full-on water crisis.
Let’s get into it.
Why Roof Leaks Are Worse Than They Seem
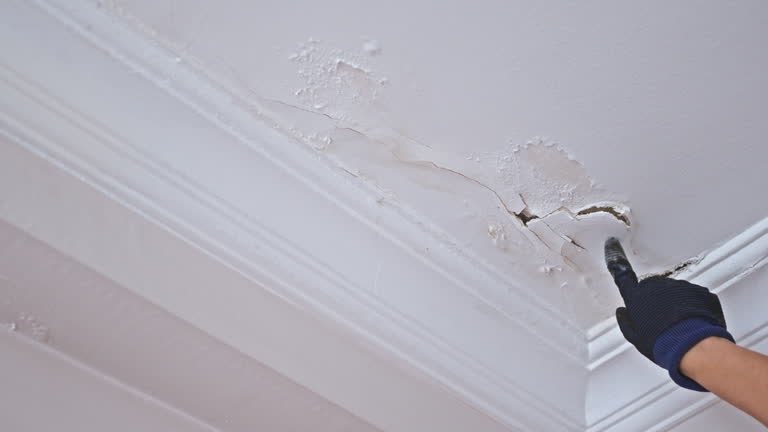
A little water-stained spot on your ceiling probably wouldn’t seem alarming. But underneath that small spot may be saturated insulation, rotten wood and the start of a serious mold problem.
Roof leaks don’t fix themselves. They deteriorate over time — especially when rain returns.
This is what an unattended roof leak can become:
| Problem | What It Causes |
|---|---|
| Wet insulation | Loss of energy efficiency |
| Wood rot | Structural damage to rafters and decking |
| Mold growth | Health risks for your family |
| Ceiling collapse | Serious safety hazard |
| Electrical damage | Fire risk from wet wiring |
Moving quickly can save you stress and money. That’s why a good roof leak fix guide is worthwhile to have in your back pocket.
Tip #1 — Identify the Source Before You Touch Anything
Here is the biggest mistake homeowners make: they find water dripping in one location, and assume that’s where the leak is.
Water travels.
It may penetrate the roof at one point, travel down a rafter or beam, then drip down somewhere entirely different. So the stain on your ceiling could be 10 feet away from the source of the problem.
How to track down the source:
- Enter your attic in the daytime. Look for light coming through.
- Shine a flashlight to look for water stains, dark streaks or soft wood.
- Wherever water is moving actively, get up and watch.
- If dry, get someone to run a hose on the roof while you watch inside.
- Begin at the top of the water trail and work toward the roof.
Tip #2 — Know the Spots Most Likely to Cause a Leak on Any Roof
Leaks don’t tend to occur in the dead center of a perfectly level shingle. They typically begin at a point of weakness.
Familiarizing yourself with these points speeds up fault finding massively.
Common locations for roof leaks:
- Flashing — Metal strips at chimneys, vents and skylights. These rust or pull away with time.
- Valleys — The area formed where two slopes of a roof meet. Water flows heavily here.
- Vent boots — Rubber seals around pipe vents dry out with age.
- Gutters — Dirty gutters back water up under shingles.
- Ridge line — The highest point of the roof where shingles meet.
- Dormers — The area where vertical walls intersect with sloping roof lines.
Always check these areas first when you do your inspection.
Tip #3 — Use Roofing Cement as Your First Layer of Defence
For small cracks, gaps or lifted shingles, roofing cement (also called roofing tar or mastic) is your best friend.
It’s thick, waterproof and easy to apply. It does not require special skills to use it.
How to apply roofing cement correctly:
- Clean the area first. Remove dirt, moss and loose material.
- Make sure the surface is completely dry — even if that takes a day or two.
- Apply the cement using a putty knife or caulk gun.
- Press down firmly and smooth out the edges.
- For lifted shingles, press the shingle down and cement underneath it.
This is a patch-type tool, not a permanent solution for deep damage. But it’s useful for small repairs and quickly halts water.
Tip #4 — Promptly Inspect and Replace Damaged Flashing
One of the most overlooked — and also one of the biggest — causes of roof leaks is flashing.
It’s the metal (typically aluminum or galvanized steel) that closes the seams where the roof joins something else. Chimneys, skylights, walls, vents — all of them use flashing.
When flashing fractures, breaks or rusts, water penetrates.
Signs your flashing needs attention:
- You can see breaks between the metal and the surface
- The metal is bent, cracked or corroded
- You see rust spots on the roof or in the attic
How to fix it:
For narrow openings, roofing cement or waterproof caulk are effective. If the flashing is bent or badly corroded, full replacement is in order. This often involves lifting adjacent shingles, taking out the old flashing and putting in new metal sealed properly.
If you don’t feel safe on a roof, this is a job that’s worth calling in a pro for.
Tip #5 — Properly Replace Cracked or Missing Shingles
A cracked, curled or missing shingle is essentially an open door for water.
Shingles are the first line of defense against rain. When they fail, everything below them is at stake.
Replace a shingle, step by step:
- Use a pry bar to slide beneath the damaged shingle and lift out nails.
- Pull the shingle out carefully.
- Insert the new shingle in place, aligning it with surrounding shingles.
- Nail it down with roofing nails along the top edge.
- Use roofing cement to seal the nail heads and edges.
Pro tip: Get a few additional shingles that match your roof when you move in — trying to match them later can be very challenging as they age and fade.
Tip #6 — Repair Vent Boot Seals Before They Fail Completely
Every pipe poking out of your roof has a rubber boot seal around it. These seals prevent water from running down the pipe and into your home.
With time — typically 10 to 15 years — the rubber dries, cracks and allows water in.
How to check your vent boots:
- Check for cracks or tears in the rubber collar around any rooftop pipe
- See if the metal base of the boot is pulling away from the shingles
- Touch the wood near the base — if it feels soft or spongy, water has already been getting in
Replacing a vent boot is an easy DIY project. You can purchase universal rubber boot replacements at any hardware store. Slide the old one off, slip the new one over the pipe, nail it down and seal the edges.
Don’t wait on this one. It is amazing how quickly water damage occurs because of a cracked vent boot.
Tip #7 — Clean and Properly Pitch Your Gutters
This one tends to shock a lot of people. Clogged gutters are one of the top contributors to roof leaks.
Water can back up when gutters are filled with leaves and debris. It sits on the roof edge and saturates beneath the shingles. It’s known as “water intrusion,” and it leads to rot, mold and leaks — all due to a dirty gutter.
Gutter maintenance basics:
- Clean gutters twice a year (spring and fall)
- Ensure that water can flow freely toward the downspout
- Confirm gutters are pitched correctly — about ¼ inch of drop per 10 feet
- Search for dips where water can stand
- If leaves get into your gutters regularly, install gutter guards
According to the Insurance Information Institute, water damage and freezing account for a significant portion of homeowner insurance claims — much of which starts at the gutters and roof edge.
Ice dams are yet another gutter issue in cold climates. When snow melts on a warm roof and refreezes at its cold edge, it obstructs drainage and pushes water underneath the shingles. Cleaning gutters and insulating the attic will help avoid this.
Tip #8 — Check Your Attic Insulation and Ventilation
Most homeowners do not associate attic ventilation with roof leaks. But they’re directly linked.
A poorly ventilated attic traps heat and moisture. That moisture condenses against the underside of the roof deck. Over time, it rots the wood and creates something resembling a roof leak — even when rain isn’t involved.
Signs of poor attic ventilation:
- Condensation or frost on the underside of the roof in winter
- A musty odor of mold or mildew in the attic
- Unusually hot attic in summer
- Ice dams forming at the roof edge in cold weather
What to do:
Ensure you have both intake vents (at the soffits) and exhaust vents (at the ridge). Good airflow pushes moisture out before it can do harm. Adding or upgrading ventilation is often a simple fix with a far-reaching impact.
Tip #9 — Use a Tarp for Emergency Leak Protection
Once in a while, you get a leak during a storm and can’t do a permanent repair immediately. Then a tarp is your best weapon.
A well-placed tarp will keep water out until the weather clears and you can make the real repair.
How to use a tarp correctly:
- Use a tarp large enough to cover the damaged section with several feet of overlap on each side.
- Let the tarp run over the ridge of the roof so it covers both sides.
- Secure the edges by weighting or nailing them down — wind will destroy a tarp that isn’t well anchored.
- Sandwich the tarp edges with 2×4 boards and nail them down safely.
Safety note: Do not get on a wet roof when it is actively raining or there are high winds. Wait for the storm to calm. Your safety is more important than stopping a leak immediately.
Tip #10 — Know When It’s a DIY Job vs. a Pro Job
Not every roof leak is a do-it-yourself project. Knowing your limits can prevent you from making things much worse.
DIY-friendly repairs:
- Replacing a few shingles
- Using roofing cement to fill in small cracks
- Replacing a vent boot
- Cleaning gutters
- Placing an emergency tarp
Call a professional for:
- Large areas of damaged or missing shingles
- Flashing replacement around a chimney
- Any repair involving work on or near the roof peak
- Signs of structural damage (sagging, soft spots)
- Leaks you can’t find after a thorough inspection
- Steep roofs without proper safety equipment
A licensed roofer may also catch issues you’ll overlook. Sometimes it pays to have an inspection in order to save thousands on repairs down the road.
Tip #11 — Do a Roof Check After Every Major Storm
The vast majority of roof damage doesn’t manifest as an obvious leak immediately. A powerful storm will crack shingles, lift flashing and degrade seals — but you may not notice water inside for weeks.
By then, the damage has spread.
Post-storm roof check routine:
- Walk around the house and inspect the roofline from the ground
- Inspect shingles without going on the roof — use binoculars
- Watch for shingle granules accumulating in gutters (a sign of wear)
- Check for any visible dents, cracks or lifted sections
- Check the attic for new water stains or wet spots
If your area has had severe hail or wind storms, you might want to call a roofer for a professional inspection. Many will do it at no charge, especially if you’re thinking about filing a claim.
Roof Leak Repair: Quick Reference Table
| Leak Cause | DIY Fix | When to Call a Pro |
|---|---|---|
| Cracked shingles | Replace with matching shingle | Large sections missing |
| Damaged flashing | Caulk small gaps | Full replacement needed |
| Cracked vent boot | Replace boot seal | Structural rot present |
| Clogged gutters | Clean and re-pitch | Gutters pulling away from fascia |
| Valley leaks | Apply roofing cement | Deep wood damage |
| Ice dams | Improve insulation/ventilation | Recurring every winter |
| Unknown source | Attic inspection with hose test | Still can’t find it |
How Long Does a Roof Repair Last?
This is something experts are asked all the time. The answer depends on what the repair was, what materials were used and how well it was done.
| Repair Type | Expected Lifespan |
|---|---|
| Roofing cement patch | 1–5 years |
| Single shingle replacement | 10–20 years |
| Flashing replacement | 15–25 years |
| Vent boot replacement | 10–15 years |
| Full roof re-lay | 20–50 years |
Temporary fixes need to be reexamined. Do not put roofing cement on a crack and walk away from it. Inspect it each season and replace it accordingly when its time has come.
Seasonal Roof Maintenance Checklist
Prevention beats repair every time. Here’s a simple seasonal schedule:
Spring:
- Inspect for winter damage
- Clean gutters after spring storms
- Check flashing and vent boots
Summer:
- Check for heat-deformed or cracked shingles
- Trim overhanging tree branches
- Check attic for heat buildup
Fall:
- Remove leaves from gutters before they freeze
- Inspect seals around chimneys and skylights
- Complete attic inspection prior to winter
Winter:
- Look out for ice dams at the edge of the roof
- Use a roof rake to clear heavy snow buildup
- Look for condensation or frost in the attic
FAQs — Roof Leak Fix Guide
Q: Is there a way to repair a roof leak from inside? A: You can make a temporary patch from the inside with roofing cement or waterproof sealant. But it’s not a permanent fix. You still need to address the issue on the exterior of the roof.
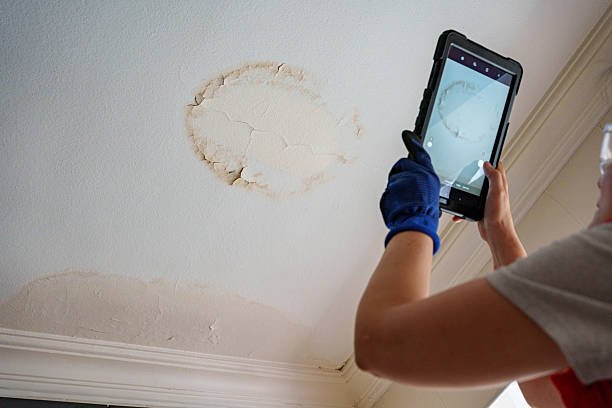
Q: How can I tell if my roof leak is covered by insurance? A: Most homeowner’s insurance will cover sudden, accidental damage — such as a storm ripping shingles off the roof. It typically does not cover leaks due to neglect or normal wear and tear. Document everything with photos and call your insurer quickly.
Q: When is the best time of year to repair a roof? A: Late spring to early fall is ideal. Materials seal properly when it is dry and mild outside. Asphalt shingles in particular require warmth to bond properly.
Q: What is the average cost to repair a roof leak? A: For minor repairs such as replacing a few shingles or resealing flashing, you may pay $150–$500. More extensive repairs that involve structural damage or large sections can be $1,000–$3,000 or more. A complete roof replacement will usually fall between $8,000–$20,000+ depending on size and materials.
Q: Can a roof leak cause mold to grow in 24 hours? A: Yes. Under the right conditions, mold can start to develop in as little as 24–48 hours. If water has pooled in insulation or wood, mold is an immediate and real concern. Always dry out wet materials quickly.
Q: How long can I delay repairing a roof leak? A: Not long. It only takes a few weeks for water damage to accumulate, even with a tiny leak. In wet climates or during rainy seasons, the damage spreads even more quickly. Any known leak should generally be addressed as soon as is practical.
Q: Can I use spray foam to repair a roof leak? A: Expanding spray foam is a poor roofing material. It absorbs moisture, breaks down rapidly under UV light and makes proper repairs more difficult later. Only use roofing cement, caulk or approved flashing materials.
Wrapping It All Up
Your leaking roof doesn’t need to be a disaster. With the right knowledge and prompt action, most leaks can be managed — and many can be repaired with simple tools and materials found at your local hardware store.
This roof leak fix guide walks you through the steps from locating the source to knowing when to call in a pro. The trick is to never ignore the signs, be quick to react when you see a problem and stay on top of regular maintenance throughout the year.
The 11 tips in this guide are the same ones professionals use every day. They work on just about every kind of roof, in just about every kind of climate and for homeowners at every experience level.
The roof is the shield that protects everything beneath it. Treat it right, and it will continue doing its job for decades to follow.