9 Smart Roof Leak Fix Guide Basics for Quick Repairs
Fixing Roof Leaks: The Basics for Quick Repairs
Meta Description: Roof leak fix guide tips every homeowner needs | Find 9 simple, time-tested essentials to stop leaks quickly, protect your home, and reduce repair costs.
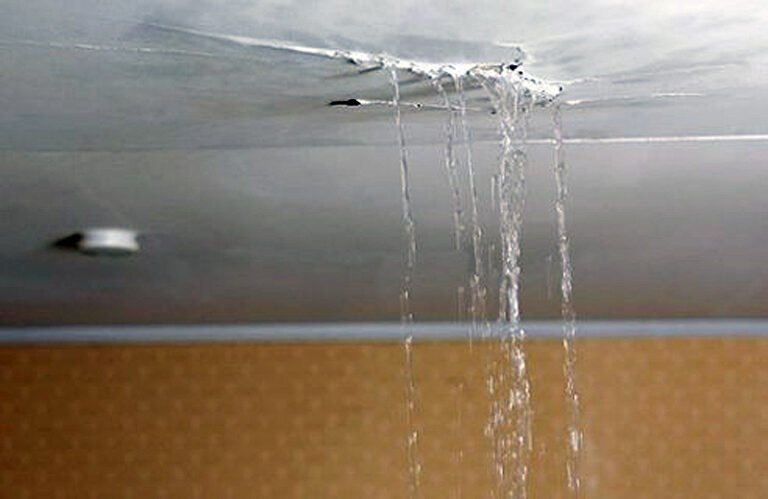
Before You Have a Flood, Stop the Drip
A small water stain on your ceiling may not seem like a big deal. But behind that stain, water may be quietly munching away at your insulation, rotting out your wood framing and sprouting mold inside your walls.
Roof leaks do not get better on their own and they certainly do not wait for a good time to worsen. They grow. Fast.
The good news? Many roof leaks can be detected early and resolved without calling a contractor — if you know what to look for and how to work fast.
This guide to fixing a roof leak covers the nine smart basics all homeowners should understand. Whether it’s a little drip after a storm or a mysterious wet spot that keeps returning, these steps will lead you to troubleshoot the problem, halt the damage and make wise repair decisions.
Let’s get into it.
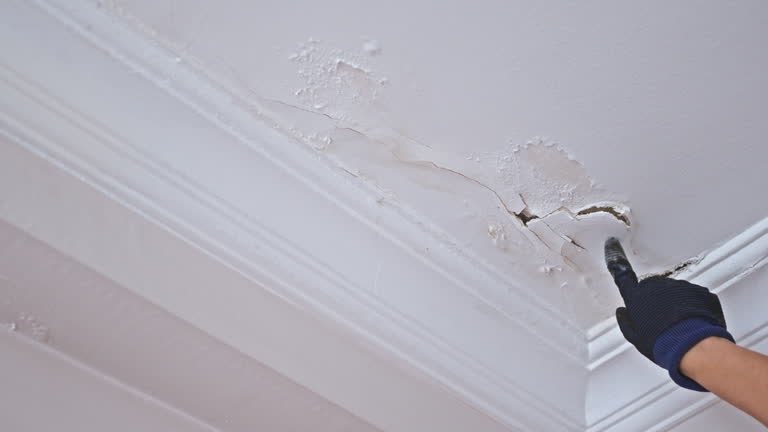
Early Warning Signs You Should Never Ignore
Before you can repair a roof leak, you need to know if one is occurring. The tricky part? Water travels. In fact, the location of that stain on your ceiling is often nowhere near where the water entered.
What to Look for in Your Home
- Brown or yellow water stains on ceilings or walls
- Bubbling or peeling paint on walls near the top or where the ceiling meets the wall
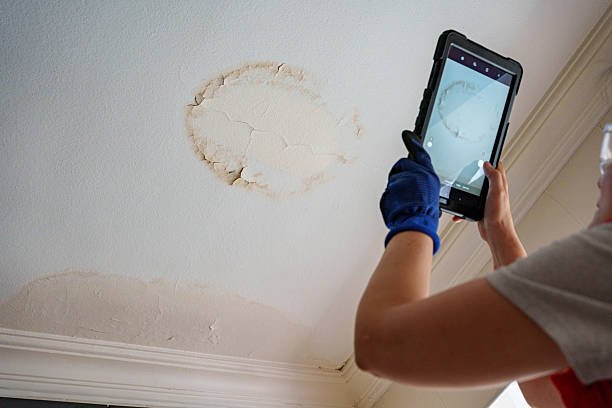
- Smell of mildew or moisture in rooms, closets, or the attic
- Visible mold or mildew on walls, wood, or insulation
- Droopy drywall or ceiling that gives under pressure
What to Look for in the Attic
Your attic is where the water goes first after coming through the roof. Get a flashlight and inspect after heavy rain.
Look for:
- Insulation that is wet or looks darker in some areas
- Rafters and decking with water stains or drips
- Sunshine shining through cracks in the roof boards
- Rust or discoloration around nail heads
Catching a leak while it’s still in the attic stage means you might be able to repair it before any damage shows inside the house.
The Source — Not Just the Wet Spot
Which brings us to where most DIY roof repairs get botched. They locate a damp spot and repair it — but the actual access point is elsewhere.
Water comes through a hole in the roof, runs across sheathing if there is any, then along rafters or roof felt then drips down. It can move a few feet from its entry point before it finds somewhere to drop.
How to Hunt Down the True Leak
Step 1: On a dry day, climb up to your attic with a flashlight. Check for stains, discoloration or any wood that appears wet or darkened.
Step 2: Mimic rain with a garden hose. One person inside watches while another runs water slowly over sections of the roof, starting at the bottom and working up. Stop and hold the water on each area for several minutes.
Step 3: At the point the person inside yells out “water!”, mark the area on the roof. That’s your entry zone.
Step 4: Note where it is relative to nearby vents, chimneys or ridge lines so that you can find it again once you’re on the roof.
It’s a process that requires patience, but it’s much more accurate than guessing.
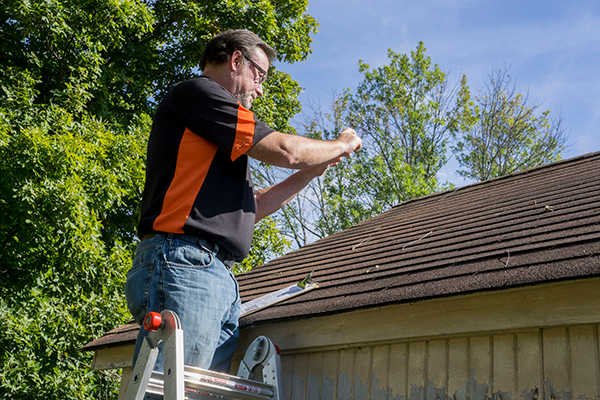
Always Put Safety First Before You Climb Up
No repair is worth a visit to the emergency room. Roofs are slippery. They’re steep and unforgiving. Make sure you’re doing it safely before you even think about getting up there.
Basic Roof Safety Rules
| Safety Item | Why It Matters |
|---|---|
| Non-slip rubber-soled shoes | Prevent sliding on wet or dirty shingles |
| Safety harness and rope | Protect against falls on steep pitches |
| Stable extension ladder | Secures your entry and exit points |
| Dry weather conditions | Wet roofs are dangerously slick |
| A spotter on the ground | Someone to watch and call for help if necessary |
When to Stay Off the Roof
- When it rains — let it dry completely
- In windy weather (20 mph plus)
- If the pitch is steep and you do not have much experience with heights
- If the roof is old and the decking could be spongy or rotted
If you are not comfortable up there, then don’t force it. The cost of a roofing contractor is far less than the bill from a hospital.
The Most Common Leak Locations
Roofs don’t leak randomly. Most leaks occur in certain areas where water is most likely to make its way inside. When you are looking for the problem, these spots can save time.
6 Most Common Roof Leak Sources
1. Flashing Around Chimneys Metal flashing makes a watertight seal at the junction between the chimney and roof. Eventually it cracks, rusts or separates from the chimney. When it does, the water rushes right in.
2. Roof Valleys A valley is the angle formed where two roof slopes meet. Here, all the rainwater from both slopes flows down through the valley. If the valley flashing is broken or if the shingles are worn, leaks in your roof are virtually assured.
3. Around Skylights Skylights are installed with seals and flashing that deteriorate as time goes by. Water pooling around the frame accelerates that process.
4. Vent Pipe Boots The rubber boots surrounding vent pipes (plumbing stacks, exhaust vents) dry and crack with age. This is a common culprit behind leaks and also one of the easiest to remedy.
5. Ridge Line & Hip Areas The top of your roof takes the most weather punishment. Ridge cap shingles can blow off or crack, exposing the peak.
6. Near Gutters and Eaves Ice dams in winter force water back up under shingles. And even without ice, clogged gutters force water to back up and seep under the edge of the roof.
Gather the Proper Tools and Materials Before Getting Started
An unprepared roof visit wastes time and complicates repairs. Here’s what you’ll want to prepare before the job starts.
Your Basic Roof Repair Kit
| Tool/Material | What It’s Used For |
|---|---|
| Roofing nails (1.5–2 inch) | Securing new or lifted shingles in place |
| Roofing hammer or nail gun | Driving nails without the risk of cracking shingles |
| Pry bar or flat bar | Lifting shingles to inspect underneath, particularly at flashings |
| Roofing caulk / sealant | Sealing small gaps and edges of flashing around vents and valleys |
| Roofing cement | Patching cracks and bonding shingles |
| Replacement shingles | Fixing damaged or missing sections |
| Flashing tape (self-adhesive) | Quick seal for flashing joints |
| Utility knife | Cutting shingles and trimming patches |
| Wire brush | Cleaning rust and debris before sealing |
| Chalk or spray paint | Marking damaged spots for repair |
If you have everything with you when you go up, that means fewer trips up and down the ladder — which also means fewer opportunities to fall.
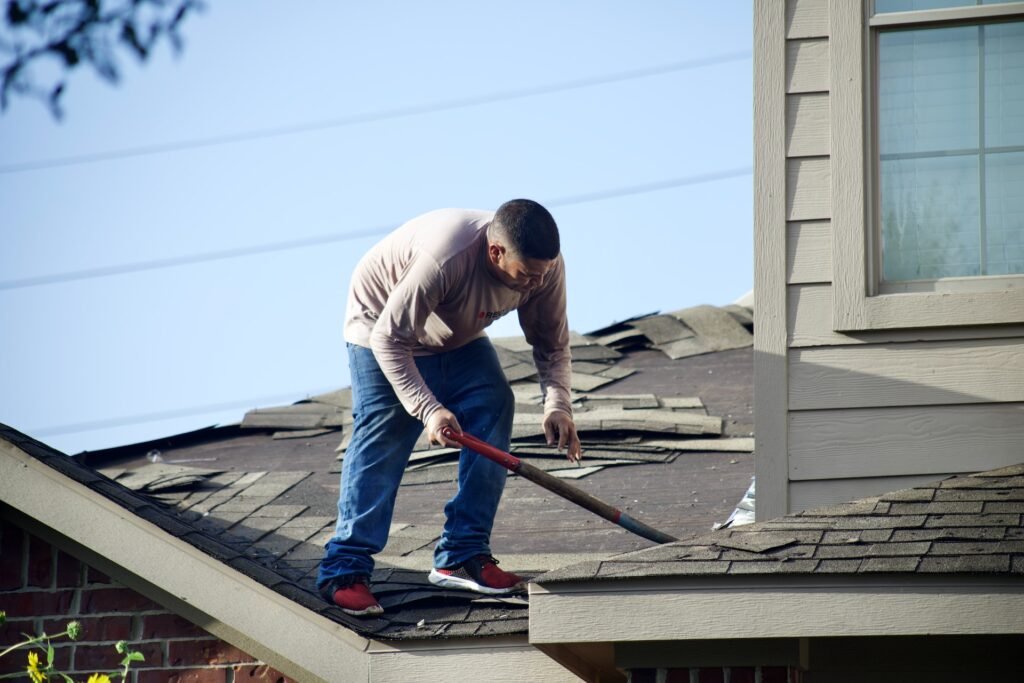
How to Repair the Most Common Roof Leaks Yourself
Now for the actual repairs. Each leak has its own solution. Here are the most common, and precisely how to treat them.
How to Replace a Cracked or Missing Shingle
The roof leak fix guide task most homeowners will face — this is a simple one.
What you’ll need: Replacement shingle, roofing nails, roofing cement, pry bar
Steps:
- Using the pry bar, gently lift up on the edges of surrounding shingles
- Remove the nails that are securing the damaged shingle and slide it out
- Push the new shingle into place and line it up with other shingles
- Nail down each edge with four roofing nails, one at each corner
- Apply a swipe of roofing cement underneath the edges of the overlapping shingles to keep them sealed flat
- Press firmly and smooth out
Pro tip: When the time comes, try to find new shingles that are as close a match to your old ones as possible in size, style and color. Take an old shingle to compare it at the hardware store.
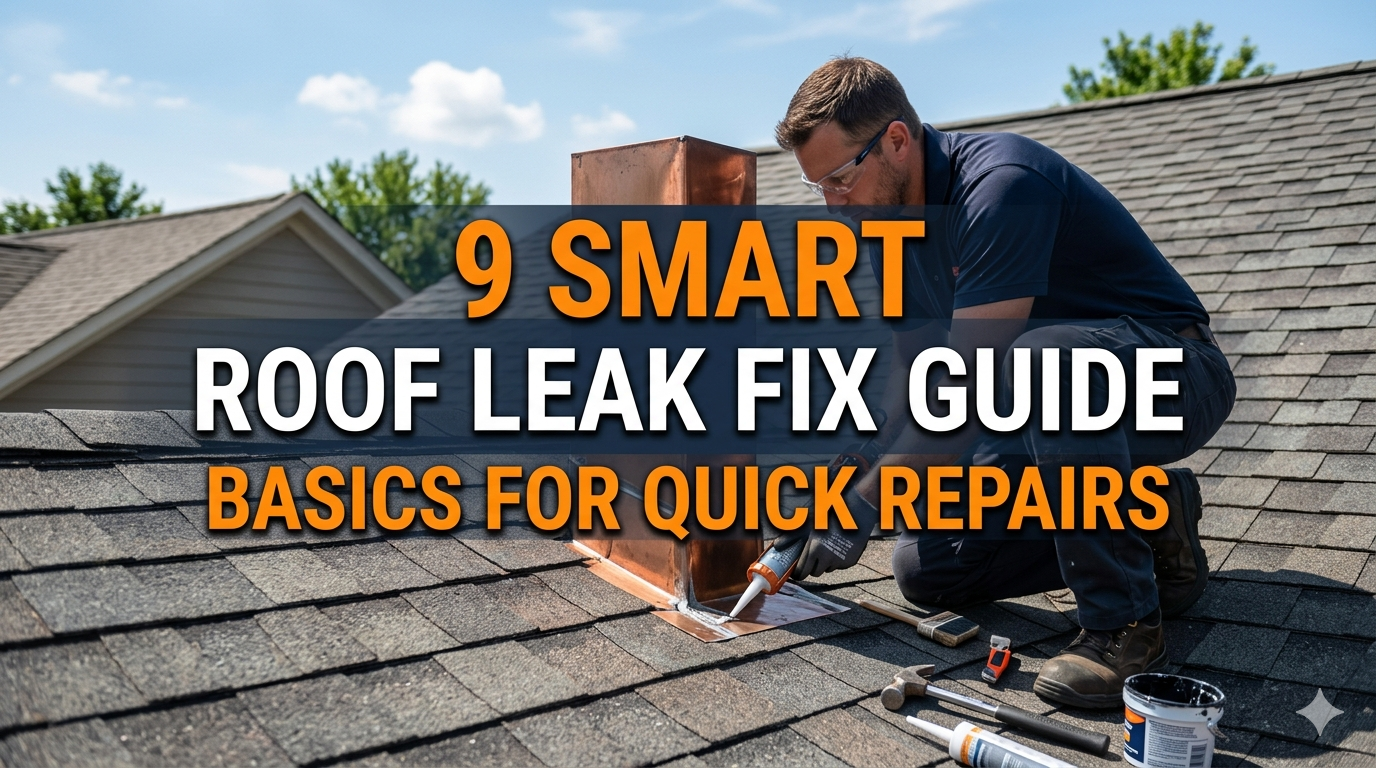
Sealing Cracked Flashing
Flashing is the thin metal (usually aluminum or galvanized steel) that seals seams around pipes, chimney stacks and skylights.
What you’ll need: Wire brush, roofing caulk or flashing sealant, possibly new flashing
Steps:
- Use the wire brush to clean rust, dirt and old dried sealant off the flashing
- Completely dry the area — even run a heat gun or wait for a warm sunny day
- Run a thick, continuous bead of roofing caulk along all seams and edges where the flashing meets the roof or chimney
- Use a putty knife to smooth it out
- Replace the entire piece if the flashing is badly bent, rusted through, or separated
Note: Don’t simply smear caulk over old flashing without cleaning it first. Sealant won’t bond to rust or grime, and the repair will fail in months.
How to Replace a Worn Vent Pipe Boot
The rubber gasket around vent pipes (known as a “pipe boot”) normally has a lifespan of 10–15 years. When it breaks, water pours straight down the pipe into your house.
Steps:
- Gently lift the shingles near the base of the vent boot
- Take out the nails that keep the old boot secure
- Slide the old boot off the pipe
- Slide the new boot over the pipe, down to the roof surface
- Nail it down and seal roofing cement around the base
- Re-cement the adjacent shingles
Universal replacement boots are available for under $20 at any hardware store. This is one of the most cost-effective repairs in roofing.
For more detailed repair walkthroughs and product recommendations, visit Roof Leak Fix Guide — a helpful resource built specifically for homeowners dealing with roof leak problems.
Quick Fixes That Actually Work (Until You’re Able to Make the Permanent Repair)
In some cases you get a leak during a storm, or in the middle of winter when you simply can’t make the full repair immediately. In such situations, a sufficient temporary solution can avert catastrophic damage until things can return to normal.
Temporary Roof Repair Options
Roofing Tarp The closest thing to a sure-fire emergency remedy is a heavy-duty polyethylene tarp. Lay it over the damaged area, extending at least 4 feet past the ridge, and secure with 2×4 boards nailed through the tarp edges (not into shingles). If properly installed, this can last for weeks.
Roof Seal Spray Flex Seal or similar rubberized sprays can temporarily seal leaking cracks, torn shingles, or small gaps. They’re not permanent but can buy you weeks.
Self-Adhesive Flashing Tape This heavy-duty tape can be used around flashing or along cracks in valley areas. It sticks well to dry surfaces and does just fine in light rain.
Roofing Cement Apply liberally to open spots or beneath raised shingles. It might not win any beauty contests, but it’ll keep water out until you can make the real repair.
Key reminder: Temporary repairs are not substitutes for the real deal. You should follow up a few weeks later, especially before the next heavy rain season.
Know When Some Projects Are Beyond DIY
There’s no shame in seeking a professional. Knowing when NOT to DIY is actually as important as learning how to make the repair. Some things require expert knowledge, special tools or safety equipment that few homeowners possess.
Indicators It Is Time to Contact a Roofing Contractor
- The roof leak is extensive across several parts of the roof
- It is more than 20 years old and previous work has been carried out on it
- The roof has considerable sag, soft spots, or visible signs of structural damage
- Mold has migrated into walls, ceilings, or insulation
- You see light shining down through the roof decking in several spots
- Water has been entering for a long time (many months or years)
- Your roof pitch is extremely steep and you are not experienced with heights
How to Choose a Quality Roofer
If you’re hiring help, protect yourself by looking into these:
| What to Check | Why It Matters |
|---|---|
| Valid contractor’s license | Ensures they’re legally certified to work |
| General liability insurance | Covers damage to your home during repairs |
| Workers’ comp insurance | Protects you if a worker is injured on your property |
| Written estimate before work begins | Prevents surprise charges later |
| Reviews on Google or Better Business Bureau | Shows real customer experiences |
| Warranty on labor and materials | Protects you if the repair fails |
Be sure to get at least three estimates before you sign on the dotted line. Genuine contractors won’t push you to make an instant decision.
According to the National Roofing Contractors Association (NRCA), homeowners should have their roofs professionally inspected at least once a year — and always after a major storm — to catch damage before it turns into a costly repair.
Avoid Future Leaks With Regular Roof Maintenance
The best roof leak fix guide is not just about repairs — it is also about preventing leaks from occurring in the first place. A little bit of routine upkeep will do a lot to preserve your roof for the long haul.
Your Seasonal Roof Maintenance Checklist
Spring (After Winter)
- Check shingles for cracked or blown-off ones following winter storms
- Inspect flashing around chimneys, vents and skylights for lifting or gaps
- Remove leaves and winter debris from gutters and downspouts
- Watch for moss or algae growing on shingles
Summer
- Check for UV damage — shingles shouldn’t appear faded, brittle or warped
- Inspect attic ventilation to ensure it’s not holding heat (which deteriorates shingles from underneath)
- Prune overhanging tree branches — they can scratch shingles and drop debris
Fall (Before Winter)
- Clean out gutters before the first freeze
- Make sure all the flashing sealants are still intact before the wet season kicks in
- Replace damaged shingles now, while snow or ice can complicate repairs
Winter
- In the case of heavy snow, use a roof rake to clear buildup from the lower part of your roof to minimize ice dams
- Look out for icicles forming at the eaves, a sign of poor insulation or ventilation
How Long Roofing Materials Last
| Type of Roofing Material | Average Lifespan |
|---|---|
| 3-tab asphalt shingles | 15–20 years |
| Architectural asphalt shingles | 25–30 years |
| Metal roofing | 40–70 years |
| Wood shakes | 20–30 years |
| Clay or concrete tile | 40–50 years |
| Flat/built-up roof (BUR) | 15–25 years |
| Rubber (EPDM) roofing | 20–30 years |
Knowing what your roof is made of and its age puts you in a better decision-making frame about whether to repair it or get ready for a full replacement.
Common Questions About Roof Leak Repairs
Q: How do I know whether my roof is leaking or it’s just condensation? A: Condensation is generally visible as small water droplets that form in cold weather and go away when it gets warm. Roof leaks show stains, wet insulation and most often appear or get worse when it rains. If brown staining appears on wood in the attic, it is almost certainly a leak and not condensation.
Q: Can I repair a roof leak from inside? A: You can slow the entry of water from the inside by applying roofing cement or hydraulic patch compounds to the attic side of the roof decking. But this is not a real fix. In order to permanently stop the leak, the actual entry point on the outside has to be fixed.
Q: What is the average cost to repair a roof leak? A: Basic repairs, such as replacing a few shingles or resealing flashing, generally cost anywhere from $150–$400. Repairs to large sections or multiple problem areas at mid-level typically cost around $400–$1,500. Significant structural repairs or complete roof replacements cost between $5,000 and $20,000 or more, depending on size and material.
Q: How long does roofing caulk last? A: Most caulks and sealants intended for roofing last five to 10 years before drying out and cracking. Areas that experience severe temperature extremes or direct exposure to UV light might require resealing more often. Be sure to check all caulked areas when you conduct your annual inspection.
Q: Can one missing shingle cause a huge leak? A: Absolutely. A single missing shingle leaves the felt underlayment (and maybe the decking, too) exposed to rain. Though the underlayment will provide some temporary protection, it is not intended for long-term water exposure. Replace a missing shingle as soon as possible.
Q: What’s the most effective temporary repair for a leaky roof during heavy rain? A: A heavy-duty tarp held down with 2×4 boards is the most dependable emergency solution. On smaller areas, roofing cement on dry or slightly damp surfaces can hold. If it is raining, don’t try any fix that needs to be completely dry — just wait until the rain lightens up.
Q: How frequently should I inspect my roof? A: Check your roof at least twice annually — once in spring and again in fall. Also do a ground-level visual inspection after any severe storm and an attic inspection after heavy rain.
Finish It Up Before the Rain Does
A leak in the roof is not a self-solving phenomenon. But with the right information — and some action — most homeowners can handle early-stage leaks, make dependable temporary repairs, and know when to call in professional help.
This guide on repairing roof leaks walked you through how to identify early warning signs, replace vent boots, seal flashing and create a seasonal maintenance checklist. The 9 basics here aren’t rocket science — they’re practical, time-tested steps that you can take to help safeguard your largest investment.
When you notice signs of a leak, act quickly. Follow it to its true origin, not the puddle on the ground. Repair what you can, know your limits and keep up with your roof throughout the year.
Your roof does a lot of work every day. Show it some love, and you’ll have it doing its thing for decades.