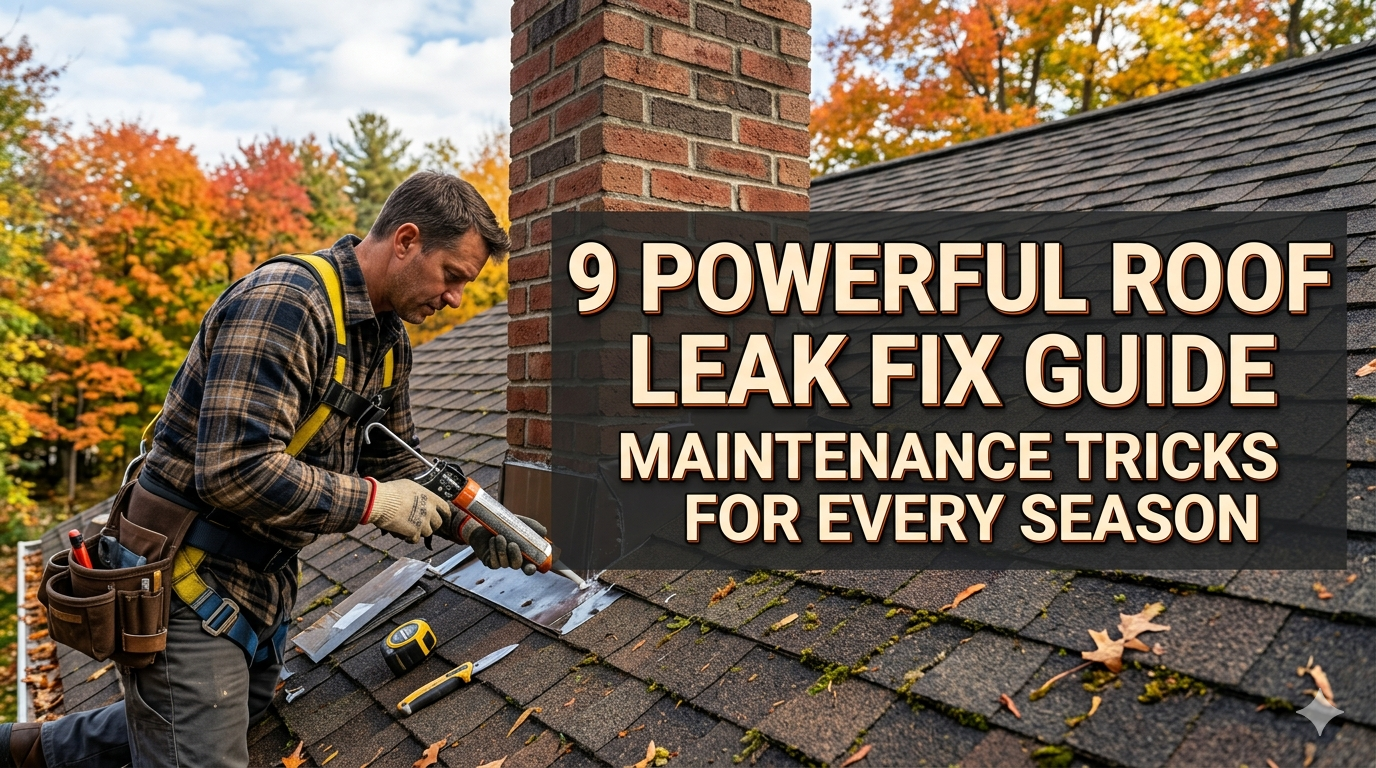
9 Powerful Roof Leak Fix Guide Maintenance Tricks for Every Season
Meta Description: Roof leak fix tips that work & door damage prevention guide — these 9 seasonal home maintenance tricks will help!
How to Fix 9 Powerful Roof Leak Guide Maintenance Pro Tips of Every Season
Water leaking from your ceiling is a homeowner’s nightmare. It typically means one thing — your roof is in trouble. And it gets costlier to ignore the longer you do.
The good news? Most roof leaks are preventable or fixable without calling a contractor every time. You just have to know what to look for and when to take action.
So to help you out, this roof leak fix guide explains 9 maintenance tricks that prove to be effective regardless of the season. Summer heat, fall leaves, winter snow and spring rain — your roof is constantly confronted with a new challenge every few months.
Let’s get into it all in an easy, step-by-step fashion.
Why Roofs Leak in the First Place
Before diving into solutions, it helps to understand why roofs leak in the first place.
Roofs don’t just start dripping for no reason. There’s almost always a reason. Here are the most likely culprits:
- Cracked or missing shingles — wind and UV rays hammer shingles
- Deteriorating flashing — strips of metal around chimneys, vents and skylights can rust or separate
- Clogged gutters — water that is unable to drain will back up under the roof
- Ice dams in winter — melted snow refreezes at the roofline and brings water indoors
- Weathered sealant — the caulking around roof penetrations dries out over time
- Poor ventilation — heat and moisture build up to decay the roof from within
Knowing these causes allows you to go into maintenance targeting the correct location.
How Frequently to Inspect Your Roof
Most roofing professionals recommend having a full roof inspection done at least twice each year — once in spring and once in fall. But after big storms you should always do a quick visual check.
| Season | What to Look For | Priority Level |
|---|---|---|
| Spring | Storm damage, missing shingles, gutter condition | High |
| Summer | UV damage, cracked sealant, flashing gaps | Medium |
| Fall | Leaf buildup, gutter blockage, branch damage | High |
| Winter | Ice dams, snow load on the roof and attic condensation | Very High |
This easy schedule can save you thousands each year in repairs.
Hack #1 — Scan the Ground Level Before Climbing Anything
You don’t necessarily need a ladder to see that things are amiss on your roof. A ground-level inspection with a pair of binoculars is a good place to start.
Go through every part of your home and look for:
- Crumbling, curled or buckled shingles, or missing shingles
- Dark stains or moss patches (indicators that moisture is present)
- Sagging areas along the roofline
- Flashing that appears bent or detached
- Debris piled against roof edges
Why it matters: Spotting a problem early — even from the ground — helps you plan your repair before water ever makes its way inside.
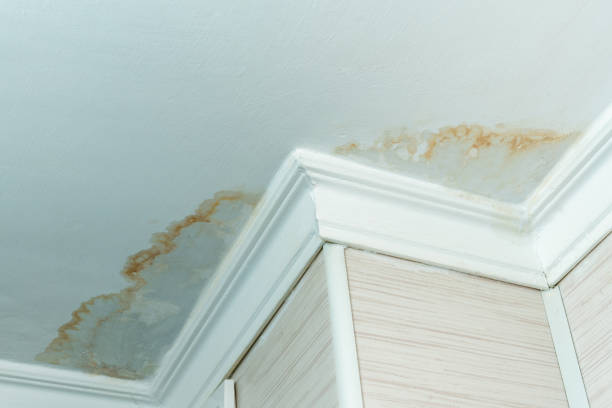
What to Look for on Your Ceiling, Too
Step inside your house and look at the ceilings on the top floor and in the attic. Look for:
- Yellow or brown water stains
- Paint peeling around the edges of the ceiling
- A musty odor (a common indication of hidden moisture)
- Wet insulation in the attic
If you notice any of these indicators, a leak is probably already developing — even if no water is leaking out quite yet.
Tip #2 — Correctly Repair Cracked Flashing
Flashing is the thin sheet metal placed wherever the roof intersects with vertical surfaces — chimneys, walls, vents and skylights. It is also one of the most frequent places leaks start.
The sealant underneath the flashing cracks over time. Water weasels its way in through those minute openings and works its way down into your walls or ceiling.
How to Repair Flashing Step-by-Step
- Use a putty knife to scrape out the old, cracked sealant
- Wipe it down with a dry cloth
- Run a new bead of roofing caulk or flashing cement along the seam
- Firmly press the flashing back into place
- Wipe the sealant with a gloved finger
- Cure material for 24 hours before rain
Use a product like roofing cement or polyurethane caulk — both have good temperature swing resistance.
Pro tip: Perform this repair in mild weather (greater than 50°F). Sealants don’t adhere well to surfaces in extreme cold or heat.
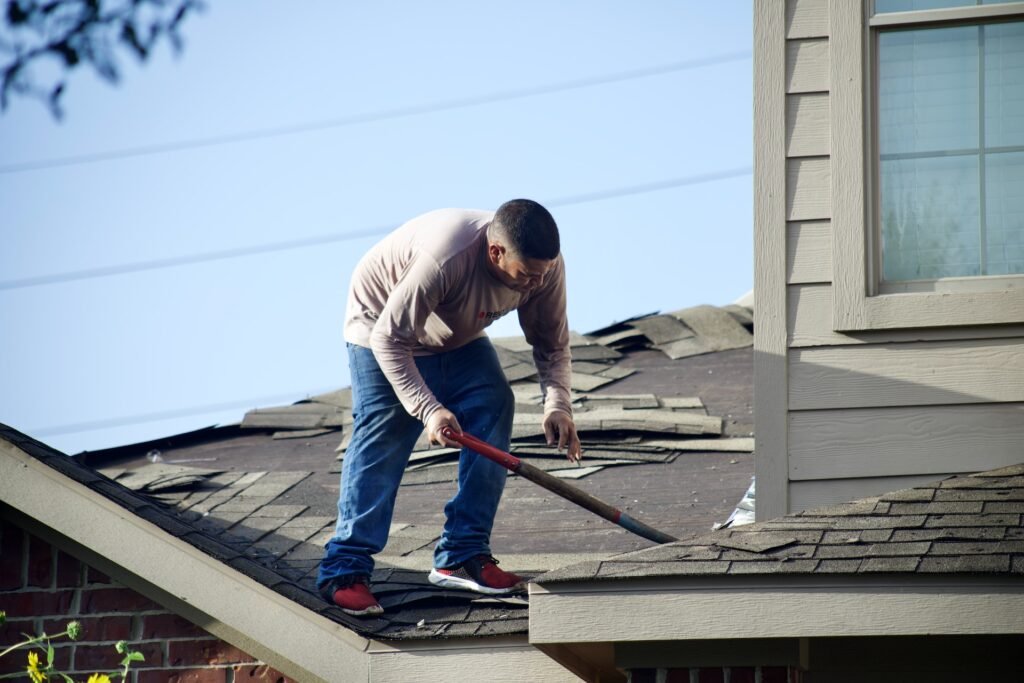
Tip #3 — Replace Broken or Missing Shingles Quickly
One missing shingle is like leaving a window open in a rainstorm. Water will seep in quickly.
Replacing shingles is not that difficult. Here’s how:
How to Replace a Shingle in 6 Steps
- Slip a pry bar beneath the edges of the surrounding shingles
- Take out each of the nails that secures the damaged shingle
- Gently slide out the old shingle
- Insert a new shingle that’s identical to the existing ones
- Nail it down at the top edge with roofing nails
- Cover the nail heads with roofing cement
As close as possible, always match the shingle style and color. A patchwork roof of mismatched materials can create a wedge for water to pool at the seams.
When to Replace vs. When to Call a Pro
| Situation | DIY or Pro? |
|---|---|
| 1–3 missing shingles | DIY-friendly |
| Large bald patches | Stop — call a pro ASAP |
| Shingles older than 20 years | Call a pro — consider full replacement |
| Structural sagging visible | Call a pro immediately |
Tip #4 — Clean Your Gutters Every Single Season
This one may seem too simple, but clogged gutters cause more roof leaks than many people know.
When gutters become clogged with leaves, twigs and dirt, water has nowhere to go. It spills over, pools against the roof edge and seeps under the shingles.
The Right Gutter Cleaning Schedule
- Spring: Remove remnants of winter and look for cracks
- Summer: A brief inspection after severe storms
- Fall: Clean at least twice (leaves fall fast)
- Winter: Clear ice before it creates dams
How to Clean Gutters Safely
- Make sure the ladder is stable and on level ground
- Use a small scoop or trowel, wearing gloves
- Remove all debris by hand into a bucket
- Flush the gutter with a garden hose
- Check that downspouts flow freely
- Check for rust, holes or sagging parts
Install gutter guards if you’ve grown weary of this practice. They significantly decrease how often you need to clean.
Trick #5 — Confront Ice Dams Before Winter Gets Heavy
Ice dams are a winter-only problem and can do serious damage if you ignore them. They develop when heat leaking from your attic melts snow on your roof, and then that water refreezes at the cold edge of the roof.
The result? A large ice ridge that retains water on your rooftop. That water then pools under your shingles and drips into your house.
How to Prevent Ice Dams
- Insulate your attic floor — prevent warm air from getting to the roof deck
- Seal drafty areas in the attic — spaces around lights, vents and pipes create losses of warm air
- Improve attic ventilation — a well-ventilated attic will stay cold and prevent uneven melting
- Use a roof rake — after heavy snowfalls, use a long-handled rake to pull snow off the lower sections of the roof
If You Already Have an Ice Dam
Don’t knock away ice with a hammer or an ice pick. You’ll damage your shingles.
Instead, fill a nylon stocking with calcium chloride ice melt and lay it across the dam. It gradually melts a channel that allows the water to drain away.
According to the Insurance Institute for Business & Home Safety (IBHS), ice dams are one of the leading causes of winter roof damage in North America — making early prevention critical.
Trick #6 — Reseal Around Roof Penetrations Every 2–3 Years
Any place something penetrates your roof is a potential leak point. This includes:
- Plumbing vent pipes
- HVAC exhaust vents
- Satellite dish mounts
- Electrical conduits
- Skylights
Over time, the rubber boots and sealants in these places will deteriorate. UV rays, rain and temperature shifts dry out the materials until they crack.
What You Need for This Job
- Roofing caulk or silicone sealant
- A utility knife
- Wire brush or sandpaper
- New pipe boot (if the rubber is cracked)
How to Reseal a Vent Pipe
- Look for cracks or gaps in the rubber boot around the pipe
- If cracked, peel it back and slide a new rubber boot on
- If only loose, clean the surface and apply fresh sealant
- Press down well and smooth with a tool or gloved finger
- Mark your calendar to revisit in 2 years
This 20-minute chore can save thousands of dollars in water damage.
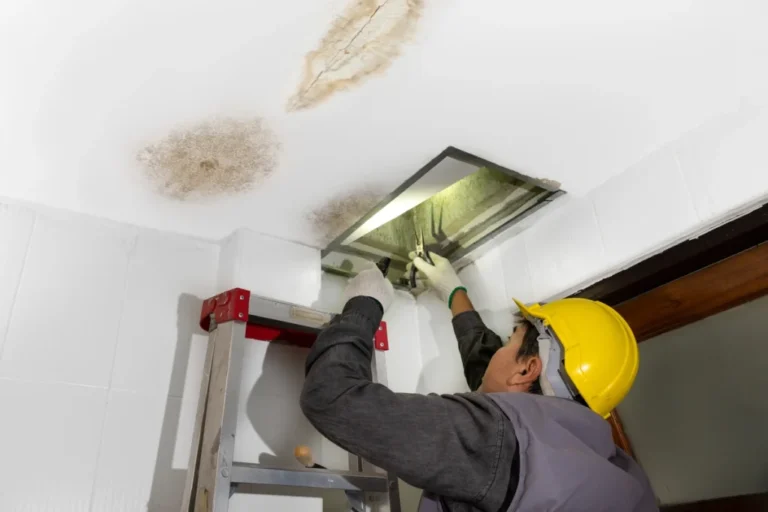
Tip #7 — Evaluate Your Attic Ventilation and Insulation
The vast majority of homeowners never give the attic a second thought — until trouble arises. But your attic is one of the critical components of your roof system.
Poor ventilation leads to:
- Moisture accumulation that rots the roof deck
- Mold and mildew growth
- Ice dam formation in winter
- Higher cooling costs in summer
How to Know If Your Attic Ventilation Is Bad
- Frost forming on the underside of the roof in winter
- Hot and stuffy attic in summer (even if outside temps are normal)
- Shingles aging faster than expected
- Mold spots on attic wood
The Ideal Attic Setup
A properly ventilated attic has intake vents (typically at the soffits) and exhaust vents (at the ridge or upper walls). Cool air flows in, gathers moisture and heat, and exits at the top.
As a rule of thumb, you want 1 square foot of ventilation for every 150 square feet of attic floor space.
If your insulation is thin, spotty or wet — replace it. Damp insulation no longer insulates properly and traps moisture against your roof structure.
Tip #8 — Trim Tree Branches Before Storms
Trees close to your house seem wonderful — until a storm causes a limb to smash through your roof.
But even in the absence of big storms, overhanging branches present persistent roof issues:
- Leaves accumulate and hold moisture
- Windy days scrape branches against shingles
- Tree shade encourages faster growth of moss and algae
- Animals (squirrels, raccoons) use branches to gain access to the roof
How Far Should Branches Be From Your Roof?
Try to keep all branches at least 10 feet away from the roof surface. For big trees, hire an arborist to inspect the health and placement of major limbs.
After each major storm, walk around your house and check if any branches have fallen on or near the roof. Even if they don’t smash through, they can split shingles or dent flashing upon impact.
Tip #9 — Make a Roof Maintenance Checklist for Each Season
A simple maintenance habit is the best way to beat roof leaks. This is easy if you have a seasonal checklist.
Your Complete Seasonal Roof Checklist
Spring Tasks:
- ✅ Check shingles for winter damage
- ✅ Clean gutters and downspouts
- ✅ Check flashing around chimney and vents
- ✅ Look for moss or algae growth
- ✅ Check for moisture or mold in attic
Summer Tasks:
- ✅ Reseal any cracked caulk around penetrations
- ✅ Trim nearby tree branches
- ✅ Inspect gutter pitch and drainage
- ✅ Check for UV-damaged shingles (cracks, fading)
Fall Tasks:
- ✅ Deep clean gutters twice
- ✅ Clean the roof surface of leaves
- ✅ Inspect attic insulation
- ✅ Inspect for loose or lifted shingles
Winter Tasks:
- ✅ Keep track of ice dam formation
- ✅ Remove heavy snow using a roof rake
- ✅ Inspect attic ventilation and insulation
- ✅ Check ceilings for stains after warm spells
Print this out and tape it inside a kitchen cabinet. It takes maybe 90 minutes a season to complete — and it can extend the life of your roof for years.

Common Roof Leak Mistakes to Avoid
Despite the best intentions, some homeowners make minor errors that turn into major issues. Here are some of the more common ones:
| Mistake | Why It’s a Problem | Better Approach |
|---|---|---|
| Ignoring small stains | Leaks grow fast | Fix immediately |
| Using duct tape as a fix | Won’t last in weather | Use roofing cement |
| Walking on wet shingles | Slippery and causes damage | Wait for dry conditions |
| Layering new shingles over old | Hides problems, adds weight | Remove and replace |
| Skipping attic checks | Misses hidden moisture | Check every season |
How Long Does Roof Repair Last?
It depends on the kind of repair and the materials used.
- Patched shingles: 5–10 years when properly installed
- Re-sealed flashing: 3–5 years before needing to be resealed again
- Gutter repairs: 5–10 years with proper care
- Preventing ice dams (insulation/ventilation): 15–20+ years
Regular maintenance will keep every repair from wearing out prematurely. A well-maintained roof can last 30–50 years depending on the material.
FAQ — Roof Leak Fix Guide
Q: Can I fix a roof leak myself, or do I always need a professional?
Many small repairs — such as replacing a handful of shingles, resealing flashing or clearing gutters — are DIY-friendly. However, if you’re dealing with structural damage, significant leaks, or roofs older than 20 years, it’s best and wiser to call a licensed roofer.
Q: How can I locate the source of a roof leak?
Go up to the attic during or immediately after rain. Search for water trails on the rafters or wet patches on the insulation. Follow the trail up — water generally enters higher than where it leaks out. Outside, check for split shingles or gaps around chimneys, vents and valleys.
Q: What is a good sealant for roof leaks?
Both polyurethane caulk and roofing cement are highly effective. Silicone sealant works well for pipe boots and vent collars. Always select a product that specifies outdoor, UV-resistant use.
Q: What’s the cost for a professional roof leak repair?
Small repairs often cost between $150 and $500. More extensive work — such as replacing large sections of shingles or repairing structural damage — can run $1,000 to $3,000 or more. Early detection ensures costs stay on the lower end.
Q: Is a small roof leak a big deal?
Yes. A small leak may look innocent, but water travels. It penetrates insulation, decays wood, spawns mold and gradually destroys the structure. What was a $200 repair today may be $2,000 or more in six months.
Q: Does homeowners insurance cover roof leaks?
It depends on the cause. Damage from storms or falling trees is typically covered. Leaks from negligence or normal wear and tear usually are not. Review your policy and document all damage with photos.
Wrapping It All Up
Your roof goes to work every day — keeping out the rain, heat, snow and wind so you’re comfortable inside. At minimum, it deserves some love each season.
This roof leak fix guide is not designed to turn you into a roofing expert. It’s about developing small, consistent habits that flag problems early, before they become prohibitively expensive catastrophes.
From repairing cracked flashing to unclogging gutters, pruning trees and inspecting your attic — each of these 9 tips takes little time but provides huge payback.
Don’t wait for a drip. Get started today, work through your seasonal checklist, and your roof will reward you with years of solid, leak-free protection.