5 Easy Roof Leak Fix Guide Maintenance Tips I Wish I Knew Earlier
Meta Description: 5 Easy Roof Leak Fix Guide maintenance tips every homeowner needs. These approaches can put the damper on water damage quickly, save you from hundreds and thousands of dollars charged for expensive repairs, and keep your home intact!
5 Easy Roof Leak Fix Guide Maintenance Tips I Wish I Knew Earlier
There’s nothing worse than listening to that dreaded drip… drip… drip during a rainstorm.
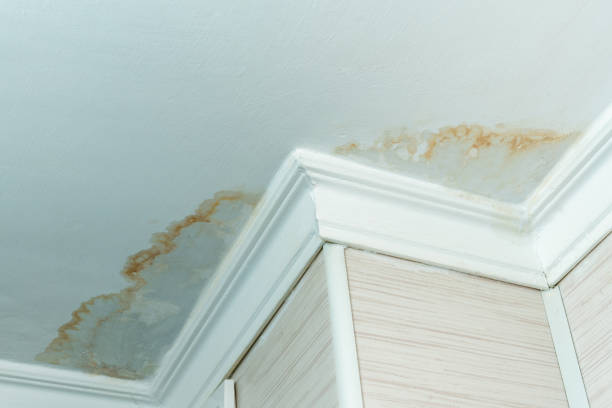
You look up. There it is — a water stain creeping across your ceiling like a bad nightmare.
Roof leaks aren’t only damaging to your home. They eat insulation, rot wood, sprout mold and sap your bank account. Average roof repair bills range from about $400 to as much as $3,000, depending on how long the leak was left unaddressed.
The brutal truth? The vast majority of those costs are avoidable.
Everything I wish someone had handed me years back is in this 5 easy roof leak fix guide. Whether it’s a slow drip or a full-blown waterfall in your attic, these tips should help you identify the issue early, fix it quickly and prevent a recurrence.
Let’s get into it.
Why Roof Leaks Are Sneakier Than You Think
The majority of people think they’ll know immediately when their roof has sprung a leak. Spoiler alert — they won’t.
A roof leak can travel a couple of feet from where the water actually comes in. It creeps along rafters, pools in insulation and permeates drywall long before you ever see it as a stain on your ceiling.
By the time you notice visible damage inside your home, the leak could have been going on for weeks or months.
The Hidden Price of Ignoring a Small Drip
Here’s a quick look at how a small leak becomes an enormous headache:
| Timeline | What’s Happening | Estimated Damage Cost |
|---|---|---|
| Week 1–2 | Water enters through a crack or gap | $0 visible damage |
| Week 3–4 | Insulation is wet, losing its ability to insulate | $200–$500 |
| Month 2 | Wood decking begins to rot and soften | $500–$1,500 |
| Month 3 | Hidden mold growths start forming | $1,000–$3,000 |
| Month 4+ | Ceiling falls down; structural damage | $3,000–$10,000+ |
That little drip you kicked under the rug in October? By spring, it could cost you a pretty penny.
Tip #1 — Read Your Roof Like a Map
You need to discover the source before you can repair anything. This may sound simple, but it trips a lot of homeowners up.
Here’s the big rule: Water gets in one place but appears somewhere else.
The wet spot on your ceiling almost never falls directly under where the leak originates.
How to Discover the Actual Entry Point
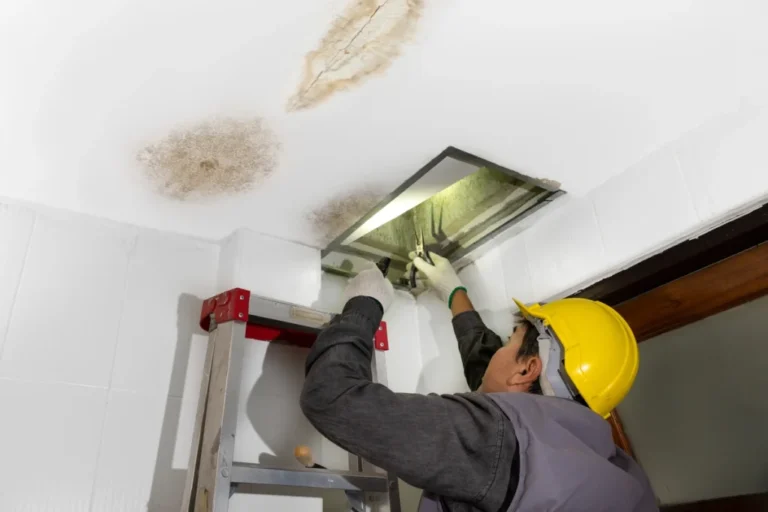
Start in your attic. Take a flashlight up there after a heavy rainstorm. Look for:
- Wet insulation or damp wood
- Dark stains or discoloration on rafters
- Any shaft of light penetrating the roof boards
If you can’t catch it in the rain, use a garden hose. Have someone wait in the attic while you spray slow water from the bottom of the roof upward, in sections. Spend a few minutes at each location. When your helper calls out that they see water, mark that area.
Initial Areas to Investigate First
Roof leaks generally occur in the same predictable places. Look in these places first:
Around chimneys — The flashing (metal strips) around your chimney pulls away or rusts with time. This is one of the leading sources of roof leaks in older homes.
Roof valleys — These are the V-shaped sections where two slopes of the roof join. Water flows fast through valleys, and any crack or missing shingle there is bad news.
Vent pipes and skylights — Anything that sticks up through your roof is a possible weak spot. As they age, rubber boot seals around vent pipes crack and shrink.
Flat or low-slope sections — These areas tend to pool water and drain poorly.
Missing or cracked shingles — Sometimes the problem is as elementary as a shingle that’s been blown off or cracked by sun exposure.
Tip #2 — Solve Small Problems Before They Turn Into Big Ones
Here is the maintenance mindset change that saves homeowners thousands of dollars every single year:
Don’t wait for a leak. Seek out the early warning signs.
A tiny tear in flashing, some granules missing from shingles, a nail that has popped up a touch — none appear to be emergencies. But each one of them is a portal for water to enter.
Your Seasonal Roof Inspection Checklist
Perform a visual inspection of your roof at least twice every year — once in spring and once in fall. You don’t have to go up there every time. From the ground, binoculars do a fine job.
Here’s what to look for:
Shingles:
- Curling or cupping edges
- Areas where granules have worn off
- Cracked, broken, or missing shingles
- Black streaks (possible algae or early water damage)
Flashing:
- Rust stains
- Visible gaps or lifted edges
- Cracked caulk or sealant
Gutters:
- Granules accumulating in the gutter (a sign that your shingles are aging quickly)
- Sagging sections
- Blockages from leaves and debris
Roof Deck (visible from attic):
- Soft or spongy spots when walked on
- Daylight showing through boards
- Dark staining or mold patches
How Often Should You Inspect?
| Season | What to Focus On |
|---|---|
| Spring | Winter storm damage, lifted shingles |
| Summer | Sun-cracked caulk, vent seals |
| Fall | Gutter debris, flashing (before rain season) |
| After Any Major Storm | Full inspection for missing shingles or debris damage |
Tip #3 — Top 5 Roof Leak Repairs You Can Do Yourself
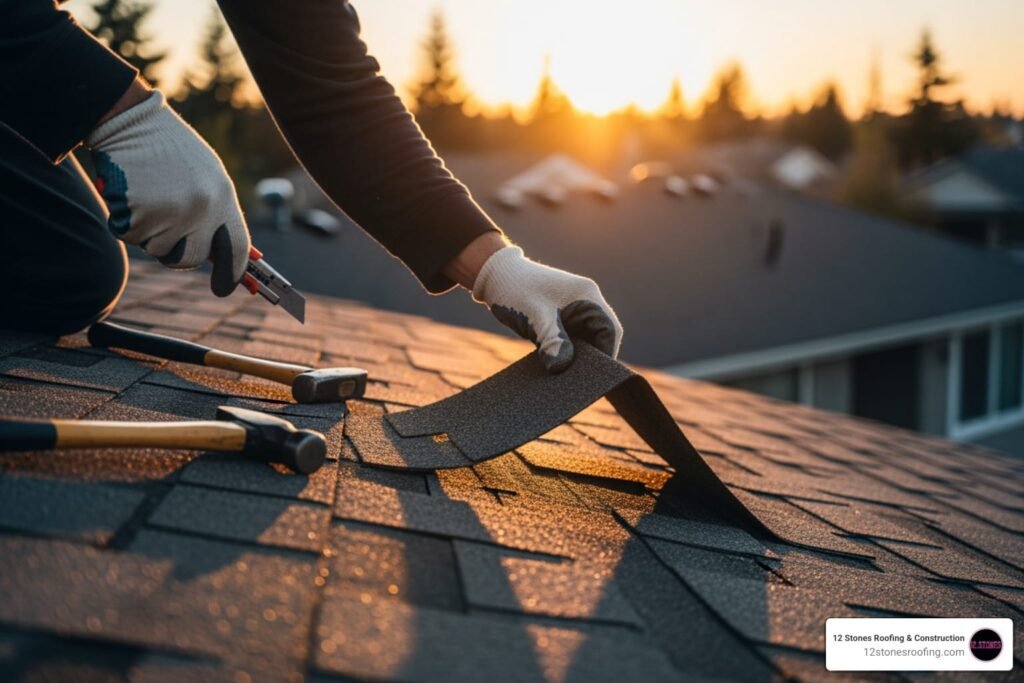
Not all roof repairs require a contractor. Some of the more frequent leaks are truly DIY-friendly — provided you’re not afraid of heights and know what you’re doing.
Safety first: Never get on a wet roof. Always wear proper non-slip footwear and use a sturdy ladder. If the slope is steep or you’re unsure, call a pro.
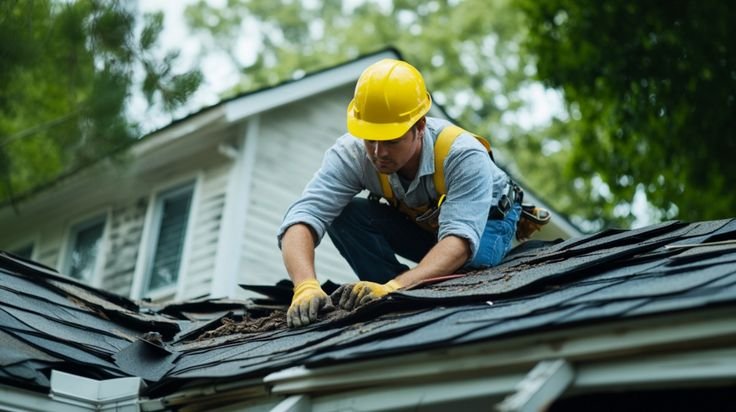
Repair #1: Replace a Broken or Missing Shingle
This is one of the simplest repairs there is.
What you’ll need: Replacement shingles (the same type and color), roofing nails, a pry bar, a hammer and roofing cement.
Steps:
- Insert a pry bar under the damaged shingle to pop out the nails
- Slide the old shingle out to remove it
- Work the new shingle into place, ensuring it lines up with the shingles next to it
- Nail through it with four roofing nails just below the adhesive strip
- Coat the nail heads and edges with roofing cement
Cost to DIY: $10–$30 per shingle
Repair #2: Reseal Flashing Around a Chimney or Vent
Flashing is thin metal that creates a waterproof seal where the roof meets vertical structures such as chimneys and walls.
Eventually, the caulk or sealant keeping it there dries, cracks and separates.
What you need: Roofing caulk or flashing sealant, a caulking gun, a wire brush.
Steps:
- Use the wire brush to remove all the old, cracked caulk
- Dry the area completely
- Run a thick bead of roofing caulk along all the edges where the flashing meets the chimney or vent
- Smooth it with your finger and let it cure according to the manufacturer’s instructions
If the flashing is bent, rusted or cracked, it should be replaced completely — a task that’s best handled by a pro unless you know your way around a roof.
Cost to DIY: $15–$50
Fix #3: Replace a Cracked Rubber Boot on a Vent Pipe
The rubber “boot” that seals around vent pipes deteriorates with age and UV exposure. This is a surprisingly frequent leak source.
What you’ll need: A new vent pipe boot (available at any hardware store), roofing nails, roofing cement.
Steps:
- Peel back the shingles surrounding the old boot
- Slide the old boot up and off the pipe
- Fit the new boot down over the pipe so it seals to the roof surface
- Nail down securely and seal all edges with roofing cement
- Re-lay the shingles around it
Cost to DIY: $20–$60
Fix #4: Clean and Repair Gutters to Prevent Overflow Damage
Clogged gutters cause water to back up under your shingles — particularly along the eaves. That’s referred to as “ice damming” in winter and “overflow damage” the rest of the year.
Clean your gutters at least twice each year. When you do, check for:
- Holes or cracks (use gutter sealant to patch)
- Sections separating from the fascia (re-secure with gutter spikes or screws)
- Downspouts that discharge too close to the foundation (extend them 6 feet or more away)
Cost to DIY: $0–$30
Fix #5: Apply Roof Sealant to a Flat or Low-Slope Area
Flat roofs and low-slope regions may crack or bubble. A high-quality roof sealant or rubberized coating can extend their life for years.
What you’ll need: Roof sealant or an elastomeric coating, a paint roller or brush, a putty knife.
Steps:
- Clean the surface thoroughly — remove dirt, debris and any loose material
- Fill any visible cracks with patching compound and allow to dry
- Apply the sealant in two coats, allowing drying time between coats
This is most effective as a prevention method or on very early-stage damage. More serious flat roof problems require professional expertise.
For more step-by-step guidance on materials, tools, and repair techniques, visit Roof Leak Fix Guide — a dedicated resource built to help homeowners tackle roof problems with confidence.
Cost to DIY: $50–$150 for materials
Tip #4 — When to Bring In a Pro (And What to Ask Them)
Here’s the cold, hard truth that most DIY guides leave out: some roof issues are truly outside the average homeowner’s range of abilities.
Recognizing when to throw in the towel and reach out to a professional is not giving up. It’s the smartest financial decision you can make.
Red Flags That Mean You Need a Roofer
- Multiple leaks appearing simultaneously — This typically indicates the complete roof system is compromised, not just one area
- Sagging roof deck — A structural issue that may lead to collapse
- Widespread shingle damage — When 30% or more of your shingles are damaged, a full replacement tends to be more cost-effective than piecemeal repairs
- Visible mold on the ceiling or walls — This indicates that water has been sitting for a long time and a full remediation is necessary
- Your roof is nearing 20 years old — A typical asphalt shingle has a lifespan of only 20–30 years, even with the best maintenance
Questions to Ask Any Roofing Contractor
Before signing anything, ask:
- Are you licensed and insured in this state?
- Can you provide references or photos from recent similar jobs?
- Will you provide a written estimate before starting work?
- What kind of warranty do you provide for materials and labor?
- Will you handle the permit if one is required?
Don’t let a contractor begin work without a written agreement. When something goes wrong, verbal promises don’t cut it.
Tip #5 — Build a Roof Maintenance Routine That Actually Sticks
The best roof repair is never having to make one at all.
The difference between homeowners who pay $200 every now and then for maintenance versus those who suddenly face an emergency bill of $8,000 comes down to consistency and simplicity.
The 20-Minute Roof Check Routine
You don’t need to spend hours up on the roof each month. Here’s a simple routine anyone can do:
Monthly (from the ground, binoculars optional):
- Scan the roof for visible missing or lifted shingles
- Check for any debris accumulating in valleys
- Make sure gutters appear properly attached
Twice a year (spring and fall):
- Clean gutters and downspouts
- Examine attic for moisture or staining
- Check caulking around all flashing and vent boots
- Watch for granule accumulation in gutters
After every major storm:
- Visual scan for missing shingles or displaced materials
- Check attic for new wet spots
According to the Insurance Information Institute, wind and hail are among the most common causes of homeowner insurance claims — making regular roof inspections one of the smartest preventive steps you can take.
Products Worth Keeping on Hand
Every homeowner should keep a small roof maintenance kit ready to go:
| Product | What It’s For | Approx. Cost |
|---|---|---|
| Roofing caulk/sealant | Resealing flashing and small cracks | $8–$15 |
| Roofing cement | Patching shingles and nail holes | $10–$20 |
| Gutter sealant | Patching gutter cracks and holes | $8–$12 |
| Replacement shingles (5–10) | Quick patch jobs after storms | $20–$40 |
| Vent pipe boot | Replacing cracked rubber seals | $15–$30 |
Having them on hand means a small problem gets fixed the day you find it — before rain turns it into a big one.
What Roof Leak Warning Signs Look Like Inside Your Home
Sometimes you don’t even have to get on the roof. Your home is constantly sending you signals.
Here’s a quick reference for what to watch inside:
Water stains on ceiling — Brown or yellowish rings indicate that water has penetrated at some point. Find the source even if it’s dry for now.
Peeling paint near the roofline — Moisture is pushing through from above.
Musty smell in upper rooms or attic — Mold is growing somewhere out of sight.
Walls bulging or bubbling — Water is trapped inside and has nowhere to go.
Spike in energy bills — Wet insulation loses its effectiveness fast. If your heating or cooling costs suddenly go up, a roof leak may be to blame.
FAQs About Roof Leak Fix and Maintenance
Q: Is it realistic to repair a roof leak myself, even if I have no roofing experience?
Yes — for simple repairs such as replacing a shingle, resealing flashing or replacing a vent boot, most homeowners with minimal DIY experience can tackle it. Always prioritize safety. Call in a professional if the repair looks complicated or the roof is steeply pitched.
Q: How long will roofing caulk last before it must be reapplied?
Most roofing caulk and sealants last 5 to 10 years. Sunlight exposure and extreme temperatures accelerate the breakdown. During your semiannual inspection, check all caulked areas and reapply where you see cracking or separation.
Q: Does homeowners insurance cover a roof leak?
It depends on the cause. Damage from sudden events such as hailstorms or falling trees is commonly covered. Gradual leaks due to wear and neglect usually are not. Document damage with photographs immediately and get your insurer involved before you make repairs.
Q: How can I tell if my roof leak is serious or minor?
A minor leak appears as a small stain after heavy rain. A serious leak means constant dripping, abnormally large stained areas, soft spots in your ceiling or deck, multiple entry points or signs of mold. If you’re not sure, ask for a professional inspection.
Q: What’s the best temporary fix for a roof leak during heavy rain?
If you can safely get into the attic, put a bucket underneath where it is dripping and cover the wet area with thick plastic sheeting or a tarp. On the exterior, a tarp over the roof secured by boards or sandbags is your standard emergency patch. These are only temporary measures — get to the source as soon as weather allows.
Q: How regularly should you get a roof professionally inspected?
Most roofing professionals say roofs in good condition should be inspected every 3 to 5 years. A roof that is 15 years or older, or subject to extreme weather, should be inspected annually.
Q: How long does an asphalt shingle roof typically last?
Asphalt shingles usually last 20 to 30 years with adequate maintenance. Metal roofs have a life expectancy of 40 to 70 years. Slate and tile roofs can last 50 years or more when properly maintained.
Wrapping It Up — Your Roof Does the Heavy Lifting So You Don’t Have To
Your roof endures a lot on a daily basis. Rain, UV rays, wind, snow, temperature swings — it takes all of that without a peep.
The least you can do is check on it twice a year.
The key to this 5 easy roof leak fix guide is that small attention now beats huge repair bills later. Learn to read your roof, keep track of seasonal checks, knock out the easy fixes yourself and call in a pro when the job goes beyond a tube of caulk and a hammer.
You don’t need to be a contractor to secure your home. All you have to do is pay attention.
Start with a 20-minute inspection this weekend. Look at your gutters. Peek in the attic. Examine the caulking around your chimney flashing. Chances are you’ll find something worth fixing before it surprises you.
The drip you’ll hear during the next storm? It doesn’t have to happen.