7 Smart Roof Leak Fix Guide Maintenance Habits That Prevent Leaks
Meta Description: Roof leak fix guide every homeowner needs — discover 7 smart maintenance habits that stop leaks before they start and protect your home year-round.
7 Maintenance Habits That Prevent Roof Leaks
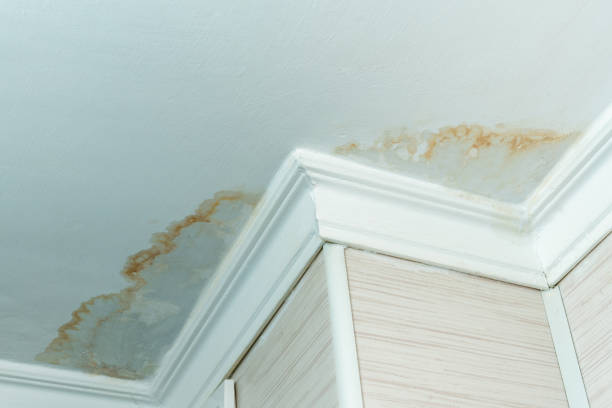
One of the most stressful events a homeowner can experience is a leaky roof. Water leaking through the ceiling, stained walls and damaged floors can cost thousands of dollars to replace. The good news? Most leaking roofs are entirely preventable.
This roof leak fix guide takes you through 7 smart habits that help your roof stay in top shape throughout the year. Whether your roof is newly installed or a few decades old, these tips will save you from impending damage before it turns into an expensive disaster.
Let’s get into it.
Why Most Roofs Are So Likely to Leak in the First Place
Before we get into habits, it’s useful to know why roofs leak. Most leaks don’t happen overnight. They accumulate gradually — neglected maintenance, weather wear and tear, minor damage that was never repaired.
Here are the top reasons:
| Reason | How It Can Lead to Leaks |
|---|---|
| Cracked or missing shingles | Exposes the underlayment to rain and wind |
| Clogged gutters | Water backs up and seeps under roof edge |
| Damaged flashing | Gaps around chimneys, vents and skylights |
| Ice dams | Melting ice forces water under shingles |
| Poor attic ventilation | Moisture buildup rots roof structure |
| Worn sealant | Old caulk surrounding seams dries out and cracks |
Once you grasp the causes, the habits below will make a lot more sense.
Habit #1 — Inspect the Roof Two Times a Year
The single best thing you can do for your roof is examine it regularly. Most experts suggest you check your roof at least twice a year — once in the spring and once in the fall.
What to Look for When You Inspect It
You don’t even have to be a pro roofer to do a basic examination. Begin from the ground with a pair of binoculars. Look for:
- Missing or curling shingles — These are hard to miss and require immediate attention
- Dark streaking or staining — This usually indicates algae or moisture damage
- Sagging portions — A sagging roof deck is a major red flag
- Loose or exposed nails — These are entry points for water
- Damaged ridge cap — The uppermost peak of the roof faces a lot of wind damage
If you’re comfortable climbing a ladder, get up to the edge and inspect the gutters and lower shingles closely. Never walk on a slick or sloped roof without safety gear.
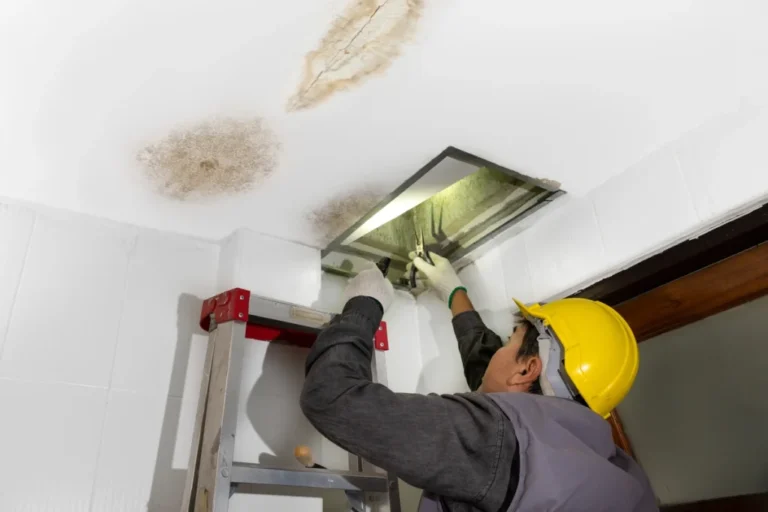
Indoor Inspection Counts Too
Be sure to look up in your attic during every inspection. Bring a flashlight and look out for:
- Water marks on the rafters or decking
- Mold or mildew smell
- Sunlight showing through the roof boards
- Wet or damp insulation
If you catch a problem in the attic, it often means you’ve caught a leak before it ever hits your ceiling — saving yourself a lot of money.
Habit #2 — Clean Your Gutters Each Season
One of the leading causes of a roof leak is clogged gutters. If gutters get clogged with leaves, twigs and debris, water can’t drain away properly. It creeps back, settles on the roof edge and eventually makes its way down below.
How Often Should You Clean Gutters?
| Season | Why It Matters |
|---|---|
| Spring | Cleans up winter debris, readies for spring rains |
| Summer | Clears buildup from storms and pollen |
| Fall | Critical — leaves clog gutters quickly |
| Winter | Check before freeze to prevent ice dams |
For most homes, cleaning gutters twice a year is sufficient. But if you have overhanging trees, you might need to clean them four times a year.
What Proper Gutter Cleaning Should Look Like
- Use a stable ladder and work gloves
- Remove leaves and debris by hand or with a plastic scoop
- Rinse out the gutter with a garden hose
- Make sure downspouts are flowing freely — run a hose down them to push water through
- Check for drooping sections or loose gutter hangers
Also make sure downspouts extend water at least 4 to 6 feet away from your foundation. Water pooling near the home can also lead to basement leaks on top of roof issues.
Habit #3 — Regularly Check and Repair Flashing
Flashing is the thin piece of metal installed around anything that protrudes from your roof — chimneys, skylights, vent pipes and roof valleys. Its job is to close the gaps where water might seep inside.
Flashing can become loose, rusted or cracked over time. When that occurs, these gaps become direct channels for water.
Signs Your Flashing Needs Attention
- Visible rust or corrosion on metal strips
- Flashing pulling away from the chimney or vent
- Missing sections of flashing
- Water staining inside directly below a chimney or skylight
- Cracked or dried-up caulk along the edges of flashing
How to Handle Flashing Repairs
For small problems, you can reseal loose flashing using roofing caulk or roof cement. First clean the area, and once it’s fully dry apply a generous bead of waterproof sealant.
For bigger jobs — such as bent, missing or heavily corroded flashing — it’s best to hire a professional. Improper flashing repairs typically only worsen leaks, not improve them.
Pro tip: If you hire a roofer for any job, always have them inspect the flashing. It takes a few minutes but may prevent significant water damage.
Habit #4 — Prune Trees Overhanging Your Roof
Trees are beautiful, but overhanging branches pose a serious danger to your roof. In storms, limbs can snap and land on shingles, creating cracks or holes. Even without storms, branches that rub against a roof gradually wear down protective granules on shingles.
Leaves falling from nearby trees also clog your gutters more quickly and keep moisture sitting against your shingles longer than it should.
The Right Way to Take Care of Trees Near Your Roof
- Cut back any branch that overhangs within 10 feet of your roof
- Remove dead or dying branches before a storm takes them down
- Watch out for trees that lean toward the house — they can become a major hazard in strong winds
- After severe storms, always check for new branches that may have fallen onto the roof
You don’t have to cut down healthy trees. Just keep them trimmed so they don’t become a hazard. Hiring a certified arborist once a year for trimming is a worthwhile investment that protects not just your landscaping, but also the roof of your home.
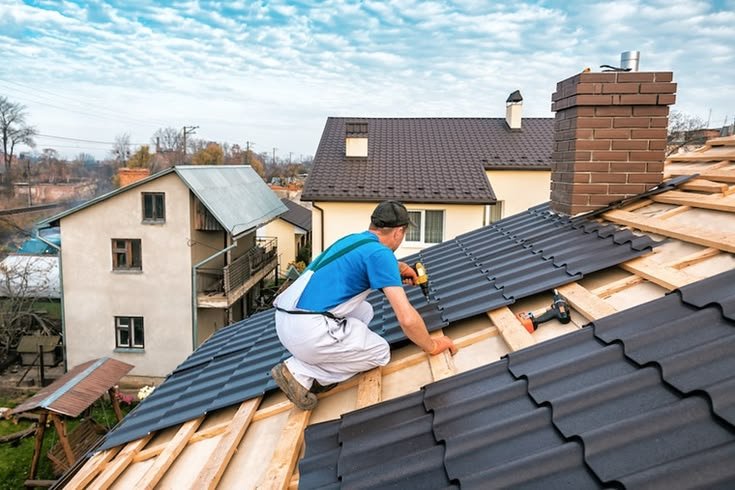
Habit #5 — Monitor Shingles Year-Round
Your shingles are the first line of defense on your roof. When they’re healthy, they shed water efficiently and shelter everything below them. When they get damaged, water gets inside.
Types of Shingle Damage to Look For
Curling shingles — Edges curl upward or the center buckles. This often means the shingle is aged or has moisture damage beneath.
Cracked shingles — Cracks let water drip straight through to the roof deck. Usually caused by heat, cold or impact from hail or debris.
Missing shingles — Even one missing shingle is an emergency. Water runs directly onto bare roof decking.
Granule loss — If your gutters are accumulating a thick layer of gritty, sand-like material, your shingles are losing their protective coating. This speeds up deterioration.
Blistering — Bubbles develop on the surface of the shingle. This occurs when moisture is trapped inside during manufacture or installation.
When to Replace vs. Repair
| Shingle Condition | Recommended Action |
|---|---|
| 1–3 damaged shingles | Spot repair or replacement |
| 4–10 damaged shingles | Section repair |
| Widespread damage or 15+ years old | Full roof assessment |
| Granule loss across the whole roof | Consider full replacement |
It is much less expensive to replace a few shingles early than to allow damage to spread. A small repair could run $150–$400. Waiting until a leak develops and damages the interior can push that number into the thousands.
Habit #6 — Make Sure Attic Ventilation and Insulation Are Up to Par
This one catches many homeowners off guard. The attic contributes substantially to roof health — even when the roof looks fine from the outside.
Inadequate attic ventilation leads to heat and moisture accumulating inside. In summer, too much heat curls shingles from underneath. In winter, warm air from the living space rises into the attic and unevenly warms the roof deck. This forms ice dams — thick ridges of ice that push water under shingles when the snow melts.
According to the U.S. Department of Energy, proper attic insulation and ventilation can also significantly reduce your home’s energy bills — making it a double win for homeowners.
Signs of Poor Attic Ventilation
- Ice dams forming on the roof edge in winter
- Shingles degrading sooner than anticipated
- High energy bills due to heat escaping through the roof
- Mold or condensation in the attic
- Rooms directly under the roof feeling unusually hot or cold
What Good Attic Ventilation Looks Like
A well-ventilated attic has a fair balance of intake vents (typically at the soffits along the roof’s edge) and exhaust vents (at the ridge or topmost part of the roof). This generates a natural movement of air that expels hot, damp air and draws in fresh air.
The general rule of thumb is 1 square foot of ventilation for every 150 square feet of attic floor space.
Insulation matters too. Make sure attic insulation does not cover soffit vents — this is a common error in DIY insulation projects. Blocked vents stop airflow and moisture builds up quickly.
Habit #7 — Make Quick Work of Minor Repairs
One of the biggest mistakes homeowners make is brushing off small roof issues because they “don’t look that bad yet.” A small crack or a loose shingle never stays that way for long.
Water is patient. It runs along gravity through minute openings, soaks into wood and spreads well beyond where it first entered. By the time you notice a water stain on your ceiling, the damage has generally been in progress for weeks or months.
The Real Cost of Waiting
Here’s what happens to repair costs over time if you delay:
| Stage of Damage | Typical Repair Cost |
|---|---|
| Early — 1–2 damaged shingles | $150 – $400 |
| Moderate — minor leak with some rot | $800 – $1,500 |
| Advanced — significant deck damage | $2,000 – $5,000 |
| Severe — structural damage + mold | $8,000 – $20,000+ |
The table tells the entire story. A $200 repair today can easily turn into a $15,000 nightmare if ignored for a year or two.
How to Find a Reliable Roofer
When minor repairs are needed, don’t simply hire the first roofer you come across. Look for:
- Licensed and insured contractors in your state
- Online reviews on Google or the Better Business Bureau
- Written estimates prior to any work beginning
- Warranty on labor — good roofers guarantee their workmanship
- No pressure to reroof the whole thing — if a roofer tells you that you need a full replacement for just 2 damaged shingles, get a second opinion
Seasonal Roof Maintenance Checklist
Here’s a quick reference guide to follow each season to keep your roof in check:
| Season | Key Tasks |
|---|---|
| Spring | Full inspection after winter, clean gutters, check flashing |
| Summer | Trim trees, check attic ventilation, look for blistering shingles |
| Fall | Clean gutters again, check for cracked shingles before cold weather |
| Winter | Watch for ice dams, inspect after heavy storms, check attic for moisture |
Print this out or save it to your phone. It takes less than an hour to run through this list every season, and it can add years to your roof’s life.
How Long Should a Roof Last?
Understanding the lifespan of your roof helps you plan smarter. Not all roofs are created equal.
| Roof Type | Average Lifespan |
|---|---|
| Asphalt shingles (3-tab) | 15 – 20 years |
| Architectural asphalt shingles | 25 – 30 years |
| Metal roofing | 40 – 70 years |
| Wood shakes | 20 – 25 years |
| Slate | 75 – 100+ years |
| Tile (clay or concrete) | 40 – 50 years |
If your roof is nearing the end of its expected lifespan, regular maintenance habits become even more critical. An older roof requires more frequent inspections and quicker action if something goes wrong.
FAQs — Roof Leak Fix Guide
Q: How do I discover the source of a roof leak? Begin in the attic during or immediately following a rainstorm. Shine a flashlight to look for wet spots, water trails or daylight coming through. From the outside, inspect above the wet spot — examine flashing, shingles and roof penetrations such as vents or skylights nearby.
Q: Can I repair a roof leak myself? Small repairs such as replacing a few shingles or resealing flashing can be DIY-friendly for someone comfortable on a ladder. However, anything involving structural damage, large stretches or steep pitches should be referred to a licensed professional. Safety first.
Q: What is the cost to repair a roof leak? Minor repairs usually cost anywhere from $150 to $500. Moderate damage with some wood rot can run $1,000 to $3,000. Leaks that cause structural damage may top $5,000 or more. Getting multiple quotes helps.
Q: Where is a roof leak most likely to be? The most common leak areas are flashing points — around chimneys, skylights and vent pipes. These areas need the most sealing and are more susceptible to weather damage over time.
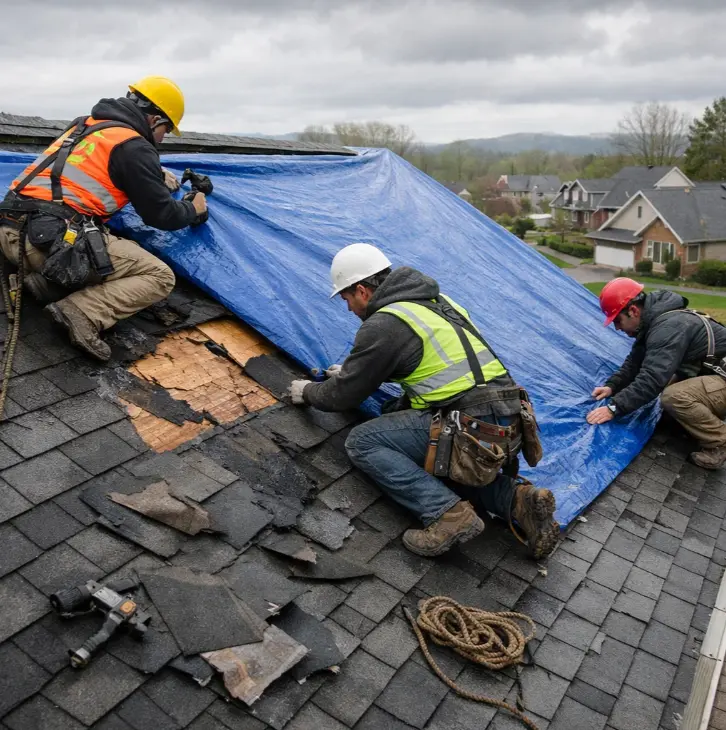
Q: How can I temporarily stop a roof leak until a roofer arrives? From the outside, cover the damaged area with a tarp secured over the ridge and down both sides. Set out buckets to catch dripping water and use a mop or towels to remove standing water from floors.
Q: Is a roof leak covered by homeowner’s insurance? It depends on the cause. Most policies cover sudden damage from storms, hail or fallen trees. Leaks resulting from lack of maintenance or age-related wear are usually not covered. Check your policy and photograph and document all damage.
Q: How often do I need to have my roof inspected by a professional? Once a year is best for most homes. If your roof exceeds 15 years, twice a year is a smart move. After any significant storm with high winds or hail, get an inspection as soon as possible.
Wrapping It All Up
Your roof is working overtime every single day — through rain, snow, wind, heat and cold. And it asks only for a little attention in return.
This roof leak fix guide is not rocket science. It’s about establishing basic habits — inspecting twice a year, cleaning gutters, paying attention to your shingles, checking flashing, managing trees, keeping airflow healthy in your attic and fixing small issues quickly.
None of these habits require significant time or money. But ignoring them can result in water damage, mold, structural rot and repair bills that reach into the tens of thousands of dollars.
Start with one habit this week. Maybe it’s cleaning the gutters. Maybe it’s grabbing binoculars and doing a quick inspection of your shingles from the yard. Whatever you do, don’t wait until you see water dripping through the ceiling.
A little roof care today keeps the big disasters away.