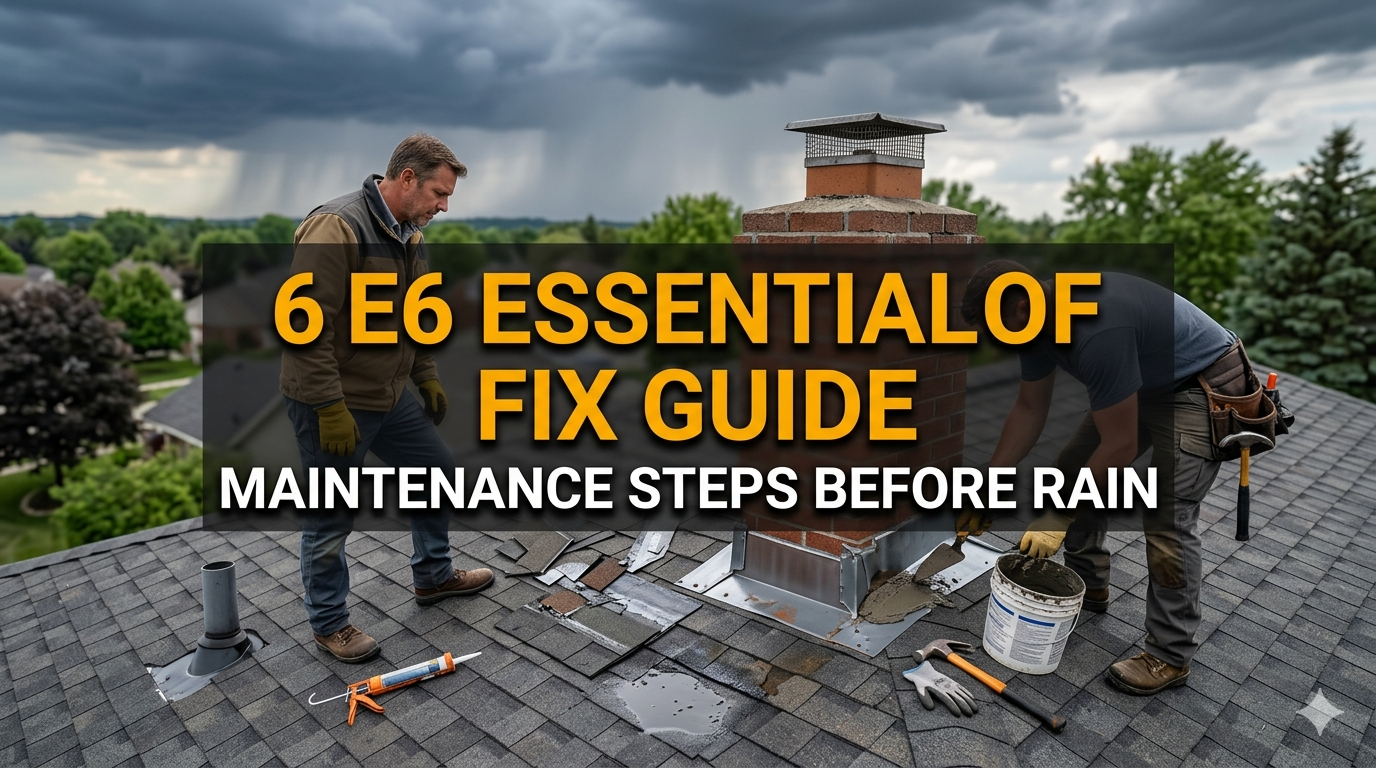
6 Essential Roof Leak Fix Guide Maintenance Steps Before Rain
Meta Description: Roof leak fix guide: Discover 6 crucial maintenance steps to safeguard your home from the rain. Here are a few simple, proven tips to stop leaks before they start.
6 Steps On Roof Leak Fix Guide Maintenance Before Rain
Rain is coming. Is your roof ready?
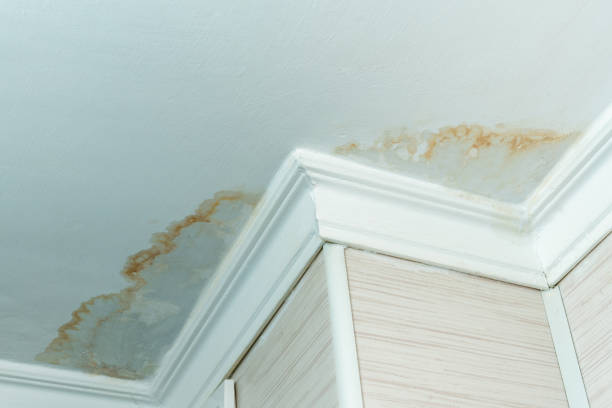
Most homeowners never give their roof a second thought — until a stream of water starts to seep through the ceiling. By that point the damage is done. A small leak can become a huge, costly issue in one storm.
The good news? A few easy maintenance steps taken before the rain can prevent most roof leaks.
This roof leak repair guide takes you through 6 critical action steps every homeowner should know to protect their home. Whether you’re a first-time homeowner or have been in your house for decades, these measures are practical to implement, affordable and straightforward.
Let’s get your roof rain-ready.
Why Roof Maintenance Before the Rain Matters
Ignoring your roof is one of the most expensive mistakes a homeowner can make.
The average roof leak fix costs $300 to $1,500 — and that’s just for the roof itself, according to the National Roofing Contractors Association. Water damage to your ceilings, walls, insulation and floors can make that number climb into the tens of thousands.
The thing is, most leaks can be avoided.
They don’t just appear from nowhere. They begin as small cracks, loose shingles, clogged gutters or damaged flashing. If left unattended, these small problems can turn into monumental ones as soon as heavy rain comes.
A proactive rooftop inspection ensures you’ll save money, stress, and a world of soggy headaches during rainy season.
| Problem Ignored | Average Repair Cost | With Early Fix |
|---|---|---|
| Cracked shingle | $150–$400 | $20–$50 |
| Clogged gutters | $500–$1,500 | $0 (DIY clean) |
| Damaged flashing | $200–$500 | $50–$100 |
| Unsealed chimney | $1,000–$3,000 | $100–$200 |
| Water-damaged ceiling | $500–$2,500 | Fully preventable |
The numbers speak for themselves. Let’s get into the steps.
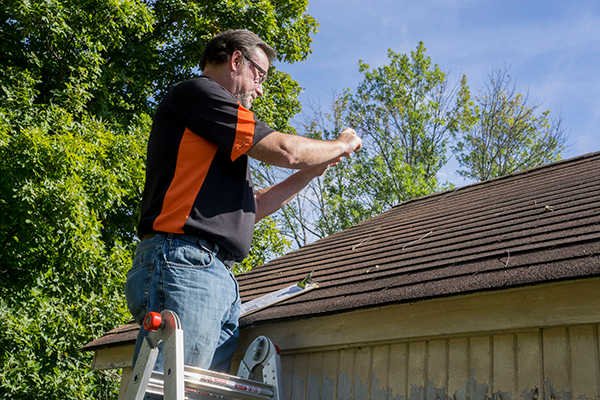
Step 1 — Walk the Perimeter and Check Your Roof From Ground Level
The first step, before climbing any ladder, is staying on the ground.
You can learn a surprising amount from a simple visual inspection from your yard. If you have binoculars, bring them. Move slowly around all four sides of your home and carefully look up at the roof.
What To Watch For When You Conduct Your Ground Check
The most obvious warning signs — missing or curling shingles. If you see a patch where the shingles are bent, raised, or completely missing, that section is susceptible to water entering.
Black streaks or discoloration on the roof surface are usually a sign of algae or moisture buildup. This causes shingles to lose strength and water-resistance over time.
Sagging areas are a red flag. A roofline should appear straight and even. If any area droops or sags, it could indicate that the decking underneath is rotting due to past water damage.
Accumulation of debris — leaves, branches, dirt — on the roof can keep moisture in and speed up deterioration. Even if your shingles appear to be in good condition, a layer of debris can become problematic.
Make Notes As You Go
Take your phone and snap pictures of anything unusual. This helps you monitor changes over time and provides you with clear reference points in case you need to contact a roofing professional further down the road.
You don’t have to be an expert to see problems from the ground. Trust your eyes. If it looks wrong, it probably is.
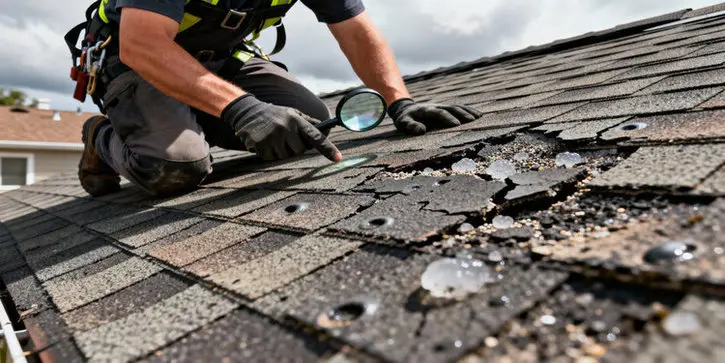
Step 2 — Ascend (Safely) and Examine Shingles Up Close
After conducting your ground inspection, it’s time for a closer look — but safety first.
Never climb your roof alone. Always have someone nearby. Make sure you have a robust extension ladder that extends at least 3 feet above the roofline. Wear rubber-soled shoes that grip, and never get up on a wet or damp roof.
If your roof is too steeply pitched or you don’t have a head for heights, skip this step and hire a pro. It’s not worth the risk.
What To Look For When You’re Standing Right There
Shingle condition — Gently press down on several shingles. They should be firm, not soft or spongy. Weak areas indicate that water has already penetrated.
Granule loss — Asphalt shingles feature tiny granules that protect them from UV rays and rain. Run your hand across a few shingles. If granules come off easily, or you see bare spots, the shingles are aging out and losing their protective top layer.
Cracked or broken shingles — Check for visible splits, chips or breaks. A hairline crack is still enough to allow water to pass through during heavy rain.
Nail pops — Occasionally roofing nails will work their way up through shingles, forming a small raised bump. Water can collect around these areas and seep in.
Quick Shingle Condition Chart
| Shingle Condition | Risk Level | Action Needed |
|---|---|---|
| Firm, full granules | Low | Monitor annually |
| Minor granule loss | Medium | Watch closely; plan replacement |
| Cracked or curling | High | Replace within 30 days |
| Soft or spongy | Very High | Replace immediately |
| Missing entirely | Critical | Emergency repair required |
Replacing a few damaged shingles yourself is manageable for most homeowners with basic DIY know-how. You will need replacement shingles that match your existing ones, roofing nails and roofing cement. There are plenty of tutorials out there, but when in doubt, hire a pro.
Step 3 — Inspect and Reseal Roof Flashing
Flashing is one of the most overlooked components in any roof leak fix guide — and it’s also one of the most common causes of leaks.
Flashing is the thin metal material (usually aluminum or galvanized steel) placed anywhere the roof meets another surface. This includes:
- Around chimneys
- Around skylights
- Along roof valleys (where two slopes intersect)
- Where the roof meets a wall or dormer
- Around vent pipes and HVAC units
These intersections are natural soft spots. Water has a way of finding all joints and edges.
How Flashing Fails
With time, flashing can separate from the surface and leave a gap. It can also rust and corrode, particularly in humid environments. The sealant around flashing eventually dries out and cracks, destroying the watertight seal.
An opening even a few millimeters wide is enough for water to pour through in heavy rain.
How To Check Your Flashing
Search for any apparent gap between the flashing and your roof or wall surface. Look for rust stains, a sign of corrosion. Press on the edges gently — they should feel securely attached, not loose or springy.
If you see small gaps or dried-out sealant, you can reseal them yourself using roofing caulk or roof cement. First, clean the area and dry it thoroughly, then run a generous bead of sealant and smooth it with a putty knife.
For wider gaps, bent flashing or extensive rust damage, replacement is a better alternative to patching. Flashing can be replaced easily and cheaply by a roofer.
Step 4 — Clear All Gutters and Downspouts
Clean gutters may feel like a different problem from roof leaks, but they’re directly linked.
When leaves, dirt and debris clog gutters, the water has nowhere to go during a rainstorm. Instead of flowing away from your home, it backs up. That backed-up water settles at the edge of your roof and seeps under shingles and into your fascia board.
This is referred to as water intrusion, and it accounts for a significant percentage of residential roof leaks.
Step-By-Step Guide: How To Clean Your Gutters
1. Gather your supplies. You will need a ladder, work gloves, a gutter scoop or small shovel, a bucket and a garden hose.
2. Start at the downspout end. Make your way away from the downspout so that you’re pushing debris toward an open area instead of into the drain.
3. Scoop out all debris. Don’t just sweep it around — fully remove leaves, mounds of dirt and any organic matter.
4. Flush with a hose. Run water through the gutter from the far end back toward the downspout. This helps clear smaller particles and allows you to check flow.
5. Test your downspouts. Water should run out fast and drain freely. If it drains slowly or backs up, you have a clogged downspout. Clear it with a plumber’s snake or some hose pressure.
6. Check gutter pitch. Gutters should slope slightly toward the downspout — about a quarter inch of pitch for every 10 feet of gutter. If water collects in any area, the pitch may require adjustment.
Gutter Maintenance Frequency Guide
| Surrounding Trees | Recommended Cleaning Schedule |
|---|---|
| No nearby trees | Once a year (before rainy season) |
| A few trees nearby | Twice a year (spring and fall) |
| Heavy tree coverage | Every 3 months |
| Pine trees nearby | Every 2–3 months (pine needles clog fast!) |
If cleaning out the gutters seems like a never-ending battle, installing gutter guards is a good long-term investment. They won’t eliminate maintenance entirely, but will cut down on how often you need to clean.
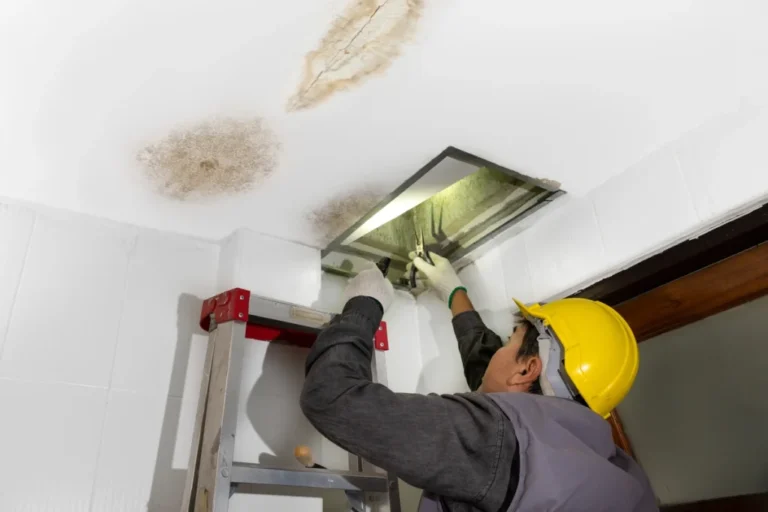
Step 5 — Inspect Your Attic for Early Signs of Leaks
Here’s one step that most people completely forget: look from the inside out.
Your attic is typically the first place to show signs of a roof leak — well before water appears on your ceiling. A quick inspection of the attic can help identify problems early, when they are still cheap and easy to remedy.
What To Bring Into the Attic
Bring a flashlight (or use your phone’s flashlight) and, if possible, go up during the day so that you can look for daylight coming in through gaps.
5 Signs To Check For In Your Attic
1. Water stains on rafters or sheathing — Brown or yellowing stains on wood are signs of past or present water intrusion. Even if the area feels dry, staining is a sure sign that moisture was present.
2. Daylight coming through — Turn off your flashlight. Those pinpoints of light you see through the roof boards are gaps that rain will use to get inside.
3. Mold or mildew — Black, green or white fuzzy growth on wood surfaces is a bad sign of sustained moisture. Mold is also a health hazard and should be addressed immediately.
4. Soft or sagging decking — Push up gently on the roof boards from underneath. They should feel firm. Soft spots signal rot, which means water has been entering repeatedly.
5. Condition of insulation — Wet, matted or stained insulation is a dead giveaway that there’s a leak somewhere above it.
What To Do If You Discover Something
If the damage is minor — a small stain or a tiny gap — take note of its location so you can patch it up from outside. If the damage is severe — widespread mold, rotting wood, large wet spots — call a roofing contractor before the next rainstorm comes.
Don’t wait. Attic problems don’t fix themselves.
Step 6 — Seal and Protect Roof Penetrations
Any place where something comes up through your roof is a potential leak site.
These areas are known as roof penetrations, and they include:
- Plumbing vent pipes
- Electrical conduits
- Bathroom and kitchen exhaust fans
- HVAC units and their supports
- Satellite dish mounts
- Skylights
Each penetration has a rubber or metal boot (a collar that forms a waterproof seal around the pipe or fixture) and sealant to keep the edges waterproof. The boots and sealant degrade over time.
How To Check Roof Penetrations
Walk around your roof and inspect each penetration point closely.
Inspect rubber boots around vent pipes. Rubber breaks down in sunlight and becomes brittle over time. Check for cracks, tears or openings around the base. A torn pipe boot is one of the most common and overlooked causes of roof leaks.
Inspect sealant around all penetrations. It should form a smooth, continuous bead without gaps or cracks. If it appears dried out, chunky or is separating from the surface, it should be replaced.
Check skylight seals and frames. Skylights are notorious leak spots. Pay attention to the flashing around all four edges and check the condition of the seal between the glass and the frame.
DIY Fixes for Penetration Leaks
Swapping out a rubber pipe boot is a relatively straightforward DIY task. You can purchase universal replacement boots at any hardware store for $10–$30. Slide a new boot over the pipe, fasten it with roofing nails and seal the edges with roofing cement.
Re-caulking around penetrations is even easier. Use a silicone-based roofing caulk specifically made for outdoor use. Scrape away the old sealant first, allow the area to dry, then run fresh caulk in a smooth, continuous bead.
These small fixes take 20–30 minutes to complete and can save you thousands in water damage.
When To Call a Professional Roofer
This roof leak repair guide aims to show homeowners that they can handle routine maintenance themselves. But some situations do need a professional.
Call a roofer if you notice:
- Large areas of missing or heavily damaged shingles
- Visible sagging or bowing along sections of roof
- Heavy mold in the attic or rotting wood
- Water stains appearing in multiple spots on your ceiling
- Flashing that has fully peeled away or rusted through
- A roof over 20 years old that is generally worn
A professional roofing contractor can do a thorough inspection, usually for free or a nominal fee. They have the tools, training and safety gear to identify and address issues that are difficult to spot from a DIY perspective.
A professional inspection every 2–3 years is a smart investment — even if everything looks fine.
Your Pre-Rain Roof Maintenance Checklist
Use this checklist before every rainy season:
| Task | DIY or Pro | Time Needed |
|---|---|---|
| Ground visual inspection | DIY | 15–20 minutes |
| Up-close shingle check (if safe) | DIY | 30–45 minutes |
| Inspect and reseal flashing | DIY / Pro | 30–60 minutes |
| Clean gutters and downspouts | DIY | 1–2 hours |
| Attic inspection | DIY | 20–30 minutes |
| Seal roof penetrations | DIY | 30–60 minutes |
Total time investment: 3–5 hours. Potential savings: Thousands of dollars.
It is one of the most usefully spent afternoons you’ll ever have.
Frequently Asked Questions
Q: How often should I perform a roof inspection? At the very least, do this twice a year — once in spring and once ahead of your area’s rainy season. After any major storm, do a quick check too.
Q: Can I repair a roof leak on my own? Yes, several small repairs — such as replacing a shingle, resealing flashing or replacing a pipe boot — are feasible as DIY projects. For bigger or structural problems, make sure to use a licensed roofing pro.
Q: What causes roof leaks the most, typically? The top three reasons for residential roof leaks are consistently broken or missing shingles, damaged flashing and clogged gutters.
Q: How long does a typical asphalt shingle roof last? An asphalt shingle roof will last 20–30 years with proper care. Metal roofs have a 40–70 year lifespan, and tile roofs can last more than 50 years.
Q: What sealant is best for roof repairs? Silicone-based roofing caulk or roofing cement is good for general sealing. For flashing repairs, butyl rubber tape works really well and is also easy to apply.
Q: Does homeowners insurance cover roof inspection? Standard homeowners insurance doesn’t cover routine maintenance, but coverage may extend to sudden damage caused by storms or falling trees. Check your policy for details.
Q: When is the best time of year to maintain my roof? Late summer or early fall is a good time — before the rainy season, but when temperatures are still mild enough for sealants and caulk to cure properly.
Wrapping It All Up
Your roof acts as your home’s first line of defense against the weather. It gets pummeled every day — sun, wind, rain, ice and everything in between.
The 6 steps in this roof leak fix guide are not complex. They don’t need elaborate tools or formal training. They simply take a few hours of your time and the willingness to be proactive about issues before they become emergencies.
Ground inspection. Shingle check. Flashing. Gutters. Attic. Penetrations.
If you do those six things before it rains, you’ll have greatly reduced the chances of a leak this season.
A few hours now saves a lot of money later. Your future self — and your dry ceiling — will thank you.