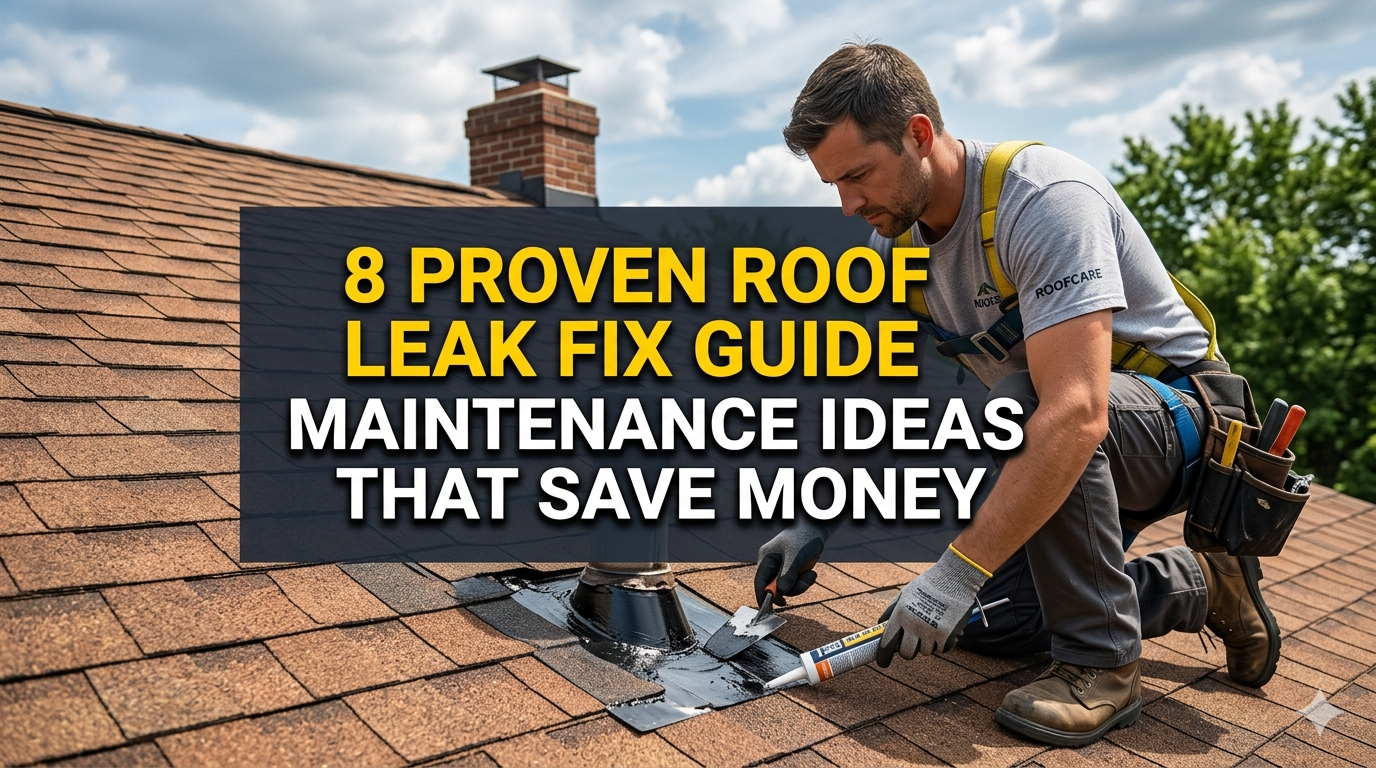
8 Proven Roof Leak Fix Guide Maintenance Ideas That Save Money
8 Money Saving Roof Leak Repair Guide Maintenance Tips
Meta Description: Tired of losing water damage & not knowing how to fix a roof leak? With 8 proven maintenance ideas, prevent valuable damage quickly and save hundreds on costly repairs—starting today.
Your Roof Is Trying to Tell You Something
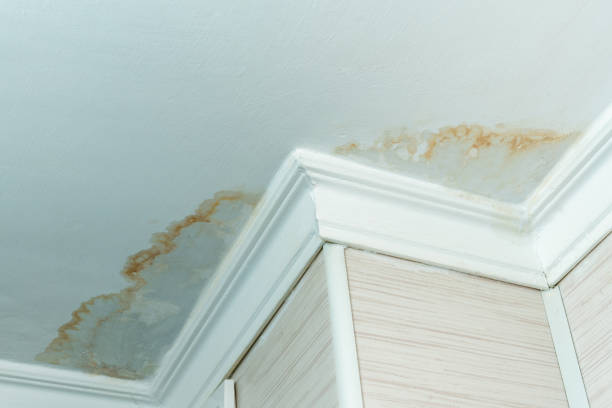
Water stains on your ceiling. A musty smell in the attic. Do shingles end up littering your yard after a storm?
These are distress signals from your roof.
The vast majority of homeowners ignore them — until a small drip turns into a $10,000 problem.
The truth is, most roof leaks don’t begin that way. It begins as small cracks, loose shingles or clogged gutters. And they take months — occasionally years — to grow indoors before you even notice them.
The good news? You don’t have to be a contractor to stop them.
This guide to fixing a roof leak walks through 8 simple, tried-and-true maintenance strategies real homeowners use to bypass leaks ahead of time and avoid unnecessary expense in the process.
Let’s get into it.
Roof Leaks: Why They’re So Expensive To Repair (And How to Avoid That)
Before getting into the solutions, it’s useful to understand why roof leaks are so costly when neglected.
Water doesn’t remain in any one place. Once it gets through your shingles, it moves through insulation, sinks into wood framing and seeps into drywall. By the time you notice a stain on your ceiling, damage has already occurred.
To put things into perspective, here’s a quick cost comparison:
| Issue | Early Fix Cost | Delayed Repair Cost |
|---|---|---|
| Cracked flashing | $150 – $300 | $1,500 – $3,000 |
| Missing shingles | $100 – $250 | $800 – $2,500 |
| Clogged gutters | $75 – $200 | $1,000 – $4,000 |
| Small roof crack | $200 – $400 | $3,000 – $8,000 |
| Skylight seal failure | $150 – $350 | $2,000 – $5,000 |
The pattern is clear. Fix it early, save thousands.
Here are the 8 maintenance ideas that allow this to happen.
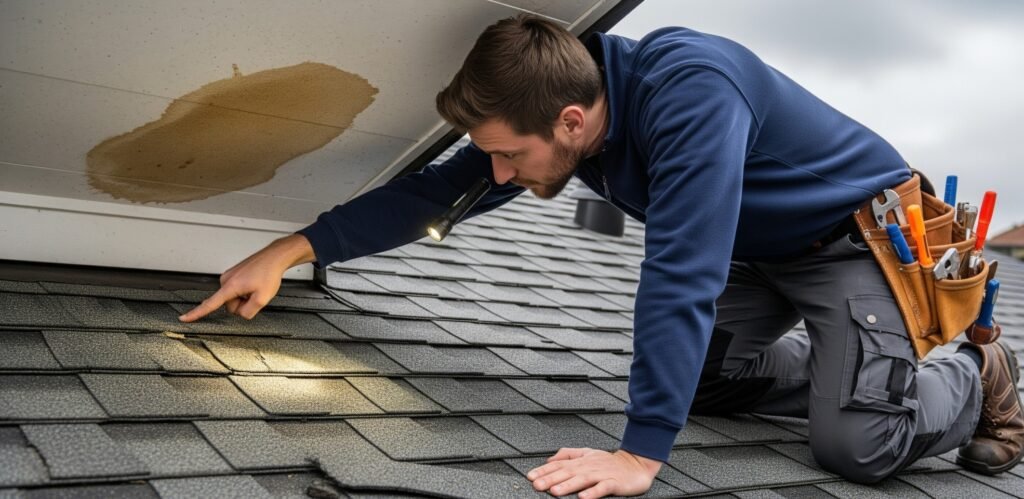
1. Inspect Your Roof Twice a Year — No Ifs, Ands or Buts
The single best thing you can do for your roof is free.
A simple visual inspection — performed in the spring and fall — detects issues before they lead to leaks.
What to Watch for From the Ground
You need not always ascend. Grab a pair of binoculars and walk around the perimeter of your home.
Look for:
- Shingles curling at the edges
- Dark areas or missing granules (the gritty surface on asphalt shingles)
- Low spots anywhere on the roof
- Streaks of algae or moss (green or black)
- Gutters filled with shingle granules
These are early warning signs. Identify them early, repair them inexpensively.
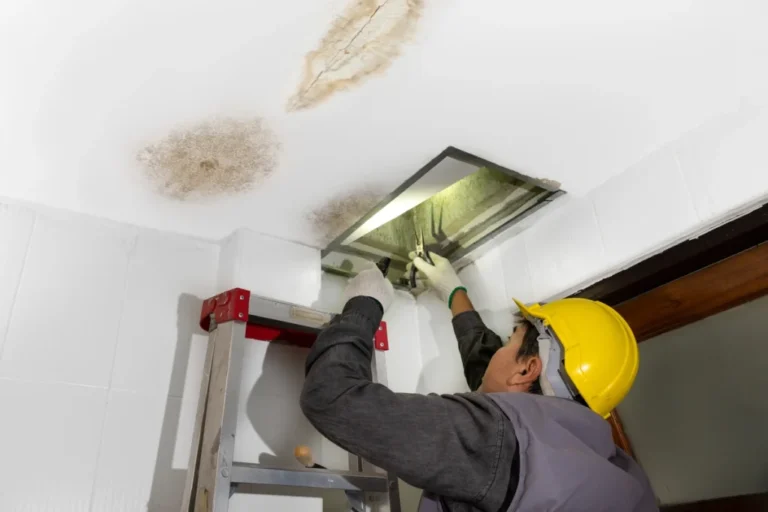
What to Check in the Attic
On a sunny day — lights off — head into your attic. If you see sunlight shining through the roof boards — you have a gap.
Also check for:
- Water stains or dark rings on rafters
- Soft or spongy wood (an indication of rot)
- Mold or mildew smell
- Damp or wet insulation
When to Call a Professional
If you notice any of the above, call in a licensed roofer to take a closer look. Many businesses provide free or affordable roof inspections. It’s worth every penny.
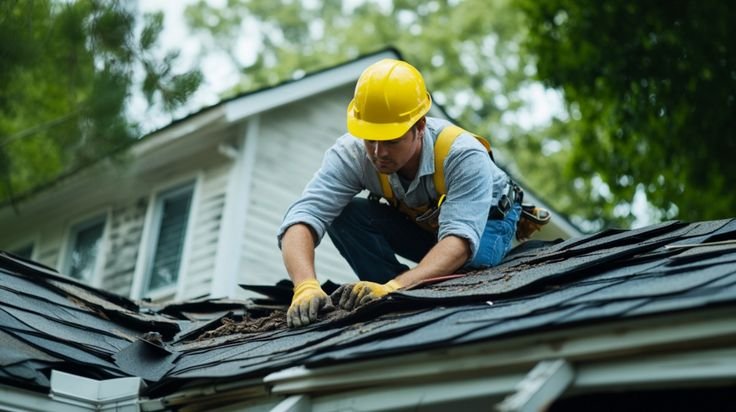
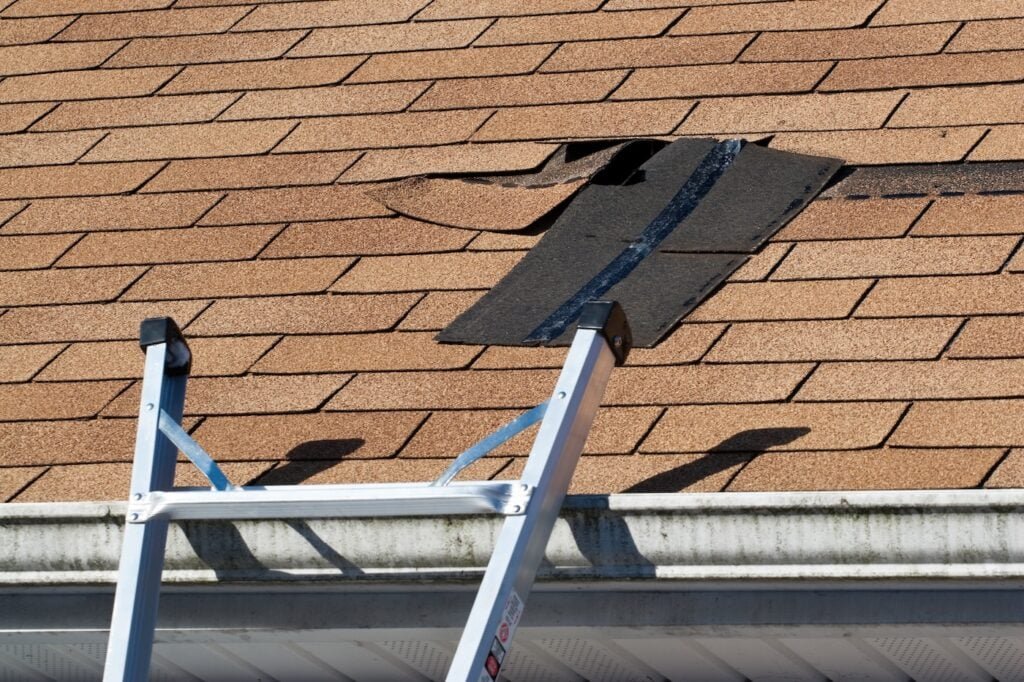
2. Replace Any Broken or Missing Shingles Immediately
Shingles are your roof’s primary layer of defense. If one is missing or fails, water takes a direct route inside.
The remedy is much easier than most people believe.
How to Spot a Problem Shingle
Take a few minutes to walk around after any significant storm. Look for:
- Shingles on your lawn or driveway
- Bald spots on the roof (darker areas where shingles were)
- Humped or buckled shingles
Replacing Shingles Yourself — The Basics
Replacing a few shingles is a manageable weekend project if you’re comfortable on a ladder and the slope isn’t too steep.
Here’s the short version:
- Run a pry bar underneath the damaged shingle to free the nails
- Remove the old shingle carefully
- Insert the new shingle into place, aligning it with the row
- Secure with roofing nails
- Seal the edges with roofing cement
You should always use shingles in the same color and material as your existing roof. Mixing types can prevent water from draining evenly.
When Not to DIY
A professional evaluation is necessary if more than 20–30% of your roof has shingle damage. Needing to replace too many shingles piecemeal can actually end up costing more than a full section repair done by a pro.
3. Fix Flashing Before It Lets You Down
Roof flashing is among the most underrated — and one of the most vital parts — of your roof system.
Flashing is the thin metal (typically aluminum or galvanized steel) that seals the seams where your roof meets walls, chimneys, skylights and vents.
And that’s where most leaks actually originate.
Why Flashing Fails
Over time, flashing can:
- Pull away from walls due to expansion and contraction
- Rust or corrode
- Crack from freezing temperatures
- Get damaged by wind or fallen debris
Even a small gap in flashing lets water in during heavy rain.
Signs Your Flashing Needs Attention
- Leaking ceilings near chimneys or skylights
- Rust streaks visible on your roof or outside walls
- Flashing that appears bent, raised or detached from the surface
- Gaps you can spot when inspection is done from the attic
Sealing vs. Replacing Flashing
Small gaps can usually be sealed with roofing caulk or flashing sealant. Wipe off the area first, put down the sealant and press the flashing back in place.
If the flashing is largely rusted or exhibits several cracks, replace it in its entirety. This process can generally be completed by a roofer in several hours.
4. Get Your Gutters Clean and Maintained Each Season
The health of your gutters is directly related to the health of your roof. Most homeowners don’t realize this.
When gutters become clogged with leaves, twigs and debris, water can back up. That backed-up water sits on your roofline, soaks under the shingles and rots the underlying wood.
This is known as “water intrusion” — and it’s one of the trickiest causes of roof leaks.
How Frequently Should You Clean Your Gutters?
| Season | Action Required |
|---|---|
| Spring | Remove leftover winter debris, assess for damage |
| Summer | Inspect after storms |
| Fall | Major clean post leaf drop |
| Winter | Check for ice dams and blockages |
At least twice a year, clean gutters. If you have overhanging trees, make that four times.
How to Properly Clean Gutters
- Have a solid ladder and stand on flat ground
- Remove debris with a gutter scoop or your hands (if gloved)
- Run water through gutters using a garden hose
- Ensure a clear flow of water to the downspout
- Check for sagging areas or loose brackets — repair these too
Consider Gutter Guards
Gutter guards are mesh or solid covers that rest atop your gutters and prevent larger debris. They’re not perfect, but they greatly minimize how often you have to clean.
A decent set costs $100–$400 for a standard home. That’s a wise investment, considering the cost of water damage repairs.
5. Prevent Ice Dams Before They Rip Your Roof Apart
If you live in a cold-climate region, ice dams pose a major threat.
An ice dam occurs when heat escapes from your house and warms the roof, melting snow, then that water refreezes at the cold eaves (the edges of the roof). The ice accumulates, captures more water and pushes it up under the shingles.
The result? Leaks, mold and damaged insulation — all courtesy of ice.
Warning Signs of Ice Dams
- Icicles hanging from the edges of your roof
- Ice accumulation along the bottom edge of the roof
- Water leaking from your soffits or eaves
- Damp patches on inside walls or ceilings following a cold snap
Prevention Is the Best Strategy
Improve attic insulation. If your attic is well-insulated, less heat escapes through the roof and snow melts more evenly (or not at all).
Add attic ventilation. Adequate airflow maintains a consistent temperature on the roof deck, which prevents the freeze-thaw cycle that leads to ice dams.
Install a roof heating cable. These electric cables run along your eaves and keep ice from forming. They are particularly beneficial for homes that have chronic ice dam issues.
How to Remove an Existing Ice Dam Safely
Don’t chop at ice with a shovel — you’ll ruin your shingles.
Instead:
- Pull snow off the roof from the ground using a roof rake (long-handled tool)
- Place calcium chloride ice melt in a stocking along the ice dam so that it creates a channel for water to escape
- Never use rock salt — it can corrode metal and damage shingles
6. Properly Seal Roof Penetrations
Every pipe, vent and chimney that juts through your roof represents a possible leak site.
These openings are sealed with flashing, rubber boots or caulk — and all of them decay over time.
Common Roof Penetrations That Leak
- Plumbing vent pipes
- HVAC vents and exhaust fans
- Chimneys
- Skylights
- Satellite dish mounts
What to Check and When
Walk your roof (safely!) or pay someone to inspect these points every 2–3 years. Or immediately after an extreme storm.
Look for:
- Cracked or shrunken rubber boots around vent pipes
- Gaps between flashing and the chimney
- Decayed or disintegrating caulk at any point of entry
- Rust around metal collars
Quick Fix for Vent Pipe Boots
The rubber boot around a vent pipe typically lasts 10–15 years. When it cracks, water slips right inside.
Replacing it is a job that’s friendly for do-it-yourselfers:
- Remove surrounding shingles carefully
- Pull out the old boot
- Slide the new boot over the pipe
- Refit and seal the shingles around it
Cost? Approximately $10–$30 for the boot itself. Far better than having water damage inside your walls.
7. Prune All Trees and Shrubs Away From Your Roof
It sounds simple. But overhanging tree branches are a leading cause of roof damage — and they’re entirely avoidable.
Branches rub against shingles whenever the wind blows, gradually removing the protective granules. On stormy days, they can break and come crashing through your roof.
The Risks of Nearby Trees
- Branch abrasion: Continuous rubbing wears off shingle granules, making them less able to shed water
- Downed branches: Even moderate-sized limbs can split or penetrate a section of roof
- Leaf accumulation: Leaves collect on the roof and in gutters, keeping moisture trapped and hastening the deterioration of shingles
- Moss and algae growth: Overhanging branches prevent the roof from drying out — ideal conditions for moss
Safe Distance Rule
Branches should not be within 10 feet of your roofline. If branches are overhanging directly above your roof, they have to go — or at least be cut back considerably.
For large branches near the roof, use a certified arborist. It’s safer and often less expensive than roof repairs from storm damage.
8. Apply Roof Sealant and Protective Coatings
One of the best-kept secrets of roof maintenance is adding some sort of sealant or protective coating.
These products create a waterproof barrier on top of your existing roof surface — which prolongs its life and helps prevent small cracks from turning into big leaks.
For more expert tips and product recommendations, visit Roof Leak Fix Guide — a dedicated resource for homeowners who want to protect their roofs and avoid costly repairs.
Types of Roof Coatings
| Type | Best For | Average Cost per 100 sq ft |
|---|---|---|
| Acrylic coating | Sloped roofs, mild climates | $0.15 – $0.75 |
| Silicone coating | Flat or low-slope roofs | $0.50 – $1.50 |
| Elastomeric coating | All roof types, great flexibility | $0.25 – $1.00 |
| Asphalt aluminum coating | Older asphalt roofs | $0.20 – $0.60 |
When to Apply Roof Coatings
Coatings are most effective on roofs that are still structurally intact. They are not a replacement for repairing severely damaged areas.
Good candidates for coating:
- Flat or low-slope roofs showing minor cracking
- Older asphalt roofs with surface wear
- Metal roofs with early rust spots
- Roofs that have had minor leaks already repaired
How to Apply It (DIY-Friendly)
- Thoroughly clean the roof surface — remove moss, algae and loose debris
- Let it dry completely
- Using a brush or roller, apply the coating from the top down
- After the first coat dries (usually in 4–6 hours), apply a second coat
One gallon usually covers about 50–100 sq. ft. Always check product instructions for your particular roof type.
The Year-Round Roof Maintenance Schedule
Keeping track of your roof doesn’t require constant effort. It just requires consistency.
| Month | Task |
|---|---|
| March/April | Full visual inspection, check attic, clean gutters |
| May | Inspect flashing and sealants after spring rains |
| July/August | Trim overhanging branches, check for moss growth |
| September/October | Major gutter cleaning, replace any summer-damaged shingles |
| November | Prep for winter: check insulation, install heating cables if needed |
| January/February | Monitor for ice dams, use roof rake after heavy snow |
Print this and hang it somewhere you’ll see it. A regular routine is the most affordable roof insurance that money cannot buy.
Five Things Homeowners Do Wrong When It Comes to Roof Leaks
Even well-meaning homeowners sometimes make the problem worse. Here’s what to avoid:
1. Ignoring small stains. A tiny water stain on your ceiling means water has no doubt traveled quite a distance already. Don’t wait.
2. Patching over the symptom. At best, slapping caulk over a visible crack without locating the root cause is just a temporary solution.
3. Pressure washing the roof. This removes granules from shingles and may drive water under them. Use gentle rinsing only.
4. Walking on the roof carelessly. Only walk on the structural ridges, not across the flat areas. Stepping on and cracking a shingle creates another leak point.
5. Delaying flashing repairs. “It’s just a little gap” becomes a destroyed attic ceiling after one heavy rain.
FAQs — Roof Leak Fix Guide
Q: How can I track down where a roof leak is coming from? Begin in the attic during or after a rain. Follow the water trails on the rafters — they usually lead back to where the water entered. Remember that water travels, so the wet spot on your ceiling may not be directly under the leak.
Q: Can I repair a roof leak myself? Yes — for small problems like shingle replacement, flashing gap sealing or applying roof coating. But if it’s extensive damage, or you have a steep or unsafe roof pitch, call a licensed roofer.
Q: What is the lifespan of a roof when properly maintained? With proper maintenance, asphalt shingle roofs are good for 20–30 years. Metal roofing materials have a life expectancy of 40–70 years. Any roof can last an additional 5–10 years with routine maintenance.
Q: What is the best temporary way to fix a roof leak? Roofing tape or a tarp fastened over the affected area serves as an interim remedy until bad weather passes. But always get a permanent repair done as soon as you can.
Q: What is the cost of roof leak repair by a professional? Minor repairs typically run $150–$500. Moderate repairs (flashing replacement, many shingles) cost $500–$1,500. Major structural damage can range from $3,000–$10,000 depending on how extensive it is.
Q: Does homeowner’s insurance cover roof leaks? It depends. Insurance generally covers sudden damage (a storm or downed tree, for example). It typically does not cover leaks from lack of maintenance or gradual wear. Maintain logs of routine inspections and repairs.
Q: What is the biggest cause of roof leaks? Improper or missing flashing is the number one cause. Next up is missing shingles, followed by clogged gutters and worn vent pipe boots.
Q: How do I know if my roof needs replacing or repairing? If repairs cost more than 50% of the replacement cost — replace it. If your roof is more than 20 years old and has extensive damage — replace it. For isolated damage on a relatively young roof — repair it.
Wrapping It All Up
A leaky roof is not a rite of passage for homeowners that you just have to live with.
It’s a problem you can stop — one that this roof leak fix guide gives you every tool to avoid.
The 8 maintenance suggestions here are not rocket science. The work doesn’t need fancy equipment or professional skills for most of it. They only need time and consistency.
- Inspect twice a year
- Replace shingles early
- Keep flashing sealed
- Clean gutters every season
- Improve insulation to prevent ice dams
- Seal all roof penetrations
- Trim your trees back
- Apply protective coatings when needed
Do these things regularly — and your roof will keep your home safe, quietly and reliably, for decades.
Ignore them, and a small drip becomes a hugely big, hugely expensive problem.
The choice is simple. Pick one item from this list today.
According to the Insurance Information Institute, water damage and freezing is one of the most common — and costly — homeowner insurance claims in the U.S. Don’t become a statistic.
Found this guide helpful? Pass it along to a neighbor who’s been putting off fixing that water stain for just a bit too long.