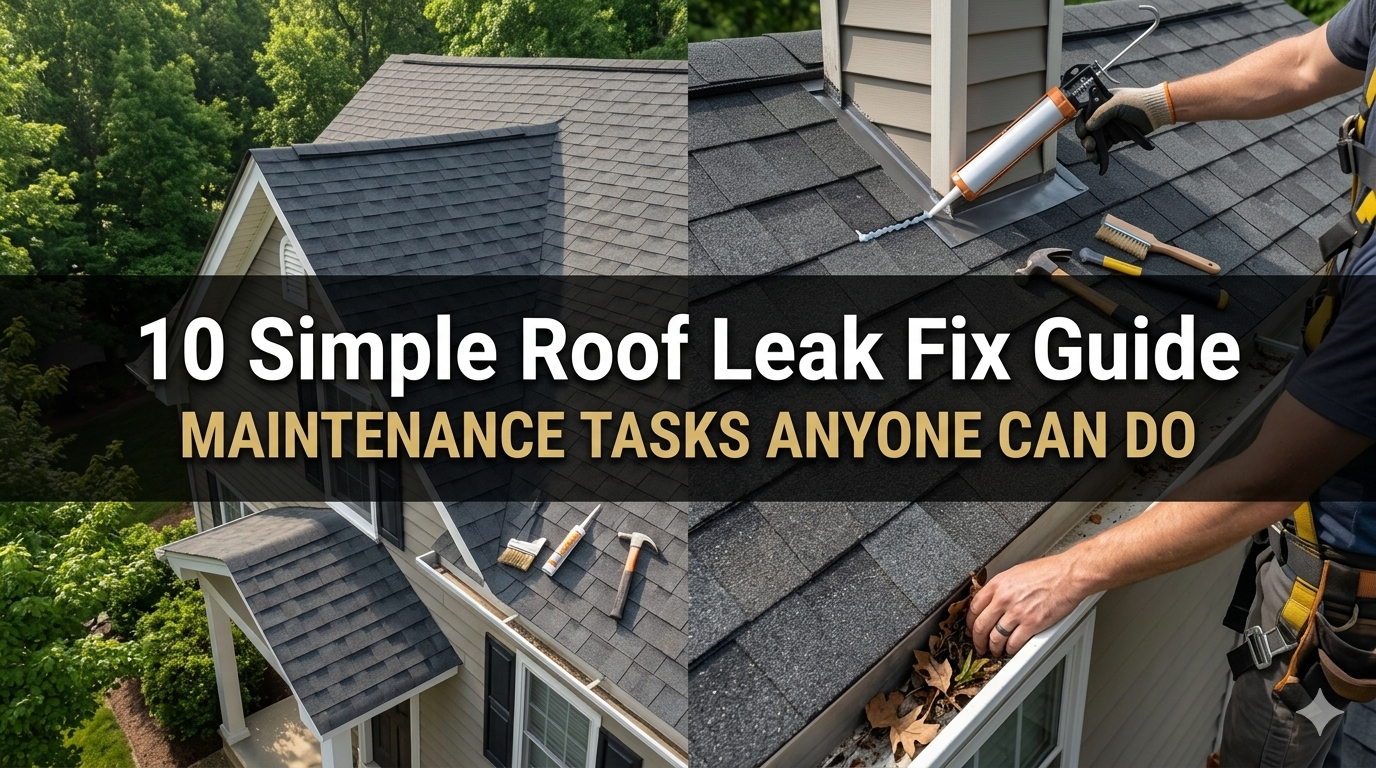
10 Simple Roof Leak Fix Guide Maintenance Tasks Anyone Can Do
Meta Description: Roof leak fix doesn’t have to cost a fortune. Discover 10 simple maintenance tasks anyone can do to stop leaks, protect your home, and save money today.
How to Fix a Roof Leak: 10 Easy Maintenance Tasks You Can Do
Your roof puts in work every day of the week. Rain, wind, snow and sun pound it unceasingly. So it’s no wonder leaks occur. The good news? You don’t need a pro for every roof leak. A lot of the most common issues are things you can repair yourself — safely, quickly and inexpensively.
In this guide, we’ll walk you through 10 simple tasks to fix a roof leak that any homeowner can complete. Whether you’re tackling a drip in the ceiling or simply looking to avoid issues before they arise, you’ve come to the right place.
Let’s get into it.
The Insidious Nature of Roof Leaks: Why Fixing One Early Is More Important Than You Think
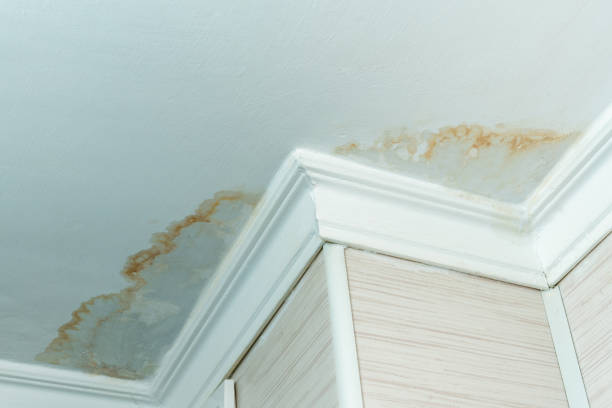
A tiny drip may not seem like much. But water is sneaky. It moves along beams, seeps into insulation and lurks behind walls. By the time you notice a stain on your ceiling, the water may have been there for weeks.
This is what happens when you ignore a roof leak:
| Problem | Timeline | Approximate Cost if Ignored |
|---|---|---|
| Mold growth | 24–48 hours | $500–$6,000+ |
| Damaged insulation | 1–2 weeks | $1,500–$3,000 |
| Rotted wood framing | 1–3 months | $2,000–$10,000+ |
| Ceiling collapse risk | 3–6 months | $5,000–$20,000+ |
| Foundation damage | Long-term | $10,000+ |
The sooner you act, the less expensive and easier the fix. That’s the golden rule of roof maintenance.
What You’ll Need Before Getting Started
Stock your supplies before climbing up or heading into the attic. Safety always comes first.
Basic Safety Gear:
- Non-slip shoes or boots
- Work gloves
- Safety glasses
- A strong ladder (never lean against gutters)
- A friend or family member nearby as a spotter
Common Repair Tools:
- Roofing caulk or sealant
- Roofing nails and a hammer
- Pry bar
- Replacement shingles
- Flashing tape or metal flashing
- Putty knife
- Garden hose (for testing leaks)
- Flashlight (for attic work)
You don’t need all of these tools for every task. Each fix is explained in detail below.
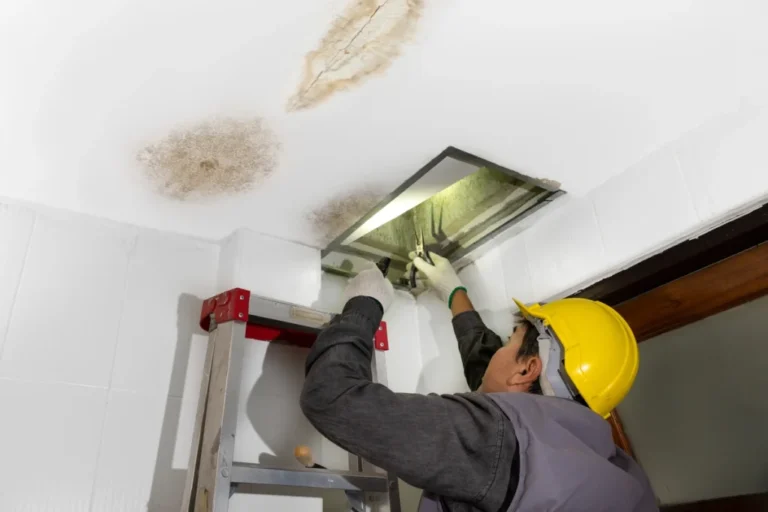
Task #1 — Check Your Attic Before You Get on the Roof
When people find a leak, most go directly to the roof. But the attic is where the true clues lie.
Why start here?
Water travels. A leak penetrating your roof at one location may trickle down several feet before it lands on your ceiling. Beginning in the attic allows you to track down where the water is actually coming from.
How to do it:
- Wait for a dry day after heavy rain.
- Take a flashlight up into the attic.
- Check for wet spots, stains or mold on the wood.
- Look for daylight coming through the roof boards.
- Use chalk to mark the wet areas so you can locate them from outside.
If you see daylight coming in — that is a direct opening. Fix that first.
Pro tip: Do this check at least twice a year — once in fall, before winter arrives, and again in spring, after the freeze-thaw cycle.
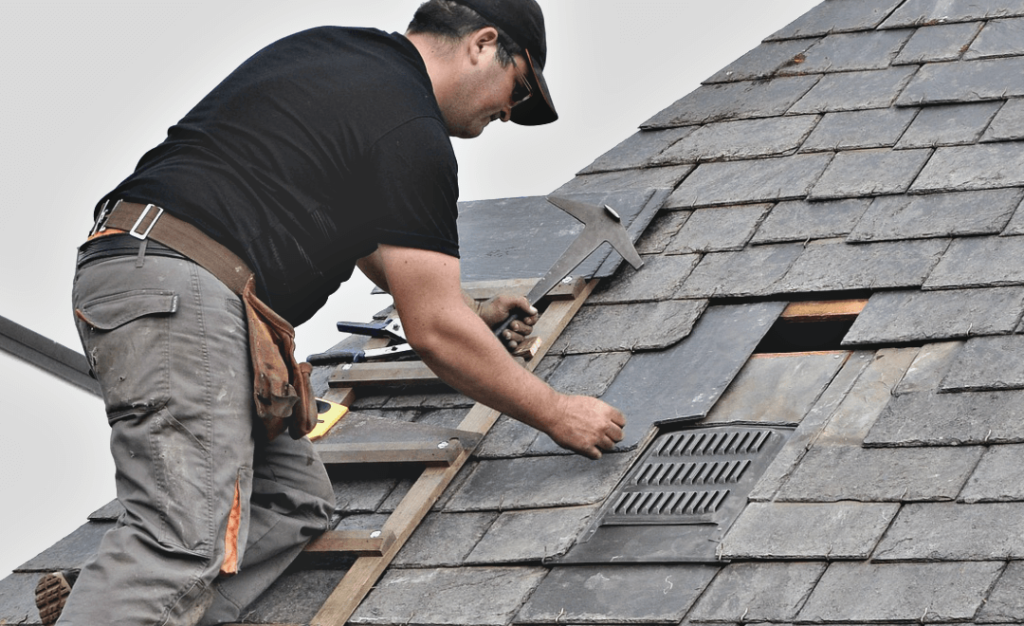
Task #2 — Replace Cracked or Missing Shingles
The most common cause of roof leaks is damaged shingles. Shingles crack, curl or blow off in storms. When they’re gone, water has a direct path into your home.
Signs that you have a shingle problem:
- Pieces of shingles in your yard after a storm
- Visible bald patches on the roof
- Curling or bubbling shingles
- Shingles that are soft or spongy to the touch
How to Replace a Shingle (Step-by-Step)
What you’ll need: Replacement shingles, roofing nails, a pry bar, hammer, and roofing cement.
- Gently insert the pry bar underneath the damaged shingle.
- Take out the roofing nails securing it.
- Slide out the old shingle.
- Insert the new shingle into the gap.
- Nail it down with four roofing nails.
- Put a small dab of roofing cement under the edges of surrounding shingles to seal them back down.
Try to match the closest color and type of your existing shingles. Even a slightly different shingle works better than an open gap.
Task #3 — Caulk Around Roof Flashing
Flashing refers to the metal strips installed around chimneys, skylights, vents and roof edges. It is responsible for directing water away from joints and seams. But flashing can wear out — lift, sag or lose its seal — over time.
This is one of the most common spots where roof leaks start.
How to Reseal Flashing
What you need: Roofing caulk, caulk gun, putty knife, and a wire brush.
- Using your wire brush, clean off any cracked or old caulking.
- Dry the area completely.
- Run new roofing caulk along all edges of the flashing.
- Using a putty knife, smooth it out.
- Let it cure for 24 hours before any rain exposure.
If the flashing is bent or has come completely away from the wall, push it back and use flashing tape to hold it in place while the caulk dries.
Task #4 — Clean Your Gutters (Yes, This Will Fix Leaks)
You may be surprised to find that clogged gutters are a leading cause of roof leaks — particularly around the edges of your roof.
Here’s why: Water backs up when gutters fill with leaves and debris. That backed-up water sits at the edge of your roof and slowly creeps under the shingles. In colder climates, this is known as a “roof edge leak” or even an “ice dam” problem.
Gutter Cleaning Checklist
- [ ] Remove all leaves, twigs and other debris by hand or with a gutter scoop
- [ ] Flush gutters with a garden hose to check for water flow
- [ ] Ensure that water flows freely through the downspout
- [ ] Inspect for sagging sections (they retain standing water)
- [ ] Inspect for holes or cracks in the gutter itself
- [ ] Ensure gutters slope gradually toward the downspout
How often should you clean your gutters?
| Climate/Tree Coverage | Suggested Frequency |
|---|---|
| Few trees nearby | Once per year (fall) |
| Moderate tree coverage | Twice a year (spring & fall) |
| Dense tree coverage | 3–4 times per year |
| After large storms | As needed |
Clean gutters can prevent a massive amount of water damage at almost zero cost.
Task #5 — Seal Gaps Around Roof Vents and Pipes
Roof vents, plumbing pipes and exhaust fans all protrude through your roof. Each one is a potential pathway for water if its seal fails.
These are sneaky leaks. Everything looks fine from the ground, but over time the rubber boot or caulk surrounding the pipe has cracked or shrunk.
How to Seal Roof Pipe Boots
What you need: New rubber pipe boot (available at any hardware store), roofing screws, caulk.
- Unscrew and remove the old rubber boot.
- Inspect adjacent shingles for damage.
- Slide the new boot over the pipe.
- Screw it down as per manufacturer’s instructions.
- Seal the edges with roofing caulk.
If the boot looks fine but there are small cracks, you can skip buying a new one. Simply run a thick bead of caulk around the whole base and smooth it down. This gives you another few years.
Task #6 — Handle Moss and Algae Growing on Your Roof
Moss and algae may seem like merely cosmetic issues. They’re not. Moss retains moisture on your shingles, increasing wear and eventually causing leaks. It also slips under shingles and lifts them.
Signs of moss or algae:
- Dark streaks or stains (algae)
- Green or fuzzy patches (moss)
- Areas that always look wet after rain dries elsewhere
How to Clear Moss Off Your Roof
What you need: Garden sprayer, moss-killing solution (zinc sulfate or a commercial roof cleaner), garden hose.
- Prepare the moss killer according to label instructions.
- Apply it liberally to affected areas.
- Let it sit for 20–45 minutes.
- Rinse gently with a garden hose (low pressure — never use a pressure washer on shingles).
- Let the roof dry naturally.
Prevention tip: Install strips of zinc or copper near the ridge of your roof. When it rains, trace minerals run down the roof and naturally prevent moss from growing back.
Task #7 — Inspect and Reseal Skylights
Skylights bring in excellent natural light. They also let in water if their seals fail.
Every year, the seal around a skylight endures heat expansion, cold contraction and UV damage. It’s not uncommon for the seal to begin breaking down after 5–10 years.
Quick Skylight Leak Check
From inside the attic, check for:
- Water stains directly below the skylight frame
- Condensation between the panes of glass (a separate problem — a failed glass seal)
- Soft or discolored wood around the frame
From outside, check for:
- Cracked or missing caulk along the skylight curb
- Lifted flashing at the corners
- Debris accumulating around the skylight edge
Resealing a Skylight
- Use a wire brush to clean the area around the frame.
- Remove old caulk completely.
- Apply weatherproof silicone caulk (not regular caulk — silicone handles UV and heat much better).
- Press flashing tape over the corners for additional protection.
- Smooth everything out and allow it to cure.
Task #8 — Cover Small Holes With Roofing Cement
Sometimes all a roof requires is a simple patch. Small holes from old satellite dish mounts, nails or general wear can be filled in directly without replacing anything.
This is one of the easiest roof leak fix methods available.
How to Patch a Roof Hole
What you’ll need: Roofing cement, a putty knife, small piece of sheet metal or flashing (for larger holes).
For tiny holes (nail-size):
- Clean the surrounding area of any dirt or debris.
- Apply roofing cement into and over the hole.
- Smooth it flat with the putty knife.
- Let it dry completely.
For slightly larger holes:
- Cut a piece of sheet metal slightly larger than the hole.
- Apply roofing cement around the hole.
- Press the metal patch over it.
- Apply another layer of roofing cement over the patch edges.
- Smooth and let cure.
This fix works well as a temporary solution during bad weather. But plan to do a permanent repair as soon as conditions allow.
Task #9 — Inspect the Chimney for Cracks and Gaps
Chimneys are one of the top three spots where roof leaks originate. The mortar between bricks crumbles. The cap at the top cracks. The flashing at the base separates.
Any of these can allow water in.
Chimney Leak Checklist
| Area to Inspect | What to Look For | DIY Fix |
|---|---|---|
| Chimney cap | Cracks, missing cap | Replace or caulk |
| Mortar joints | Crumbling, gaps | Apply mortar repair mix |
| Flashing at base | Lifted, cracked, gaps | Re-caulk or re-flash |
| Crown (top concrete) | Cracks | Apply crown coat sealant |
| Brick surface | Spalling, dark stains | Apply waterproof sealant |
Fixing Chimney Mortar
Store-bought mortar repair compound comes pre-mixed. Dab it into cracked joints with a small brush or putty knife. Smooth it level and let it cure for 48 hours before rain exposure.
For the chimney crown — the concrete cap sitting at the very top — use a product specifically labeled “chimney crown coat.” It’s flexible and handles expansion and contraction far better than regular concrete repair.
Task #10 — Do a Full Seasonal Roof Inspection Twice a Year
The best roof leak fix is one you never have to make — because you discovered the problem before it began.
A twice-yearly roof inspection takes only 30–45 minutes and can save you thousands. You don’t need to get on the roof every time. A pair of binoculars from the ground can tell you quite a bit.
For a complete walkthrough of what to look for and how to stay on top of every potential problem, visit Roof Leak Fix Guide — a helpful resource packed with practical tips for homeowners.
Your Seasonal Roof Inspection Checklist
From the ground (binoculars help):
- [ ] Check for missing, curled or broken shingles
- [ ] Check for sagging areas
- [ ] Inspect chimney, vents and skylights for visible damage
- [ ] Check gutters for overflow or pulling away from fascia
- [ ] Look for moss, algae or dark staining
From the attic (flashlight required):
- [ ] Wet spots or staining on the roof decking
- [ ] Mold or mildew smell
- [ ] Daylight visible through boards
- [ ] Sagging between rafters
Best times to inspect:
- Late fall — prior to winter freezing and snow loads
- Late spring — after the freeze-thaw cycle of winter
Mark anything suspicious on a simple hand-drawn diagram of your roof. That makes it easier to track problems as they develop and provide clear information to a contractor if professional help becomes necessary.
When to Call a Professional
These 10 tasks do a lot of heavy lifting. But there are times when calling in a pro is the wiser choice.
Call a roofer if:
- After multiple checks, the source of the leak remains completely unclear
- You find large areas of sagging or rot
- Your roof is more than 20 years old
- You discover extensive mold in the attic
- You’re uncomfortable working at height — safety must come before savings
- The repair area is larger than a few square feet
A professional inspection usually runs $150–$400 and may save you from a $10,000+ repair if a major issue goes undetected. According to the Insurance Information Institute, water damage and freezing account for a significant share of homeowner insurance claims each year — making proactive roof care one of the smartest investments you can make.
How Long Do These Fixes Last?
| Repair Type | DIY Lifespan | Professional Lifespan |
|---|---|---|
| Shingle replacement | 10–20 years | 15–25 years |
| Caulk/sealant | 2–5 years | 5–10 years |
| Flashing repair | 5–10 years | 10–20 years |
| Gutter cleaning | Ongoing | Ongoing |
| Moss treatment | 2–3 years | 3–5 years |
| Pipe boot replacement | 5–10 years | 10–15 years |
| Chimney mortar repair | 5–10 years | 10–20 years |
Re-inspect and re-seal any caulked areas every 2–3 years to stay ahead of problems.
FAQs: Roof Leak Fix Questions Answered
Q1: How can I locate the leak in my roof? Check the attic with a flashlight after heavy rain. Look for wet wood, stains or mold. Follow the wet trail upward — that usually leads to the point of entry. Water nearly always travels downhill from where it enters.
Q2: Can I fix a roof leak myself or should I always hire a contractor? Many common leaks are completely DIY-able — cracked caulk, loose shingles, clogged gutters and pipe boot replacements can all be handled with basic tools on an afternoon. Only structural damage, widespread rot or full re-roofing should be left to the pros.
Q3: What’s the best product to quickly stop a roof leak? Roofing cement (also known as roof patch compound) and self-adhesive flashing tape are the quickest repairs. They work in emergency situations and can be applied even in damp conditions. Reliable brands include Henry, Flex Seal and Gardner.
Q4: How much does it cost to fix a roof leak? Simple DIY repairs range from $10 to $100 in materials. Professional repairs can be as low as $150 for minor patching and up to $1,500+ for flashing replacement or partial re-roofing. Detecting leaks early nearly always keeps costs at the lower end.
Q5: How frequently should I check my roof? The general guideline is twice a year — in the fall and spring. You should also inspect after any major storm involving high winds or hail.
Q6: Are roof leaks covered by homeowners insurance? It depends on the cause. Damage from sudden storms is usually covered. Gradual wear and neglect typically is not. Take photos right after a storm to document damage for any insurance claim.
Q7: Can heavy rain make a new roof leak? Yes. Even new roofs can leak if flashing is improperly placed, if a nail went astray, or if wind drives rain at unusual angles. A new roof leak should be reported promptly to the installer.
Wrapping It All Up
A roof leak fix doesn’t have to be expensive or complicated. These 10 tasks cover the most common causes of leaks — and they are all things you can reasonably do yourself.
Here’s a quick summary of what you’ve learned:
- Always check the attic first
- Immediately replace cracked or missing shingles
- Reseal flashing around chimneys and skylights
- Keep gutters clean to prevent edge leaks
- Replace aging pipe boots around vents
- Treat moss and algae before they cause damage
- Reseal skylights with silicone caulk
- Fill small holes with roofing cement
- Inspect and repair your chimney regularly
- Commit to a twice-yearly roof inspection routine
Stay consistent. Catch problems early. And if something feels out of your comfort zone — call a pro. Your roof protects everything inside your home. Give it regular attention, and it will take good care of you for decades.