11 Smart Roof Leak Fix Guide Maintenance Tips from My Roofer
Meta Description: Roof leak fix tips straight from a professional roofer — discover 11 smart maintenance strategies to protect your home, save money, and stop leaks before they start.
11 Smart Roof Leak Fix Guide: Maintenance Tips from My Roofer
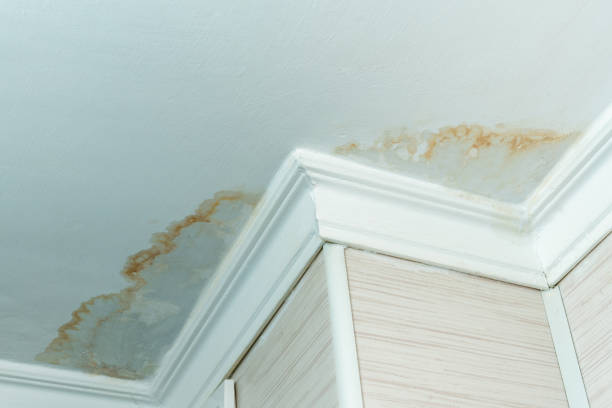
There’s nothing worse than waking up to a water stain on your ceiling.
That drip-drip sound at 2 AM? Pure stress. And by the time you notice it, the damage is often already done.
I’ve had a few roof scares over the years. After the last one — a sneaky leak that ruined part of my attic insulation — I sat down with my roofer for a long, honest conversation. He gave me tips I wish I’d known years earlier.
This guide shares all of it. Whether you’re a first-time homeowner or you’ve owned your place for decades, these 11 roof leak fix tips will help you stay ahead of damage, save money, and feel more confident every time it rains.
Why Roof Leaks Are More Dangerous Than They Look
A small drip doesn’t seem like a big deal.
But here’s the truth: by the time water shows up on your ceiling, it’s already traveled through your roof deck, insulation, and possibly your wall framing.
Roof leaks lead to:
- Mold and mildew growth
- Rotting wood structures
- Damaged electrical wiring
- Higher energy bills from ruined insulation
- Expensive structural repairs
Catching a leak early — or better yet, preventing one — saves you thousands of dollars.
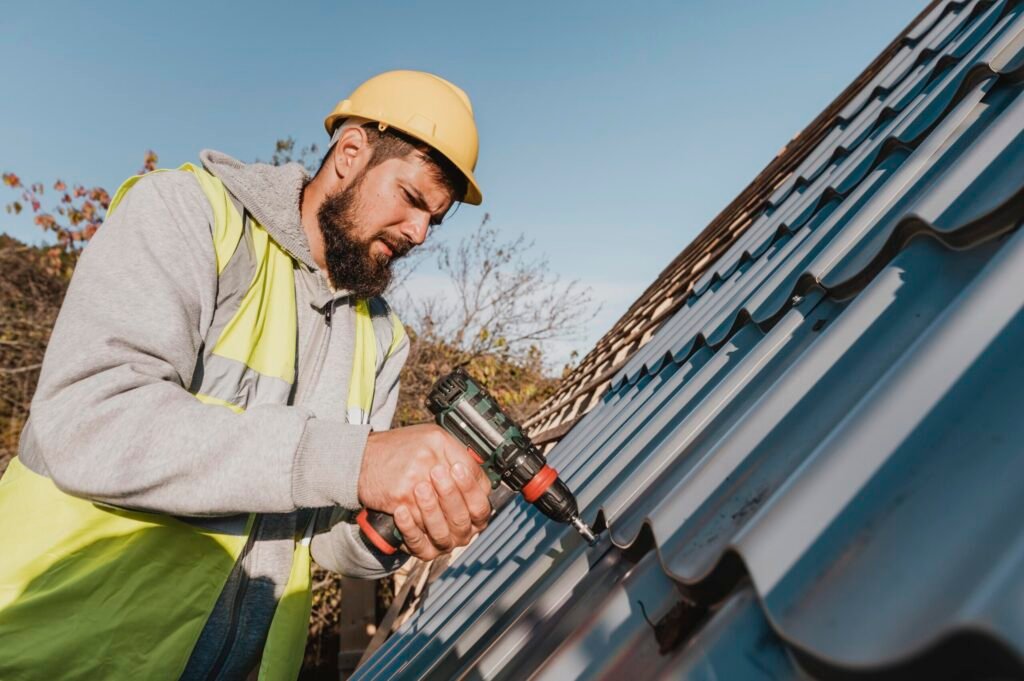
The 11 Smart Roof Leak Fix Tips My Roofer Shared
Tip 1: Do a Roof Inspection Twice a Year (And After Every Major Storm)
My roofer told me this first, and he said it’s the one tip most homeowners skip.
Walk around your house and look up. You don’t always need to climb up there yourself. Use binoculars if needed.
What to look for:
| Warning Sign | What It Could Mean |
|---|---|
| Missing or curled shingles | Wind or age damage |
| Dark streaks or staining | Algae or moisture buildup |
| Sagging roof sections | Water damage or structural weakening |
| Granules in gutters | Shingles wearing down |
| Visible gaps near flashing | Entry points for water |
Check your attic too. Look for light coming through the roof boards, water stains, or damp insulation.
Do this in spring and fall. And always after a heavy storm or strong winds.
Tip 2: Keep Your Gutters Clean and Flowing
Clogged gutters are one of the most common causes of roof leaks — and one of the most overlooked.
When gutters fill with leaves and debris, water backs up. That standing water pushes under your shingles and into your fascia boards.
How often should you clean them?
- Twice a year minimum
- More often if you have trees hanging over your roof
- After major storms
While you’re cleaning, check for:
- Sagging sections that hold water
- Rust spots or cracks
- Loose hangers or separated joints
A clean gutter system moves water away from your roof and foundation. It’s cheap maintenance that prevents expensive repairs.
Tip 3: Check Your Flashing — It’s Where Most Leaks Begin
Flashing is the thin metal strips that seal the gaps around chimneys, skylights, vents, and roof valleys.
My roofer told me that flashing is responsible for the majority of roof leaks he sees. It shifts, cracks, or corrodes over time — and water finds those gaps fast.
What to inspect:
- Look for rust, cracks, or lifted edges
- Check the sealant around the flashing — it dries out and shrinks
- Look for gaps where the flashing meets the chimney or vent pipe
If the sealant looks dried and cracked, re-sealing it is a simple DIY fix with roofing caulk. But if the metal itself is damaged, call a pro.
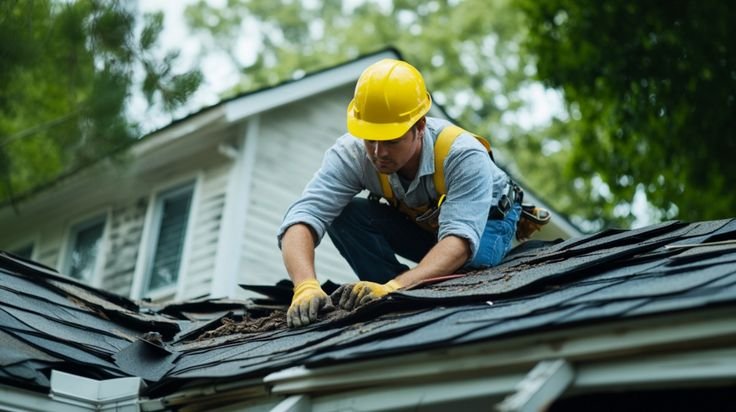
Tip 4: Replace Damaged or Missing Shingles Right Away
Don’t put this one off.
A single missing shingle is an open invitation for water to enter. Shingles protect the underlayment beneath them. Once that’s exposed to rain, rot sets in fast.
Signs a shingle needs replacing:
- It’s missing entirely
- It’s cracked, curled at the edges, or buckled
- It looks darker than the surrounding shingles (moisture)
- It’s covered in moss or algae
Replacing one or two shingles is a manageable DIY job for a careful homeowner. But if you see widespread damage, get a professional assessment.
Pro tip from my roofer: Always keep a few spare shingles from your original installation. Color-matching replacement shingles years later can be surprisingly difficult.
Tip 5: Check Around Skylights and Chimneys Every Season
These two spots are notorious leak zones.
Skylights have rubber seals and metal flashing that degrade over time. Chimneys go through constant heating and cooling cycles that crack the mortar and shift the flashing.
Skylight checklist:
- Look for condensation between the panes (seal failure)
- Check the rubber gasket around the frame
- Inspect the flashing on all four sides
Chimney checklist:
- Look for cracked or missing mortar between bricks (tuckpointing)
- Check the chimney cap — it keeps rain out of the flue
- Inspect the flashing at the base where it meets the roof
Both of these are worth checking every single season. A small crack in fall can turn into a serious leak by spring.
Tip 6: Don’t Let Moss and Algae Sit on Your Roof
That green or black stuff growing on your shingles isn’t just ugly.
Moss holds moisture against your roof. Over time, it works its way under shingles and causes them to lift. Algae creates dark streaking and breaks down shingle materials.
How to handle it:
- Use a zinc sulfate or copper sulfate treatment (safe for most shingles)
- Apply a commercial roof cleaner designed for moss and algae
- Avoid pressure washing — it strips the protective granules from shingles
Prevention tip: Install zinc or copper strips near the roof ridge. When it rains, trace amounts of metal wash down the roof and naturally prevent growth.
Tip 7: Seal All Roof Penetrations Properly
Every pipe, vent, and wire that passes through your roof is a potential leak point.
This includes:
- Plumbing vent pipes
- Electrical conduits
- HVAC vents and exhaust fans
- Satellite dish mounts
Each of these should be sealed with a rubber boot (pipe flashing) or roofing sealant. These boots crack and harden over years of sun and temperature changes.
My roofer showed me a vent pipe on my own roof where the rubber boot had split completely — I had no idea until he pointed it out. Water had been entering slowly for months.
Check all penetrations annually. Look for cracked rubber, separated sealant, and rust around metal collars.
Tip 8: Make Sure Your Attic Has Proper Ventilation
This one surprised me when my roofer explained it.
Poor attic ventilation doesn’t just cause heat buildup in summer. It creates moisture problems year-round that lead to rot, mold, and shingle damage from the inside out.
How poor ventilation causes leaks:
- Warm, moist air from inside the house rises into the attic
- It hits cold roof decking in winter and condenses
- That moisture soaks into wood, causing rot and eventually structural failure
Signs your attic ventilation is poor:
| Sign | Possible Cause |
|---|---|
| Ice dams forming on roof edges | Heat escaping through roof, freezing at eaves |
| Mold or mildew in attic | Trapped moisture with nowhere to escape |
| Shingles wearing out too fast | Excess heat baking them from below |
| High cooling bills in summer | Heat buildup from inadequate airflow |
The fix usually involves adding ridge vents, soffit vents, or attic fans. It’s not glamorous work — but it makes a real difference.
According to the U.S. Department of Energy, proper attic insulation and ventilation can significantly reduce energy costs and prevent moisture-related damage throughout the year.
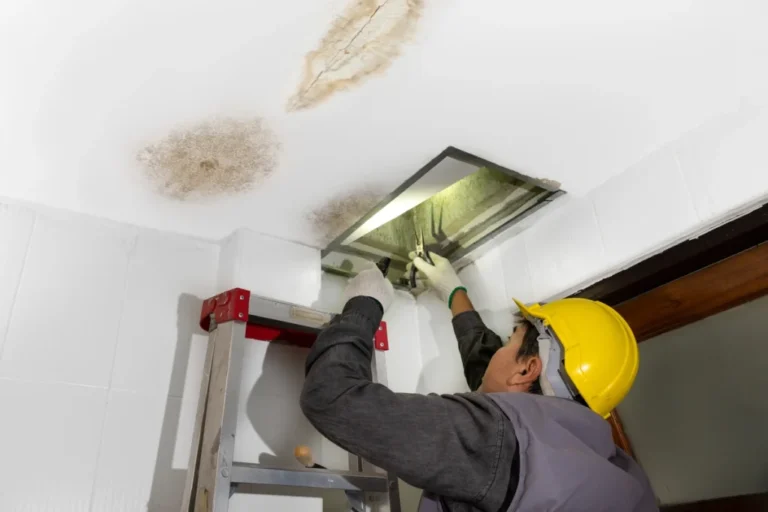
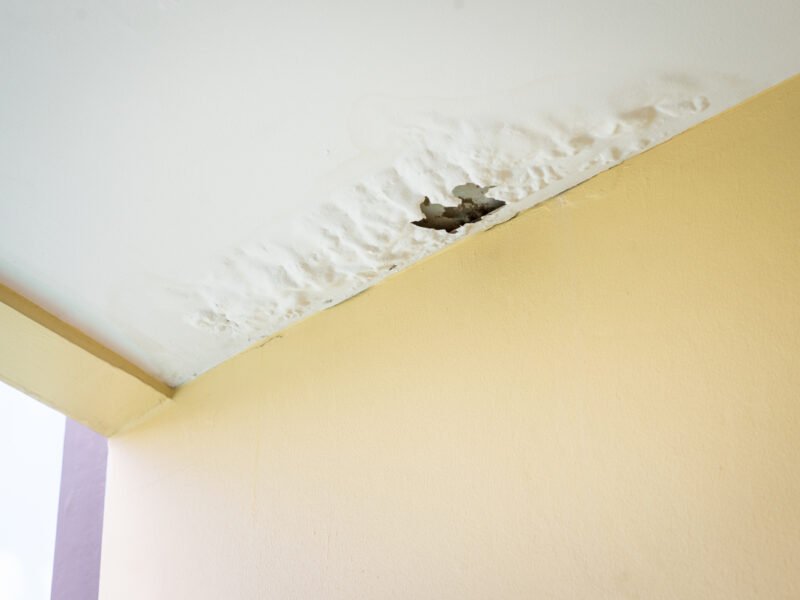
Tip 9: Act Fast When You Spot a Leak Inside
If you see a water stain on your ceiling, don’t wait and watch.
That stain represents water that has already soaked through multiple layers of your home. The longer you wait, the more damage spreads.
Immediate steps:
- Place a bucket to catch drips
- Use a screwdriver to poke a small hole in the center of the water bubble (if there is one) — this releases pressure and prevents a larger ceiling collapse
- Photograph everything for insurance purposes
- Go up to the attic and trace where the water is coming from
- Apply a temporary patch if you can safely access the roof
Finding the actual source: Water travels. The stain on your ceiling might be 10 feet away from where the leak actually enters. Trace the water path in the attic back to its origin point.
For more detailed step-by-step repair walkthroughs and product recommendations, visit Roof Leak Fix Guide — a helpful resource built specifically for homeowners dealing with roof leak issues.
Tip 10: Hire a Professional Roofer for Annual Inspections
I know — hiring someone feels like an unnecessary expense when nothing seems wrong.
But my roofer showed me things during his inspection that I never would have caught on my own: a small crack in my chimney cap, a nail popping through a shingle, and a section of flashing that had started to lift.
None of those looked serious from the ground. But each one was a leak waiting to happen.
What a professional inspection includes:
- Full shingle-by-shingle check
- Flashing inspection at all transition points
- Gutter and downspout review
- Attic moisture and ventilation check
- Documentation of current roof condition
The cost of an inspection is typically far less than one emergency repair call. And if you’re buying or selling a home, a roof inspection is non-negotiable.
Tip 11: Know When It’s Time to Replace, Not Repair
This is the tip my roofer saved for last — and maybe the most important one.
There comes a point where patching doesn’t make financial sense anymore. If your roof is old, covered in repairs, and leaking in multiple spots, you’re spending money to delay the inevitable.
Average roof lifespan by material:
| Roof Material | Average Lifespan |
|---|---|
| Asphalt shingles (3-tab) | 15–20 years |
| Architectural shingles | 25–30 years |
| Metal roofing | 40–70 years |
| Tile (clay or concrete) | 50+ years |
| Wood shake | 20–25 years |
| Slate | 75–100+ years |
Signs it’s time to replace:
- Your roof is near or past its expected lifespan
- You’re making repairs every year
- More than 30% of shingles are damaged
- There’s widespread sagging or soft spots
- Granule loss has left shingles thin and bare
A new roof is a major investment. But compared to the damage an aging, leaking roof can do to your walls, ceilings, insulation, and foundation — it often pays for itself.
Quick Roof Maintenance Calendar
Staying on schedule makes everything easier. Here’s a simple year-round plan:
| Season | Key Task |
|---|---|
| Spring | Full visual inspection after winter; check flashing and chimney; clean gutters |
| Summer | Check attic ventilation; look for algae or moss growth; inspect skylights |
| Fall | Clean gutters before leaves pile up; check shingles before winter; reseal any gaps |
| Winter | Watch for ice dams; check attic for condensation; don’t let snow pile up near vents |
DIY vs. Professional: When to Call a Roofer
Some tasks are safe and simple for a careful homeowner. Others require a trained pro.
| Task | DIY Friendly? |
|---|---|
| Visual inspection from ground | ✅ Yes |
| Cleaning gutters | ✅ Yes (with proper ladder safety) |
| Replacing 1–2 shingles | ⚠️ Maybe (if comfortable on roof) |
| Re-sealing flashing | ⚠️ Maybe (simple sealant jobs) |
| Full flashing replacement | ❌ Call a pro |
| Chimney repair or tuckpointing | ❌ Call a pro |
| Structural roof repair | ❌ Call a pro |
| Full roof replacement | ❌ Call a pro |
When in doubt, err on the side of caution. Falls from roofs are one of the leading causes of home-related injuries. No DIY savings are worth that risk.
How Much Do Common Roof Repairs Cost?
Knowing the numbers helps you budget and plan ahead.
| Repair Type | Estimated Cost Range |
|---|---|
| Single shingle replacement | $150–$400 |
| Flashing repair or replacement | $200–$600 |
| Gutter cleaning | $100–$250 |
| Chimney cap replacement | $200–$500 |
| Skylight re-sealing | $150–$400 |
| Moss/algae treatment | $150–$600 |
| Roof vent replacement | $150–$500 |
| Emergency leak repair (temporary) | $300–$1,500 |
| Full roof replacement (asphalt) | $8,000–$20,000+ |
Costs vary by location, roof pitch, and material. Always get at least two to three quotes before committing to a major repair.
Conclusion: Stay Ahead of the Leak
Roof problems don’t announce themselves.
They build quietly — a small crack here, a lifted shingle there, a bit of moss that holds just enough moisture. Then one rainy night, the ceiling starts dripping.
The good news? Most roof leaks are preventable.
With twice-yearly inspections, clean gutters, sealed penetrations, and a professional eye on your roof once a year, you can catch 90% of problems before they become disasters.
My roofer put it simply: “A roof is only as good as the attention you give it.”
Take these 11 roof leak fix tips seriously, stay on a maintenance schedule, and your roof will do its job for decades.
Frequently Asked Questions (FAQs)
Q1: How do I find where a roof leak is coming from? Start in your attic with a flashlight. Look for water stains, dark spots, or damp insulation. Trace the moisture back toward the roof — the entry point is often uphill from where the water shows up inside.
Q2: Can I fix a roof leak myself? Minor repairs like replacing one or two shingles or re-sealing flashing with roofing caulk are manageable DIY jobs. But anything involving structural damage, extensive flashing replacement, or work on a steep or high roof should be left to a licensed professional.
Q3: How long does a roof repair last? A properly done shingle repair can last 10–15 years or more. Sealant repairs typically last 5–10 years before they need to be redone. The quality of materials and workmanship matters a lot.
Q4: What’s the best time of year to repair a roof? Late spring through early fall is ideal. Roofing materials like asphalt shingles need warm temperatures to seal properly. Avoid repairs in freezing temperatures if possible.
Q5: How often should I have my roof professionally inspected? Once a year is the standard recommendation. Add an extra inspection after any major storm, hail event, or if you notice anything unusual like leaks, stains, or visible damage.
Q6: Does homeowner’s insurance cover roof leaks? It depends on the cause. Sudden damage from a storm or falling tree is usually covered. Gradual damage from neglect or age typically is not. Document all damage with photos and contact your insurer promptly after any storm event.
Q7: What causes ice dams and are they a sign of roof problems? Ice dams form when heat escapes through your roof, melts snow, and the water refreezes at the cold eaves. They’re a sign of poor attic insulation or ventilation — not necessarily shingle damage. But ice dams can cause serious leaks if left unchecked.