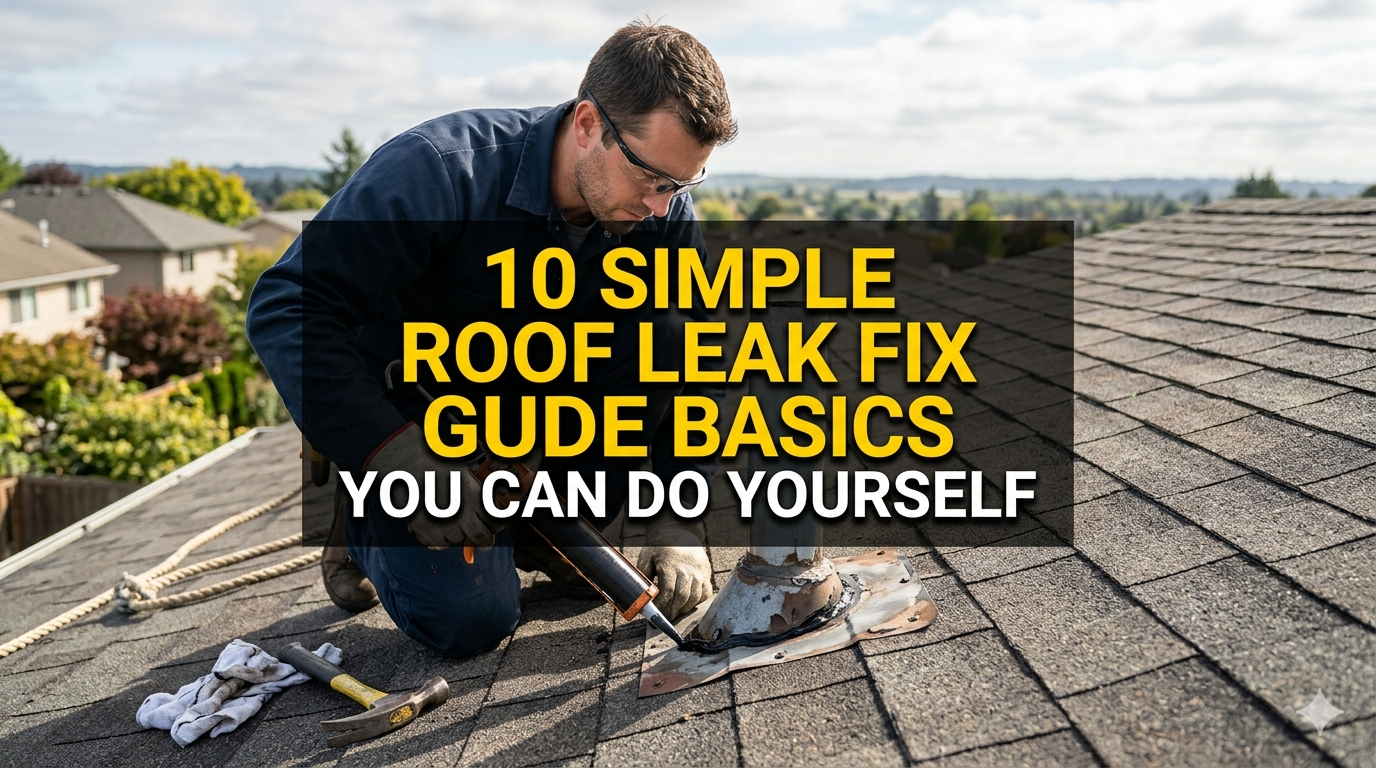
10 Simple Roof Leak Fix Guide Basics You Can Do Yourself
Simple Guide To 10 Roof Leak Fixes You Can Do Them Yourself
Meta Description: Roof leak fix for every home — 10 easy, cost-saving DIY repairs to quickly stop leaks and shield your house from water damage.
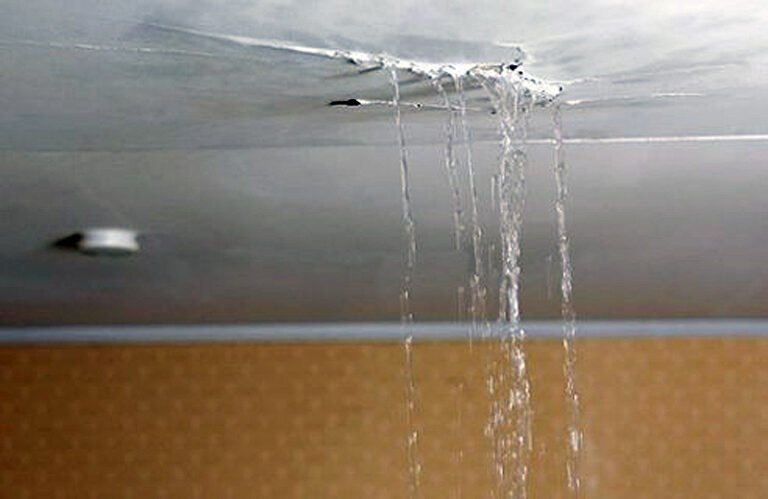
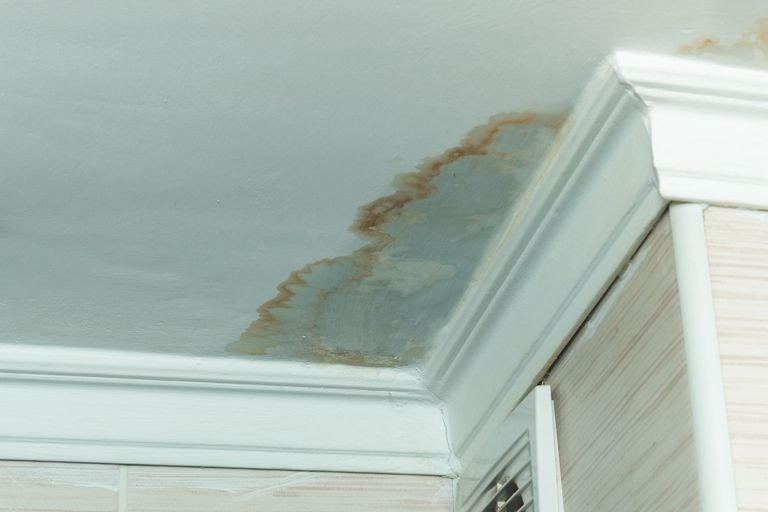
Your Roof Is Leaking — Don’t Panic Just Yet
A leaky ceiling is every homeowner’s nightmare. But here’s some good news: Not every roof leak requires an expert. So many leaks are tiny, findable and fixable — if you know what you’re doing.
This roof leak repair guide walks you through 10 practical, beginner-friendly basics any handy person can take on themselves. No fancy tools. No roofing degree. No fancy footwork, no big secret, just simply put one foot in front of the other with clear steps, smart tips and a little confidence.
Whether you’ve discovered a water stain on your ceiling or seen missing shingles after a storm, this guide should help.
Where Roof Leaks Come From in the First Place
It’s helpful to know what makes roofs leak before you go fixing them.
Roofs endure punishment all year long — rain, wind, snow, heat and rays from the sun wear them down over time. A tiny crack or a loose shingle can provide access to enough water that can lead to significant damage inside your home.
Common causes of roof leaks include:
| Cause | How It Leads to a Leak |
|---|---|
| Damaged or Missing Shingles | Exposes the underlayer to rain |
| Cracked Flashing | Allows water to seep around chimneys and vents |
| Clogged Gutters | Forces water back under roof edges |
| Worn Pipe Boot Seals | Creates gaps around plumbing vents |
| Ice Dams | Traps water and pushes it under shingles |
| Improper Roof Valleys | Water pools and seeps through joints |
| Old or Cracked Sealant | Breaks down over time, losing waterproofing |
Understanding the cause allows you to address the correct issue on the first attempt.
Safety First — Before You Approach Anything
This should be mentioned first and foremost: roof work can be hazardous.
You don’t have to be reckless to do this yourself. You just have to be smart about it.
General safety precautions to take each and every time:
- Never go on a wet or icy roof
- Make sure you use a strong, correctly angled ladder
- Wear shoes with rubber soles and good grip
- Whenever possible, work with a partner
- Steep pitches above 6:12 should be avoided unless you are experienced
- Wear a roof safety harness if your roof is too high or the slope is steep
If you don’t feel comfortable going up, hire a pro. No minor repair is worth a major injury.
Tools and Materials You’ll Need
Most of these can be found at your local hardware store for a total cost of under $50.
Basic toolkit for DIY roof repairs:
- Roofing nails
- Roofing caulk or sealant
- Roof cement (asphalt-based)
- Replacement shingles (match to existing)
- Pry bar or flat bar
- Hammer or nail gun
- Utility knife
- Wire brush
- Putty knife
- Ladder
- Chalk or marker (to indicate problem areas)
- Waterproof flashing tape
Having these ready beforehand saves you from going up and down multiple times.
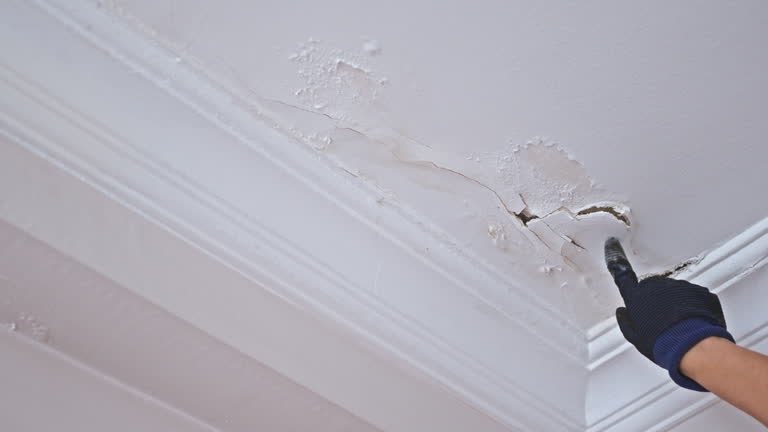
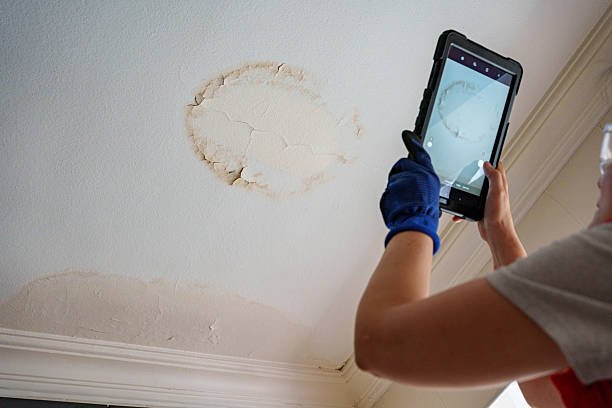
How to Locate the Source of a Roof Leak
Discovering the leak is often more challenging than patching it up. Water travels. A stain on your ceiling might not be directly beneath the real entry point.
Step 1: During or after rain, head up into your attic with a flashlight. Check for water trails, dark spots or wet insulation.
Step 2: Follow the line of water up and toward the peak of the roof. The entry is often higher than where you see the damage.
Step 3: Make a mark on the inside, then go outside and find the location on the roof surface.
Step 4: If it’s dry, have someone use a garden hose to wet sections of the roof as you look on from inside. Start low and keep working your way up until you find it.
This detective work prevents you from performing repairs in the wrong location.
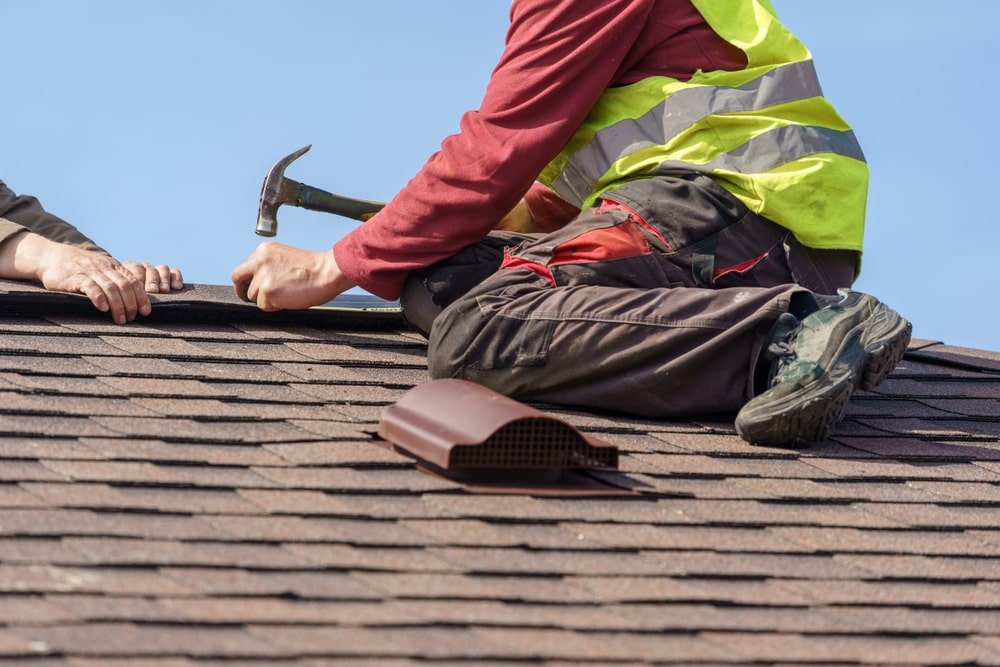
Fix #1 — Repairing Missing or Damaged Shingles
This is one of the main reasons a roof leaks — and also one of the simplest to repair.
How to Spot a Bad Shingle
Look for shingles that are:
- Cracked or split
- Curling at the edges
- Completely missing
- Covered in moss or dark streaks (sign of moisture damage)
How to Replace a Shingle
- Gently raise the edges of the neighboring shingles
- Using a pry bar, remove the nails holding the damaged shingle
- Slide out the old shingle
- Insert the new shingle, making sure it lines up with the row
- Nail down with roofing nails along the top edge
- Place a small bead of roofing sealant underneath the overlapping edge
Tip: When your roof is installed, buy a handful of matching shingles to have on hand. Shingle colors fade through the years, so finding a match can be difficult down the road.
Fix #2 — Seal Up Cracked or Lifted Shingles
Not always is a shingle missing — it may be cracked or it may have begun to lift. That’s an easier fix.
For a crack: Squirt roofing sealant directly into the crack through a caulk gun. Smooth it with a putty knife. Press the shingle down firmly.
For a lifted shingle: Apply roofing cement underneath the raised section. Press it down flat and hold it there. Nail the edges if necessary, then cover the nail heads with sealant.
If done properly, these little fixes can last years.
Fix #3 — Repair Roof Flashing That Is Leaking
Flashing is thin strips of metal (typically aluminum or galvanized steel) laid around chimneys, skylights, vents and roof valleys. It’s supposed to channel water away from joints — but over time it cracks, rusts or pulls away.
Signs That Your Flashing Is the Issue
- Visible cracks or gaps in the metal
- Rust-colored stains around chimney or vent
- Water damage stains on walls near those areas within the home
How to Fix It
For minor cracks or gaps: Apply roofing caulk or flashing sealant to the damaged area. If there is rust or debris on the surface, first clean it away with a wire brush. Let it dry completely.
For pulled-away flashing: Wedge it back in place and fasten it with roofing nails. Apply roofing cement over both the nails and edges.
For seriously rusted or bent flashing: Replace it completely. Cut new flashing to fit, slide it under the shingles and seal the edges. It requires more work, but it lasts much longer.
Fix #4 — Reseal Around Vent Pipes
Around every pipe that comes through your roof there is a rubber boot (also known as a pipe boot or pipe collar). These boots will crack and dry out with time — especially in hot climates.
How to Know if a Pipe Boot Is Your Problem
Climb up into the attic and focus on inspecting around any plumbing vents. If you spot daylight, moisture or water stains around those pipes, the boot is probably worn out.
How to Fix It
Option A — Quick Fix: Run a heavy bead of roofing sealant around the bottom of the boot where it meets the pipe and where it meets the roof. This buys time, but is not a permanent solution.
Option B — Full Replacement: This is the sensible choice. Remove the old boot by pulling back surrounding shingles, unscrew the old collar, and slide a new rubber boot over the pipe. Nail it down, seal the edges, and replace the shingles.
Replacement boots are about $10–$20 at any hardware store.
Fix #5 — Clear and Fix Clogged Gutters
This one doesn’t even require you to get on the roof itself. But it’s just as important.
When gutters fill with leaves and debris, water backs up. That backed-up water can seep under the shingles at your roof’s edge, causing fascia rot and interior leaks.
How to Clean and Maintain Your Gutters
- Use a ladder to safely access the gutters
- Remove debris by hand or with a gutter scoop
- Flush the gutters with a garden hose
- Check that your downspout drains freely
- Watch for sagging sections and re-secure with gutter hangers
- Check the drip edge under the roof edge shingles for damage
Clean at least twice a year — once in late spring and once in late fall after leaves have dropped.
Fix #6 — Patch a Flat Roof Blister or Crack
If you have a flat or low-slope roof, whether modified bitumen, EPDM rubber, or built-up, leaks show differently. You’ll see blisters, cracks or open seams.
How to Patch a Flat Roof
For blisters:
- Let the area dry completely
- Cut an X in the blister with a utility knife
- Press the flaps down and let them dry
- Apply roofing cement under the flaps
- Press them flat and cover with a patch of matching material
- Use roofing cement to seal all edges
For cracks or open seams: Cover the crack with roofing sealant or self-adhering flashing tape. Press down firmly and smooth the edges. For larger cracks, place a peel-and-stick roofing patch to cover.
Fix #7 — How to Handle Skylight Leaks
Skylights have a reputation for leaking — almost never because the skylight itself is faulty, but because the seal surrounding it has failed.
Where Skylight Leaks Come From
- Caulk around the frame that is cracked or dried out
- Flashing on one of the four sides is damaged
- Condensation forming inside (not a true roof leak, but looks like one)
How to Fix It
- Remove debris from around the skylight frame
- Scrape out old cracked caulk with a putty knife
- Run a new bead of clear silicone or roofing caulk all the way around
- Review and reseal the flashing on all four sides
- If the frame itself has cracks or damage, replacement of the skylight could be necessary
For condensation issues: increase ventilation in your attic space and confirm the integrity of any internal glazing in the skylight.
Fix #8 — Seal Chimney Leaks
Chimneys have several possible entry points for leaks — the flashing, the mortar, the crown and the cap. Any one of these can allow water in.
Chimney Leak Checklist
| Area | What to Look For | Repair |
|---|---|---|
| Chimney cap | Missing or cracked cap | Replace the cap |
| Chimney crown | Cracks in the concrete top | Apply crown sealant |
| Mortar joints | Gaps or crumbling mortar | Repoint with fresh mortar |
| Step flashing | Gaps or rust | Reseal or replace flashing |
| Counter flashing | Pulled away from chimney | Re-embed and seal |
A brush-on formula of chimney crown sealant is available for easy DIY application. It’s flexible with temperature changes and lasts for years.
Fix #9 — Repair Roof Valleys
A roof valley is the point where two slopes of a roof meet. Water from either side flows down into this channel — so it carries a heavy water load whenever it rains.
Valleys are covered with special flashing or a thick layer of shingles. Over time, those linings crack, split or wear through.
Signs of Valley Damage
- Water stains running along an interior ceiling in a diagonal line
- Bent or cracked valley lining on the roof
- Shingles separating from the valley center
How to Fix a Leaking Valley
For small cracks: Spread roofing cement along the damaged area and smooth it down.
For larger damage: You may have to remove the shingles on either side, install new valley flashing (W-metal or open valley flashing) and then relay the shingles. This is a more complicated repair, but still DIY-friendly if you go slowly.
For a deeper dive into all these repairs and more expert tips, visit Roof Leak Fix Guide — a complete resource for homeowners tackling roof repairs on their own.
Fix #10 — Use Roof Sealant as a Temporary Fix
Sometimes you have to stop the leak right now — before you can make a proper repair. That’s where roof sealant or roof patch spray can help.
These can be purchased at hardware stores and applied even in damp conditions. They’re not permanent fixes, but they give you time.
How to Use Roof Sealant
- Clear the area of debris
- Shake the can or open the tube
- Apply a thick, even coat over the damaged area
- Stretch the sealant several inches beyond the visible damage on all sides
- Allow to cure completely prior to rain (refer to product label for cure time)
Good temporary options include:
- Flex Seal spray or liquid
- Henry 208R wet patch roofing cement
- Gorilla Waterproof Patch & Seal tape
Weather permitting, always follow up with a proper fix.
When to Call a Professional
DIY repairs are great for small, easily reachable problems. But some cases require a licensed roofer.
Call a professional if:
- The leak is massive or extensive
- You notice sagging or soft areas in the roof deck
- Your roof is over 20 years old
- The damage is at the ridge cap or structural components
- You’re not comfortable working at height
- Repeated fixes haven’t stopped the leak
Seeking professional help doesn’t mean you are a failure. It means you are smart enough to know your limits.
According to the National Roofing Contractors Association (NRCA), homeowners should have their roofs professionally inspected at least once every two to three years — or after any major storm — to catch damage before it becomes a costly problem.
Roof Leak Fix Cost Comparison
| Repair Type | DIY Cost | Professional Cost |
|---|---|---|
| Replace 1–3 shingles | $10–$30 | $150–$400 |
| Re-seal flashing | $5–$15 | $200–$500 |
| Replace pipe boot | $10–$20 | $150–$300 |
| Gutter cleaning | $0–$20 | $100–$250 |
| Skylight re-seal | $10–$25 | $300–$600 |
| Flat roof patch | $20–$50 | $200–$650 |
| Chimney crown repair | $15–$40 | $200–$800 |
DIY savings are substantial — if repairs are executed properly. A botched job could require costly repairs down the line.
Seasonal Roof Maintenance Checklist
Regular roof inspections are the best prevention against emergency repairs.
Spring:
- Look for winter damage — cracked shingles, ice dam damage, shifted flashing
- Clean gutters after spring pollen and debris
- Check attic for evidence of moisture or mold
Summer:
- Inspect for UV-damaged or blistered shingles
- Check skylights and vent seals
Fall:
- Clean gutters before winter
- Check flashing and reseal if necessary
- Check chimney cap and crown
Winter:
- Look for ice dams at the edge of roofs
- If necessary, use a roof rake to remove heavy snow loads
- Monitor attic for condensation
A visual inspection, done twice a year and taking just 20 minutes, can save you thousands.
FAQs — Roof Leak Fix Guide
Q: How can I tell whether my roof is leaking or if it’s just condensation? A: Condensation typically occurs near cold surfaces, such as windows or skylights, and dissipates when humidity levels drop. A real roof leak creates an expanding water stain or drip that shows up during rain or after it.
Q: Can a roof leak be repaired from the inside? A: Temporarily, yes. You can apply roofing cement or waterproof tape on the underside of the roof deck from inside the attic. But that is a temporary solution — exterior damage needs to be addressed as well.
Q: How long does roofing caulk last? A: Most roofing caulks, when properly applied, should last 10–20 years. They break down more quickly in sweltering heat, or if applied when it’s cold. Always use a caulk rated for outdoor roofing use.
Q: Is my roof safe to walk on? A: It depends on the pitch and material. Asphalt shingle roofs with a moderate slope are usually walkable in rubber-soled shoes. Roofs made of tile or metal and those with a steep angle are more risky. Never walk on a wet roof.
Q: When is the best time of year to fix a roof leak? A: Late spring through early fall is ideal — dry weather, mild temperatures, and no frost. Sealants and cements set best when temperatures are between 50°F and 90°F (10°C–32°C).
Q: What is the cost of repairing a small roof leak yourself? A: Most small DIY repairs use less than $50 in materials. The trick is spotting the problem early, before it leads to water damage in your ceilings, walls or insulation.
Q: Can a roof leak lead to mold? A: Yes. Even a slow, small leak can give mold what it needs to thrive in terms of moisture within 24–48 hours. If your attic insulation is wet or you smell mustiness, examine closely and dry everything out as quickly as possible.
The Bottom Line — You Can Do This
Most leaks boil down to a few fixable problems — an errant shingle, a broken seal, clogged gutters or worn flashing.
This roof leak fix guide provided 10 easy repairs you can do yourself, without any specialized training or expensive tools. The key is acting fast. Unchecked, a small leak becomes a big problem.
Twice a year, inspect your roof. Take care of small issues before they become great big problems. And when something feels out of your depth, don’t hesitate to call for help.
Your home is worth protecting — and now you know how.