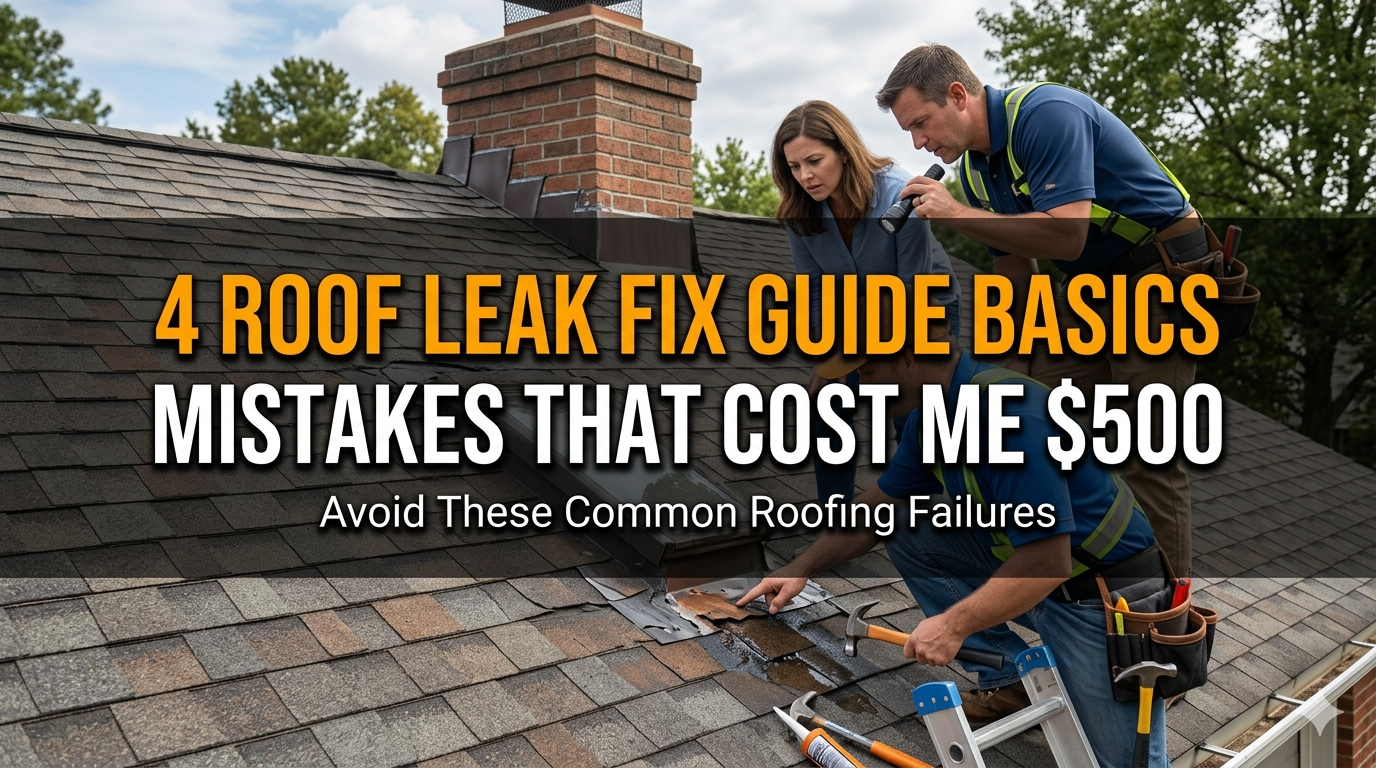
4 Roof Leak Fix Guide Basics Mistakes That Cost Me $500
Meta Description: 4 Roof Leak Fix Guide basics mistakes that cost me $500 — learn what I did wrong so you can save money and fix your roof leak the right way.
4 Roof Leak Fix Guide Basics That Cost Me $500 In Mistakes
I thought a roof leak would be easy to fix.
Get yourself some caulk, slop it on and you’re done. Right?
Wrong. Very wrong.
That single moment of overconfidence cost me $500 — a lesson I never forgot. And honestly? The majority of my mistakes weren’t about being careless. They were about not understanding the fundamentals.
This guide is for you if you’re facing a leaking ceiling or a soggy attic. I’m going to point out the four major roof leak fix mistakes I made — and, more importantly, how to avoid them.
By the end of this article, you’ll know exactly what not to do, what to do instead, and how to deal with a roof leak the proper way without wasting hundreds of dollars.
My Roof Leak Story: Why It Got Expensive Fast
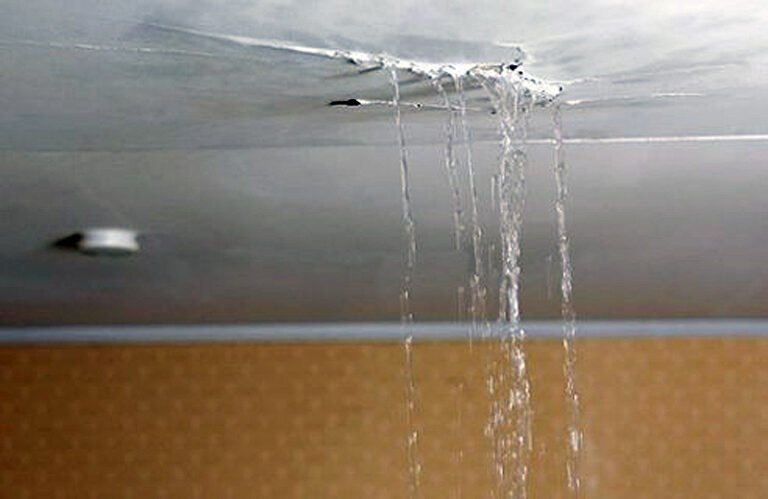
It began as a tiny brown stain on my bedroom ceiling.
It wasn’t even leaking — just a slight discoloration after heavy rainfall. I ignored it for two weeks. Then, one morning, I awoke to a slow drip on my floor.
I climbed up, identified what I assumed was the issue, whipped out a tube of roofing caulk and considered it done. Three deluges later, the leak returned — worse than ever.
Long story short, I called a professional roofer who discovered four distinct problems. Two of those were caused by my own “fixes.”
Total bill: $500+.
Allow me to explain each misstep I took.
Mistake #1 — I Attempted to Repair the Leak From Inside
The Indoor Patching That Seems Like It Works (But Doesn’t)
When water is trickling onto your floor from the ceiling, your first response is to stop it — from within. That sounds reasonable on its face. You see the problem. You patch the problem. Done.
But here’s the truth: the leak you see on the ceiling is nearly never where a leak starts on the roof.
Water travels. It can seep in through a cracked shingle, run along a rafter five or six feet and then drip down somewhere entirely different. Patching up the ceiling merely conceals the evidence — it does nothing to close off the actual entry point.
I used hydraulic cement on the interior of my attic where I noticed moisture. It dried, looked solid — I thought I’d nailed it. What really happened is the water took a new route around my patch and seeped into the insulation. When the roofer finally showed up, I had wet, moldy insulation to replace.
What You Should Do Instead
Whenever possible, repair a roof leak from the outside. Here’s a simple way to trace where the leak actually comes from:
| Step | Action | Why It Matters |
|---|---|---|
| 1 | Go into the attic on a sunny day | Sunlight bursting through gaps reveals entry points |
| 2 | Look for water stains on rafters | Stains flow downward — track them up |
| 3 | Measure the stain from a wall | Helps you find the corresponding spot on the roof |
| 4 | Check the roof surface directly above | Look for cracked, curled or missing shingles |
| 5 | Check flashing around vents and chimneys | Flashing failures are the #1 cause of leaks |
The fix always begins at the roof surface — not below it on the ceiling.
Mistake #2 — I Used the Wrong Sealant in the Wrong Place
There Are Different Types of Roof Sealants
Walk into any hardware store and you’ll find entire walls of caulks, sealants and adhesives. I picked up the first tube that said “roof sealant” and hoped for the best.
It was not fine.
Different types of sealants are designed for different materials and conditions. Picking the wrong one can actually make things worse — it might not adhere properly, crack under heat, or repel the substances you’re trying to join together.
Here’s a breakdown of common roof sealants and where they really perform:
| Sealant Type | Best Used For | Avoid Using On |
|---|---|---|
| Silicone | Metal flashing, gutters, non-porous surfaces | Shingles, wood, painted surfaces |
| Polyurethane | Shingles, wood decking, high-traffic areas | Metal joints (too rigid) |
| Butyl Rubber | Flashings, seams, around vents | Ultra-high UV exposure areas |
| Asphalt-Based | Shingle repairs, flat roofs | Metal or rubber roofing |
| EPDM Liquid | Rubber/flat roofs only | Pitched shingle roofs |
I used a silicone-based sealant on cracked asphalt shingles. Silicone doesn’t adhere well to asphalt. It lasted about three weeks and then peeled right off during the next heat wave.
How to Pick the Right Product
Here are three things to do before purchasing any sealant:
First, determine what type of roof you have — asphalt shingle, metal, flat/rubber, tile or wood shake.
Second, read the label carefully. It should list compatible surfaces. If your material is not listed, put it back.
Third, check the temperature rating. If you’re in an area with very hot summers or freezing winters, your sealant needs to handle that range without cracking or becoming brittle.
Doing this one thing could have saved me about $80 in wasted materials and a second service call.
Mistake #3 — I Did Not Clean the Surface Before Applying Any Fix
Why Everything Goes Wrong With a Dirty Roof Surface
This was probably the most boring mistake on this list — but also the most expensive one for me.
Before any patch, tape, sealant or coating is applied, the surface must be clean and dry. Completely clean. No dirt, no moss, no algae, no old sealant residue, no wet spots.
I did a quick rub with an old rag, waited 20 minutes and applied my patch. What I didn’t realize:
- There was a thin film of algae on the shingles that I couldn’t see clearly from the ground
- The surface was still slightly wet from the rain the night before
- Old dried sealant from a previous owner was still partially attached beneath where I was patching
The result? My patch never fully bonded. It seemed solid but had tiny air gaps beneath. Water seeped in through capillary action — that phenomenon where liquid gets pulled into small spaces against gravity — and made the damage worse.
The Proper Way to Prepare a Roof Surface
Follow this prep process before you even touch a sealant or patch material:
Step 1 — Clear the Area Remove leaves, debris and loose granules. Use a soft-bristle brush, not a metal one. Metal bristles can scratch and damage shingles.
Step 2 — Eliminate Moss or Algae If you see any green or black biological growth, treat it with a diluted bleach solution (one part bleach to three parts water) or a commercial roof cleaner. Let it sit for 15 minutes, then rinse.
Step 3 — Remove Old Sealant Use a putty knife or plastic scraper to remove old cracked caulk or dried sealant. Do not layer new sealant over old — it won’t hold.
Step 4 — Let It Dry Completely Wait a minimum of 24–48 hours after rain before any repair. In a humid climate, wait even longer. The surface needs to be bone dry.
Step 5 — Apply Primer if Needed Some sealants — specifically on metal or rubber roofing — require a bonding primer first. Check the product instructions.
Proper prep takes time. But it’s the difference between a fix that lasts five years and one that breaks down in five weeks.
Mistake #4 — I Fixed the Symptom and Not the Real Problem
The Danger of Surface-Level Thinking
This was my most costly mistake. Everything else I did wrong cost me time and materials. This one cost me structural damage.
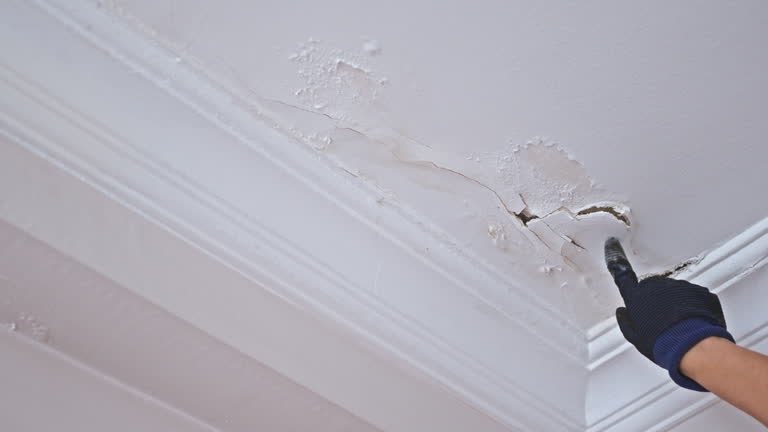
When I discovered a cracked area close to my chimney, I sealed it and left it at that. What I didn’t do was check the flashing around the chimney, inspect the surrounding shingles for wear, or look at the roof deck underneath the damage.
The real problem wasn’t the crack. The real issue was that the flashing had pulled away from the chimney wall by nearly half an inch — likely from years of expansion and contraction. Water had been seeping in for months. The roof deck underneath had soft spots, and one small area was beginning to rot.
The roofer had to remove shingles, replace a 3-foot section of decking, re-flash the chimney and reshingle. That accounted for the majority of my $500 bill.
Had I looked at the bigger picture rather than just applying a quick fix to the visible crack, I might have caught the flashing issue early and corrected it for $30 worth of flashing tape and a tube of sealant.
How to Think Like a Roofer (Not Just a Patcher)
When you find a problem on your roof, train yourself to look one level deeper. Here’s a checklist to use every time:
Visible Damage Checklist:
- ✅ Found a cracked or missing shingle? Check the 3 shingles on either side for granule loss or curling.
- ✅ Found a gap near a vent pipe? Inspect the rubber boot around the base — it hardens and cracks with age.
- ✅ Found a wet spot in the attic? Trace it all the way up to the roof surface before doing anything.
- ✅ Found lifted flashing? Check whether the underlying caulk has also failed — they typically fail together.
- ✅ Found soft spots on the roof? That’s rotted decking. Shingles alone won’t fix it — the deck needs replacement.
The goal isn’t just to stop the drip. The goal is to fix the reason the drip started.
What I Wish I’d Known Before Getting Started: Roof Leaks 101
Since this article is built around the roof leak fix guide basics, let’s make sure the fundamentals are clear before you pick up a caulk gun. For more in-depth guides, tips and product recommendations, Roof Leak Fix Guide is a great resource to bookmark.
Where Roof Leaks Actually Come From
Most roof leaks don’t start right in the center of a big, flat shingle field. They nearly always come from transition points — places where two surfaces meet or where something pokes through the roof.
The most common sources:
- Flashing failures — Metal strips around chimneys, skylights and vents pull away over time
- Pipe boot seals — The rubber collar around vent pipes wears out in 10–15 years
- Valley seams — Where two roof slopes meet, water channels and can back up under shingles
- Ridge caps — The shingles at the very top can crack or lift, especially in windy areas
- Gutters — Clogged gutters cause water to back up under the lowest row of shingles (ice dams in winter)
- Nail pops — Roofing nails that push back up through shingles create tiny entry holes
When to Call a Pro vs. DIY
Not every roof leak is a DIY job. According to the National Roofing Contractors Association, homeowners should get a professional roof inspection at least once a year — and always after a major storm. Here’s a straightforward breakdown of when to call in the pros:
| Situation | DIY or Pro? |
|---|---|
| One or two cracked/missing shingles | DIY (with proper prep) |
| Deteriorated pipe boot | DIY (replacement boots ~$10–20) |
| Minor flashing gap (less than ½ inch) | DIY with flashing tape |
| Widespread granule loss on shingles | Pro — full roof assessment needed |
| Soft spots or spongy decking | Pro — structural repair required |
| Leak near chimney or skylight | Pro recommended — complex flashing work |
| Active water intrusion during rain | Emergency pro call |
| Roof older than 20 years | Pro inspection before any DIY |
The Real Cost of Getting It Wrong
Let me put some actual numbers around my $500 loss:
| My Mistake | DIY Cost (Wrong Way) | Actual Repair Cost |
|---|---|---|
| Indoor patch + wet insulation | $15 (cement) | $120 (insulation replacement) |
| Wrong sealant (silicone on shingles) | $12 (sealant) | $0 (re-done correctly) |
| Poor prep + patch failure | $25 (materials) | $60 (second service call) |
| Ignoring flashing + deck rot | $8 (sealant) | $320 (deck repair + re-flash) |
| Total | $60 spent | $500 paid |
The DIY attempt that was supposed to save money ended up creating $440 in additional damage.

A Simple Roof Leak Fix Guide: Do It Right the First Time
Here’s a condensed step-by-step process that covers the basics correctly:
1. Find the real leak source — Follow from the stain on your ceiling up into the attic, then up to the roof surface.
2. Assess the full damage area — Don’t simply repair what is visible. Check the surrounding shingles, flashing and deck below.
3. Choose the right materials — Select a sealant that matches your roofing material. When in doubt, consult the staff at your local hardware store.
4. Prepare the surface — Clean, dry and debris-free. No shortcuts.
5. Make the repair — Apply sealant, replace shingles or re-flash as needed.
6. Test your work — Use a garden hose to simulate rain and check for any remaining leaks from the attic.
7. Check again after the next real rainstorm — Give it one real test before declaring success.
FAQs — Roof Leak Fix Guide Basics
Q1: How can I tell if my roof leak is serious or minor?
If the leak is at a transition point (chimney, vent, valley) and you notice soft spots in the decking or a mold smell in the attic, it’s serious. A single cracked shingle with no surrounding damage is typically a minor issue.
Q2: Am I capable of repairing a roof leak on my own with no experience?
Yes — for small jobs like replacing a shingle or two, or sealing a pipe boot. But if the leak involves flashing, decking or large areas, engage a professional. Trying to save $100 can end up costing you $500 — as I learned.
Q3: How long will a DIY roof sealant repair last?
A proper sealant repair can last 5–10 years when done correctly with the right prep and the right product. Done the wrong way and it might fail in a single season.
Q4: Is it safe to walk on my roof to make repairs?
Only if you have a low-pitch roof (less than 4:12 ratio) and are using proper footwear and safety precautions. Steep roofs are dangerous without harnesses and roof brackets. When in doubt, stay off.
Q5: What’s the best time of year to fix a roof leak?
Late spring or early fall. Most sealants need temperatures between 45°F and 85°F to apply and cure properly. Avoid making repairs in freezing conditions or during active rain.
Q6: My ceiling has a water stain but no active drip. Should I still fix the roof?
Absolutely. A dry stain means the leak has already happened. It will happen again with the next heavy rain. Find the source now before it gets worse.
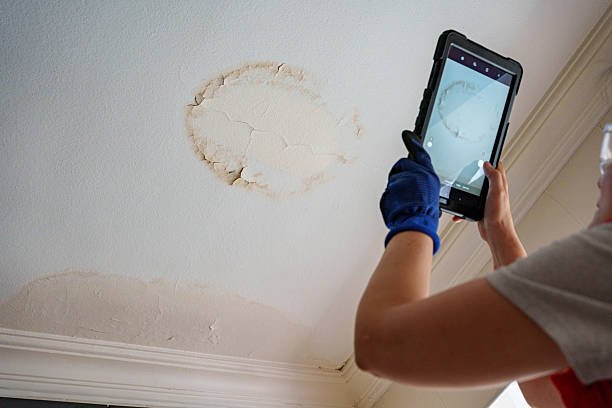
Q7: Will homeowner’s insurance cover a roof leak repair?
It depends on the cause. Sudden damage from a storm is typically covered. Gradual deterioration or poor maintenance usually isn’t. Before you make repairs, document everything with photos.
Wrapping It All Up
A leaky roof feels urgent, and that urgency makes people rush.
Rushing leads to skipping steps. Skipping steps leads to mistakes. Mistakes lead to $500 repair bills.
The four mistakes I made — patching from the inside, using the wrong sealant, skipping surface prep and fixing only the surface symptom — are all completely avoidable once you know what to watch for.
The roof leak fix guide basics aren’t complicated. They just require slowing down, looking at the big picture and using the right materials the right way.
Whether you tackle this yourself or hire a pro, understanding these fundamentals will save you money, protect your home and give you the confidence to handle the next rainstorm without that pit-in-your-stomach dread.
Fix it right. Fix it once.