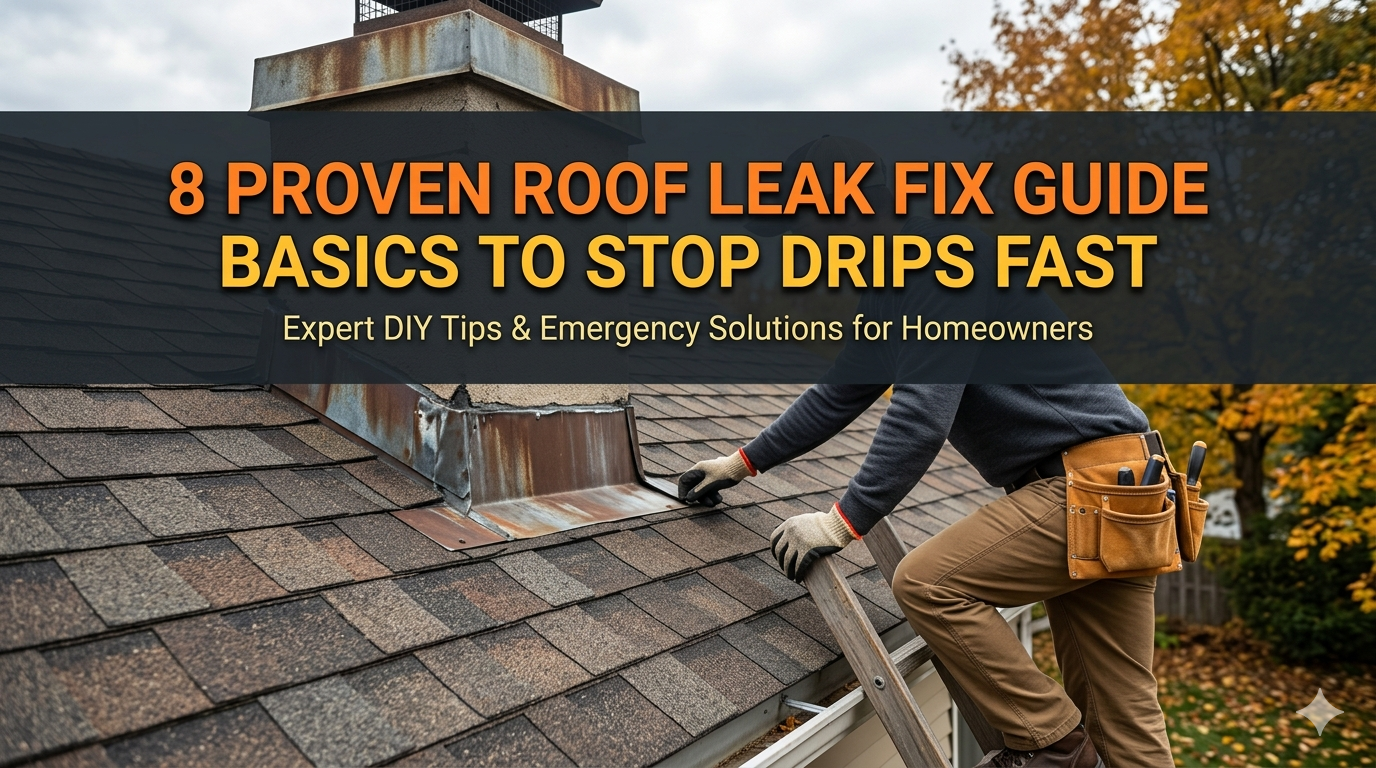
8 Proven Roof Leak Fix Guide Basics to Stop Drips Fast
8 Surefire Roof Leak Repair Tips to Stop the Drips Quickly
Meta Description: Roof leak fixing guide containing 8 basic proven steps to help you seal drips quickly. Bring your house to safety by discovering simple repair ways you can seal leaks and damage.
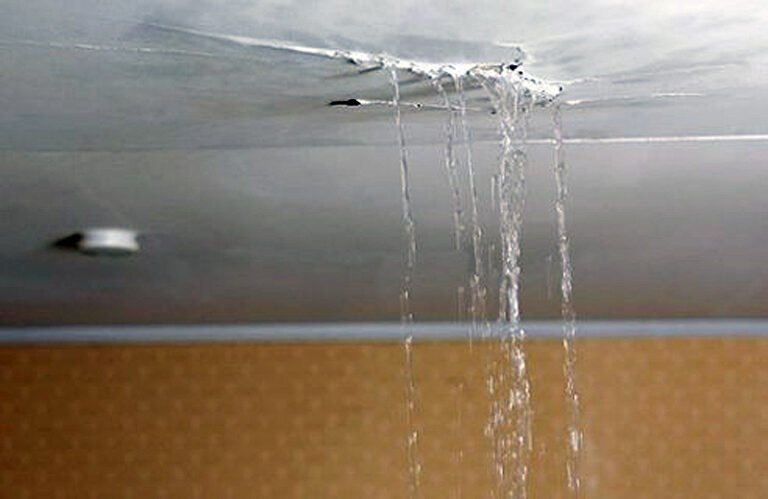
Your Roof Is Leaking — What to Do Right Now
A leaky ceiling is a homeowner’s worst nightmare.
It’s amazing how a little water stain can lead to an exorbitant repair tab if you do not pay it some attention. Roof leaks don’t fix themselves. They become more acute with each rainstorm.
The good news? Many roof leaks can be located and repaired without immediately hiring an expensive contractor. Armed with the right tools, some patience and this roof leak fix guide, you’ll be able to stop the drip quickly and prevent serious water damage to your home.
This article guides you through eight tried-and-true basics — from identifying the source to executing a sturdy repair. These steps apply no matter what your roof is made of — shingles, metal, or flat material.
Let’s get into it.
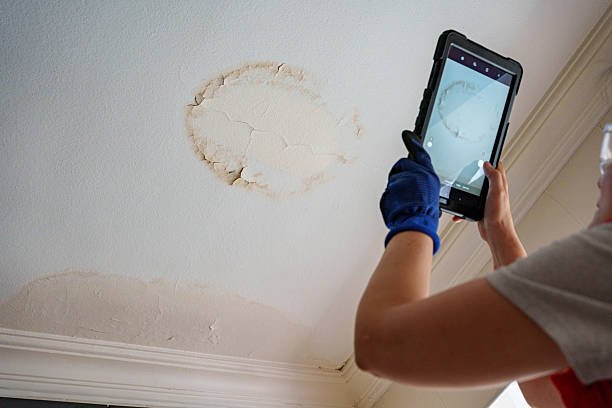
The Roof Leaks That Are More Dangerous Than They Look
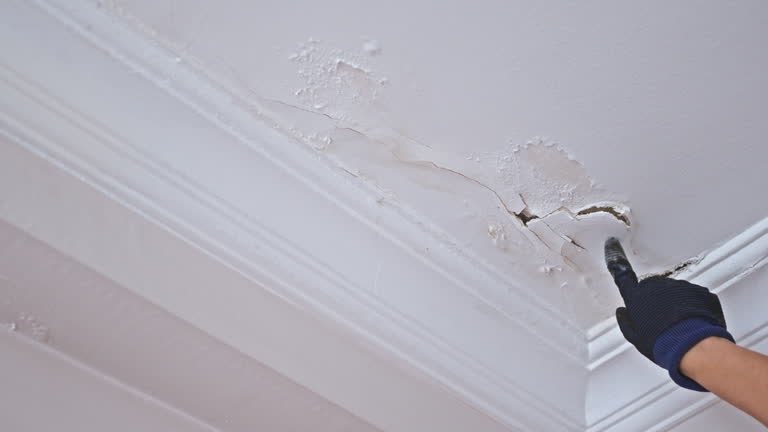
Most folks look up and see a wet patch on the ceiling and think it’s just an inconvenience.
It’s not.
Water that enters your roof system can:
- Rot wooden beams and rafters
- Grow mold within 24 to 48 hours
- Damage insulation (which causes your energy bills to rise)
- Ruin drywall and paint
- Gradually weaken the structural rigidity of your house
A $200 leak to fix today could turn into a $10,000-plus problem in a year if ignored.
That’s why acting fast matters. And that’s precisely what this guide is for.
Before You Begin: What You’ll Need
Before you climb up on your roof or into the attic, collect your supplies.
| Tool / Material | Purpose |
|---|---|
| Flashlight | Dark attic space inspection |
| Garden hose | Rain simulation / leak source search |
| Roofing nails and hammer | Shingle securing |
| Roofing cement / sealant | Crack filling |
| Replacement shingles | Damage replacement |
| Pry bar | Old shingle lifting |
| Caulking gun | Sealant around flashing |
| Safety harness and rope | Steep roof fall prevention |
| Rubber-soled shoes | Better grip on roof surface |
| Ladder | Roof access |
Safety comes first. Never walk on a wet roof. Never do this without someone with you.
Tip #1 — Locate the Leak Before Fixing Anything
This seems obvious, but most DIY roof repairs aren’t successful because people repair the wrong place.
Water is sneaky. It may make its way into your roof in one spot and travel a few feet before dripping down through your ceiling. So the damp spot in your house is seldom directly beneath the actual leak.
Start Inside the Attic
Go into your attic on a sunny day. Bring a flashlight.
Look for:
- Water stains (brown or yellow rings on wood)
- Damp, dark, or soft areas on the beams
- Mold or mildew growth
- Light coming through gaps in the roof deck
If you notice a stained beam, look up. The point of entry is typically further up the slope than where the water ended up.
Use the Garden Hose Method
Can’t find the source in the attic? Grab a buddy and a hose.
Have your helper remain inside near the wet area. You take the hose onto the rooftop. Begin low and soak one section at a time. Wait a few minutes. You’ve found the zone when your helper sees water dripping.
Then move the hose up slowly until you isolate the spot. Mark it with chalk or tape.
This technique is effective even if the leak only appears during heavy rain.
Basic #2 — Check the Obvious Places First
Leaks don’t usually occur at the center of a sound, intact roof. They almost always start at a weak point.
The most common culprits:
Flashing Failures
Flashing is the thin metal strips placed around chimneys, vents, skylights, and where the roof meets a wall. It makes these joints waterproof.
Over time, flashing:
- Pulls away from the surface
- Cracks due to temperature changes
- Gets corroded or rusted
- Loses its sealant layer
Examine all the flashing on your roof. Inspect for gaps, raised edges, or absent sealant. This is the number one cause of roof leaks.
Missing or Cracked Shingles
Walk your roof carefully (or use binoculars from the ground). Look for:
- Cracked, curling, or buckling shingles
- Bald patches where the granules have washed away
- Shingles that are completely missing
- Dark areas that appear wet even if it has not rained
A damaged shingle is an open invitation for water to enter.
Clogged or Damaged Gutters
This one surprises people. When gutters get clogged, water backs up under the edge of your roof — a phenomenon called “ice damming” in cold climates and “water ponding” in warmer weather.
Clean your gutters every spring and fall. Look for sagging sections or holes.
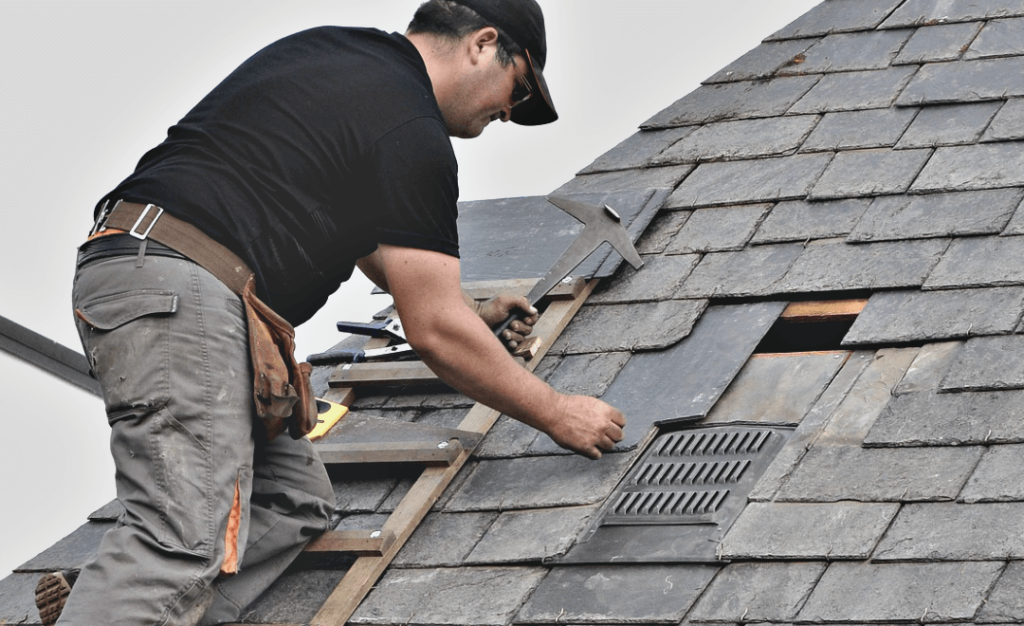
Tip #3 — Repair Damaged Shingles Properly
Fixing a damaged shingle is one of the most common roof leak repairs — and one of the easiest for a confident DIYer.
Here’s how to do it step by step:
Step 1: Use a pry bar to raise the edges of the adjacent shingles. Be careful not to crack them.
Step 2: Remove the roofing nails securing the damaged shingle. A flat pry bar works well for this.
Step 3: Remove the old shingle. If it rips, that’s fine — just pick out all the pieces.
Step 4: Slide the new shingle into place. Align it with the shingles to its left and right.
Step 5: Fasten it with four roofing nails — one in each corner, about an inch from the edge.
Step 6: Spread a small bead of roofing cement beneath the corners of the surrounding shingles to reseal them.
Pro tip: Try to purchase replacement shingles from the same manufacturer. This helps with color matching and material compatibility.
Basic #4 — Reseal and Repair Flashing Like a Boss
Bad flashing is the sneakiest cause of roof leaks. Water comes in through a small gap and travels far before you ever see it.
How to Fix Step Flashing
Step flashing lines up along walls where the roof intersects vertical surfaces. Each piece overlaps the next.
If a piece has pulled away:
- Carefully lift the shingle above it
- Press the flashing back flat against the wall
- Apply roofing cement behind the flashing to hold it in place
- Re-nail if necessary (use galvanized roofing nails)
- Seal the nail heads with roofing cement
How to Fix Chimney Flashing
Leaky chimney flashing is one of the most common problems.
Check for:
- Gaps between the flashing and the chimney bricks
- Cracked mortar where the flashing is embedded
- Rust or holes in the flashing itself
For tiny gaps, apply a generous bead of roofing sealant with a caulking gun. For significant damage, you might have to replace the entire chimney flashing — which is a job for a pro.
Need reliable roofing products and step-by-step repair resources? Visit Roof Leak Fix Guide for expert tips, product recommendations, and everything you need to tackle roof repairs with confidence.
Basic #5 — Treat Flat Roof Leaks Differently
Flat roofs need a different approach than sloped shingle roofs.
Water doesn’t flow off a flat roof — it pools. This causes the roofing membrane to deteriorate and split over time.
Finding Leaks on a Flat Roof
Flat roof leaks are trickier to track down because water might migrate a significant distance under the membrane before making its way into the building.
Look for:
- Blisters or bubbles in the membrane
- Cracks or tears in the roofing material
- Pooling water after rain
- Soft areas that feel spongy underfoot
Patching a Flat Roof
For small cracks or holes:
- Thoroughly clean the area — remove dirt, debris, and any loose material
- Allow it to dry completely (do not patch a damp surface)
- Cut a patch from matching roofing membrane — it should be 6 inches larger than the damage on each side
- Spread roofing cement over the damaged spot
- Press the patch firmly into place
- Apply additional cement over the top and edges
- Smooth it out and let it cure for 24–48 hours
For larger damage, contact a roofing contractor. DIY patching on large sections can make things worse.
Basic #6 — Completely Seal Roof Penetrations
Every pipe, vent, and skylight that comes through your roof is a potential leak point.
These penetrations are surrounded by a rubber “boot” or metal flashing. Over time, these crack, shrink, or pull away from the pipe.
Fixing a Pipe Boot Leak
Pipe boots are the rubber or metal collars around vent pipes. UV exposure makes rubber boots crack after a while.
To fix:
- Check if the boot is cracked (common) or completely broken
- For small cracks, spread lap sealant around the pipe’s base and over the crack
- For a totally cracked boot, install a slip-on rubber boot cover — these are inexpensive and fit over the existing boot with no need to remove it
- Ensure the new boot fits snugly around the pipe diameter
Skylights and Roof Windows
Skylights leak along the frame edges where the sealant has dried out.
Inspect the perimeter caulk. If it’s cracked or pulling away, scrape it clean and apply a fresh bead of silicone roofing caulk. Be sure to press it firmly into the gap.
Inspect the flashing around the skylight frame as well — it should lay flat with no raised edges.
Common Roof Leak Locations — Quick Reference Guide
| Location | Most Common Cause | Best Fix |
|---|---|---|
| Around chimney | Cracked or lifted flashing | Reseal or replace flashing |
| Near vents / pipes | Cracked rubber boot | Boot cover or lap sealant |
| Skylight edges | Dried-out caulk | Fresh silicone caulk |
| Ridge line | Missing or cracked ridge cap | Replace ridge cap shingles |
| Roof valleys | Worn valley flashing | Replace valley liner |
| Roof edges | Clogged gutters / ice dams | Clean gutters, add ice guard |
| Flat roof surface | Membrane bubbles or tears | Patch with roofing membrane |
| Wall-roof joint | Loose step flashing | Re-nail and reseal flashing |
Tip #7 — Stop Ice Dams Before They Cause Leaks
If you live in a place with cold winters, ice dams are a serious threat to your roof.
An ice dam develops when heat from your attic melts snow on your roof. The meltwater travels to the cold roof edge and refreezes. This ice wall traps more water behind it — and that water backs up under your shingles.
How to Prevent Ice Dams
- Add attic insulation: This prevents attic heat from warming the roof surface
- Improve attic ventilation: Adequate airflow keeps the roof deck at a consistent temperature
- Install ice-and-water shield: This is a self-adhesive membrane applied along the roof’s lower edge during re-roofing
- Use a roof rake: After heavy snowfall, use a long-handled roof rake to remove snow from the lower 3–4 feet of your roof
How to Remove an Existing Ice Dam
Never use a pick or sharp tool — you will damage your shingles.
Fill a nylon stocking with calcium chloride ice melt. Place it across the ice dam so it runs perpendicular to the roof edge. The calcium chloride gradually melts a channel through the dam for water to escape.
Do not use rock salt — it can corrode shingles and kill nearby plants.
According to the Insurance Institute for Business & Home Safety (IBHS), proper attic insulation and ventilation are among the most effective long-term defenses against ice dams and the roof leaks they cause.
Basic #8 — Make a Temporary Emergency Fix First
A leak sometimes occurs right in the middle of a storm. There’s no way you can make a full repair in the rain. But you can slow or stop the damage temporarily.
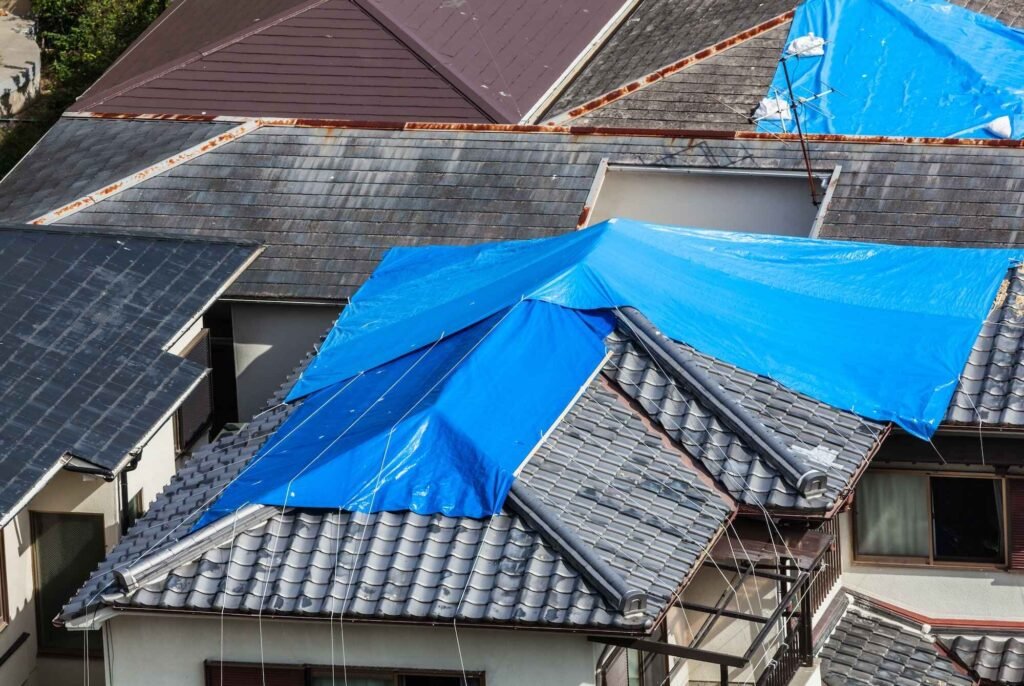
Using a Tarp
A heavy-duty polyethylene tarp is your most valuable emergency tool.
- Identify the area of the roof from where the leak is coming
- Unroll the tarp over the damaged section
- Extend it past the roof ridge on one side and down to the gutter on the other
- Secure the edges with sandbags, bricks, or wood boards
- Do NOT use nails to secure the tarp — you’ll create more holes
The tarp can remain in place until you are able to make a proper repair in dry weather.
Using Roofing Tape
Roofing tape (also known as bituminous tape or flashing tape) is great for quick seals.
For a small crack or gap, clean the surface and dry it as best you can, then press the tape firmly over the damage. Some tapes can be used on wet surfaces — check the label.
This is a short-term fix only. A permanent repair should always follow.
How Long Do Roof Repairs Last?
| Type of Repair | Expected Lifespan |
|---|---|
| Roofing cement patch | 2–5 years (depending on conditions) |
| Replaced asphalt shingles | 15–30 years |
| Resealed flashing | 5–10 years |
| New pipe boot | 5–10 years |
| New flat roof membrane patch | 5–15 years |
| Ice-and-water shield (full install) | 20+ years |
| Emergency tarp (temporary) | Days to weeks only |
When to Call a Professional Roofer
This roof leak repair guide covers a huge amount of DIY ground. But some situations require a licensed professional.
Call a roofer when:
- The leak is coming from multiple places at once
- You can see large sections of damaged, missing, or rotted decking
- The roof is older than 20 years with widespread shingle wear
- There is visible mold growing in the attic
- The structure underneath feels soft or spongy
- Water damage has spread into walls or electrical fixtures
- You are not comfortable working at height safely
It’s also a good idea to get a professional inspection every 2–3 years — even if you don’t notice any obvious damage. Roofers catch small problems before they become large ones.
FAQs — Roof Leak Fix Guide
Q: How do I stop a roof from leaking from the inside of my house? From inside, you can apply a temporary fix with hydraulic cement or roofing sealant on the underside of the roof deck. But this is not a permanent solution. The actual leak needs to be sealed from the outside.
Q: How can I tell if my roof leak is serious? Signs of a serious leak include large water stains on the ceiling, sagging areas, visible mold, or water coming through even during light rain and not just heavy storms. Any of these deserve urgent attention.
Q: What’s the cost of fixing a roof leak? A simple shingle replacement or flashing repair will cost $150–$500 DIY or $300–$1,500 with a contractor. More extensive repairs involving the roof deck or structural damage can cost $2,000–$10,000 or more.
Q: What is the best sealant for a roof leak? Use a rubberized roofing cement or polyurethane roofing sealant for most repairs. Butyl-based caulk is a good option for flashing. Silicone or lap sealant is recommended for pipe boots.
Q: How long can I go before I fix a roof leak? Address even a minor leak within a few days. Mold can start growing within 24–48 hours. Water damage to wood and insulation becomes serious after a few weeks and far more expensive to repair.
Q: Will homeowner’s insurance pay for a roof leak? It depends on the cause. Unexpected damage from a storm or fallen tree tends to be covered. Gradual decline from lack of maintenance generally isn’t. Review your particular policy and photograph the damage before making repairs.
Q: Can heavy rain make a roof leak even without visible damage? Yes — if your gutters are clogged, your attic has poor ventilation, or your roof is very old, even an apparently healthy-looking roof can spring leaks during heavy downpours. Regular maintenance significantly reduces this risk.
Wrap-Up — Don’t Let a Little Drip Turn Into a Bigger One
A roof leak is stressful. But it doesn’t need to be overwhelming.
This roof leak repair guide gives you everything you need to act quickly. From locating the source to patching shingles, resealing flashing, and handling emergency repairs — these 8 basics work on real roofs in real conditions.
The trick is to move fast and stay safe.
Start with the attic. Identify the source of the leak before you touch anything. Repair it during dry weather with the proper materials. And if the job is bigger than you prepared for — hire a pro. There’s no shame in that.
Your home is worth protecting. A little effort now saves a lot of money later.
Have a question about a different home repair topic? Keep reading for more plain-language, practical guides written step by step.