
6 Easy Roof Leak Fix Guide Repairs You Can Do in 15 Minutes
6 Roof Leak Fixes You Can Do in 15 Minutes
Meta Description: 6 Easy Roof Leak Fix Guide repairs you can do fast — help stop water damage today with simple tools, quick-patch solutions and proven DIY tips any homeowner can handle.
Plug the Leak Before It Becomes a Deluge
A small roof leak can quickly become a big problem.
One day it’s a tiny drip. A week later, you have water stains on the ceiling, sodden insulation and mold seeping into your walls. The worst part? Because the job seems daunting — a roof is not something that most homeowners fix themselves — most wait until it’s far too late to act.
Actually, it doesn’t — or at least not always.
Most common roof leaks are surprisingly easy to repair. You do not require special training or pricey equipment. Armed with the right materials and a little confidence, you can patch up many leaks in 15 minutes or less.
This 6 easy roof leak fix guide will take you through the most common types of roof leaks there are, and what to do to fix them yourself. Got a cracked shingle, a gap around a vent pipe or a worn-out flashing joint? There’s a quick fix waiting for you.
Let’s get into it.
What Are the Primary Causes of Roof Leaks?
It helps to understand why roofs leak before you pick up your tools.
Roofs get pummelled day in and day out — the sun, wind, rain, hail and snow all deteriorate them over time. But most leaks are not the result of a complete roof failure. They come from small, specific weak spots rather than bigger system failures.
Here are the biggest offenders:
| Cause | How Common | Typical Fix Time |
|---|---|---|
| Cracked or missing shingles | Very common | 10–15 minutes |
| Damaged flashing | Very common | 10–15 minutes |
| Clogged gutters | Common | 10–20 minutes |
| Cracked vent pipe booting | Common | 10–15 minutes |
| Sealant failure around skylights | Moderate | 10–15 minutes |
| Exposed or lifted nail heads | Moderate | 5–10 minutes |
Once you locate the source, the repair is usually a simple matter.
Safety First — Before You Use That Ladder
This section is brief but incredibly important.
When it comes to doing work on a roof, never compromise on safety.
- Use a solid, non-slip ladder rated to your weight.
- Wear rubber-soled shoes that have good grip on shingles.
- Do it on dry days — wet roofs are incredibly slick.
- Do not work alone — have someone close enough to help if needed.
- Avoid steep slopes if you don’t feel comfortable. Call a pro for those.
A roof repair is not worth a trip to the emergency room. As long as you stay safe, the job becomes enjoyable.

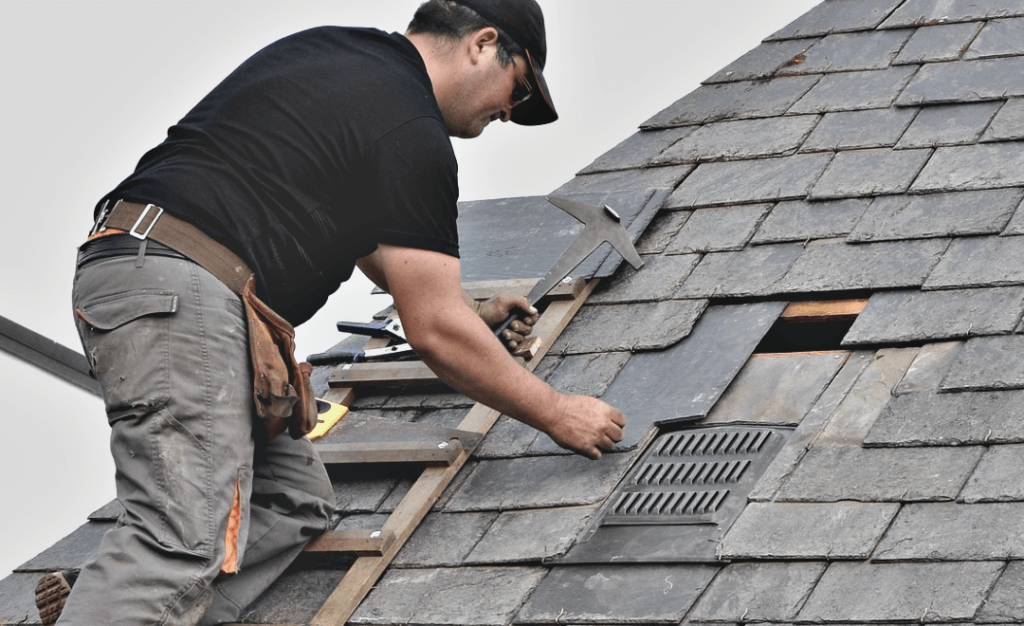
Repair #1 — Cracked or Damaged Shingles
Why This Happens
There are several reasons shingles crack. Age is the biggest one. As shingles age, they naturally dry out and get brittle. Hail and falling branches can shatter them too.
A cracked shingle doesn’t always look like trouble from the ground. But even a hairline crack can admit enough water to lead to stained ceilings, rotting wood and mold.
What You’ll Need
- Roofing cement or asphalt roof sealant
- Putty knife or caulking gun
- Replacement shingle (if crack is extensive)
- Work gloves
How to Fix It in 15 Minutes
Step 1: Identify the broken shingle. Look for ones that are clearly split, curling at the edges or have missing chunks.
Step 2: For small cracks, scoop some roofing cement and push it into the crack with a putty knife or caulking gun. Pack it tightly into the gap and flatten it out.
Step 3: If the shingle is badly damaged, insert a pry bar beneath it to lift the nails. Slide out the old shingle.
Step 4: Push the new shingle into position. Nail it tight at the top corners.
Step 5: Apply a small dab of roofing cement over each nail head to secure them.
That’s it. Seriously.
Pro Tip: Keep some extra shingles stashed in your garage. They are cheap, and having the correct match saves hours at repair time.
Fix #2 — Leaky Roof Flashing
What Are the Symptoms of Flashing Failure?
Flashing is the thin metal — typically aluminum or galvanized steel — that’s installed around chimneys, skylights, vents and roof valleys. Its job is to channel water away from seams and joints where the roof meets a wall or structure.
When the flashing cracks, pulls away or corrodes, water sneaks right in.
Flashing leaks are actually more common than shingle leaks. They are also easy to miss because they don’t appear damaged from far away.
What You’ll Need
- Roofing caulk or flashing sealant
- Wire brush
- Putty knife
- Metal flashing patch (for larger gaps)
- Work gloves
How to Fix It in 15 Minutes
Step 1: Inspect the flashing around your chimney, vents and skylights. Check for gaps, rust, cracks or lifted edges.
Step 2: Scrape away any rust, dirt or old dried sealant from the damaged area using a wire brush.
Step 3: For small cracks or seams, add a thick bead of roofing caulk directly on top of the damaged area. Stuff it into the gap and smooth it with a putty knife.
Step 4: If the flashing edge is lifted or separated, tuck it down firmly, then caulk the edge.
Step 5: For larger damage, cut a metal flashing patch to slightly exceed the damaged area. Coat the back side with roofing cement, then press it down over the damaged flashing, sealing all edges with caulk.
Let it cure for 24 hours or more before rain falls on it.
Fix #3 — Damaged Vent Pipe Boot
The Boot Nobody Talks About
Most roofs have vent pipes sticking out of them. They are part of the plumbing or ventilation system in your home. A rubber or neoprene “boot” wraps around the base of each pipe and forms a watertight seal that prevents water from leaking in.
Eventually, that boot cracks, splits or pulls away from the pipe. And once it does, water pours straight down the pipe and into your house.
This is arguably one of the most underdiagnosed causes of roof leaks. Shingles are often blamed by homeowners when the boot is actually to blame.
What You’ll Need
- New pipe boot (match your pipe size)
- Pry bar
- Roofing nails
- Roofing cement
- Utility knife
How to Fix It in 15 Minutes
Step 1: Carefully pull back the shingles surrounding the base of the vent pipe. Be careful so as not to crack them.
Step 2: Pull out the nails that are securing the old boot. Wiggle the old boot off the pipe.
Step 3: Work the new boot down over the pipe. Check that the flat base is flush with the roof decking.
Step 4: Nail down the base of the new boot at the corners.
Step 5: Spread roofing cement around the edges of the boot base. Replace the shingles back over the top half of the boot as they were.
Done. You’ve just fixed one of the most common hidden leak sources around.
Fix #4 — Clogged or Damaged Gutters
How Gutters Cause Roof Leaks
This one shocks a lot of people.
Gutters do more than drain rainwater — they protect the edge of your roof. When gutters become clogged with leaves, dirt and debris, water backs up underneath the shingles close to the roofline. That backed-up water seeps into the wood, causing rot, leaks and ice dams in winter.
What You’ll Need
- Work gloves
- Garden trowel or gutter scoop
- Garden hose
- Gutter sealant (for cracks)
- Ladder
How to Fix It in 15 Minutes
Step 1: Pick out all leaves, mud and debris from the gutter. Begin at the downspout and work your way outward.
Step 2: Use a garden hose to flush the gutter. Look for water pooling anywhere — that means the gutter has sagged and needs to be re-pitched.
Step 3: Check the downspout. If water does not flow easily, it is blocked. Run the hose at full pressure from the top to clear the clog.
Step 4: Check for cracks or holes in the gutter itself. Apply gutter sealant on the inside of any cracks.
Step 5: Verify that gutter hangers are stable. Loose hangers pull gutters away from the fascia, creating gaps where water can sneak in behind your roof edge.
How Often Should You Clean Your Gutters?
- Trees nearby: every 2–3 months
- Average tree cover: twice a year (spring and fall)
- Open yard: once a year minimum
Fix #5 — Skylight Seal Failure
Skylights Are Beautiful — Until They Leak
Skylights bring in natural light and provide an inviting appearance to any space. But they are among the most challenging parts of a roof to keep watertight.
Over time, the sealant around a skylight dries and develops cracks. The flashing can corrode or pull apart. Even a small gap allows enough water through to stain your ceiling and wreck your drywall.
The good news? Most skylight leaks are a simple sealant fix — if the glass itself is not cracked.
What You’ll Need
- Clear or white silicone sealant (exterior grade)
- Utility knife
- Wire brush
- Caulking gun
- Clean cloth
How to Fix It in 15 Minutes
Step 1: Inspect the skylight frame closely. Check for cracked, shrunk or missing sealant around the edge where the frame meets the roof.
Step 2: Cut out all the old, damaged sealant using a utility knife. Clean it all out — new sealant does not stick to old sealant.
Step 3: Wire-brush the area clean and wipe it dry with a clean cloth.
Step 4: Run a new, continuous bead of exterior silicone sealant around the entire outside edge of your skylight frame. Don’t leave any gaps.
Step 5: Smooth out the sealant with either a wet finger or putty knife. Ensure it sits snug against both the frame and the roof surface.
While you’re up there, inspect the flashing as well. If it’s raised or rusted, address it like the flashing fix in Repair #2.
Fix #6 — Exposed or Popped Nail Heads
The Little Problem That Leads to Big Leaks
This is the most underappreciated roof leak on this list.
All shingles have nails that attach them to the roof deck. Each nail is normally covered by the overlapping shingle above it. But nails eventually migrate upward through the shingle — a phenomenon known as “nail popping.” As a nail pops up, it pierces the shingle above, creating a small hole.
Tiny hole. Big leak. It’s a surprisingly effective combination.
You’ll also find exposed nails around flashing, vents and ridge caps. Any exposed nail head is a potential entry point for water.
According to the Insurance Information Institute, water damage from roof leaks is one of the most common homeowners insurance claims — making timely repairs even more important.
What You’ll Need
- Roofing cement or nail sealant
- Hammer (if re-nailing)
- Putty knife
How to Fix It in 15 Minutes
Step 1: Walk the roof and scan for nail heads sticking up through shingles, especially near the ridge and around any roof penetrations.
Step 2: If the nail is only slightly raised, hammer it back down flush with the shingle surface.
Step 3: Put a dab of roofing cement directly over the nail head. Spread it out in a small circle about the size of a quarter.
Step 4: If the nail hole has already allowed water to seep in and you notice discoloration or a soft spot around it on the shingle, spread a wider layer of roofing cement over the entire compromised area.
Step 5: Popped nails in multiple locations in one area can mean wood deck expansion and contraction. If you find more than five or six in a concentrated area, consider calling a roofer for an inspection.
How to Locate a Roof Leak You Can’t See From Outside
Sometimes the leak is obvious. Sometimes it isn’t.
If you can’t see it from the roof, do this:
From the attic: On a sunny day, enter your attic with all the lights turned off. Search for pinpricks of daylight filtering through the decking. That’s your leak.
After rain: Step into your attic soon after a storm. Trace any water stains, drips or damp wood back to the highest point on the roof deck. That’s closest to the source.
Water stain tracking: Water travels. A ceiling stain eight feet from the wall may be from a nail hole or crack directly at the roofline. Always work uphill from the stain.
A Side-by-Side Comparison of Repair Methods
| Type of Repair | Skill Level | Material Cost | Time to Complete |
|---|---|---|---|
| Cracked shingle patch | Beginner | $5–$15 | 10–15 min |
| Shingle replacement | Beginner | $10–$25 | 15 min |
| Flashing seal | Beginner | $5–$10 | 10–15 min |
| Vent pipe boot swap | Intermediate | $10–$20 | 15 min |
| Gutter cleaning & seal | Beginner | $0–$10 | 10–20 min |
| Skylight reseal | Beginner | $5–$12 | 10–15 min |
| Nail head sealing | Beginner | $3–$8 | 5–10 min |
When to Call a Professional Instead
DIY repairs are wonderful — but they can only do so much.
Call a roofing professional if:
- The roof is older than 20 years and showing significant wear
- The leak is spread out over a large area (several or more square feet of wet decking)
- You notice sagging of any kind on the roof surface — this indicates structural damage
- Mold is present inside the attic or on decking
- You’re not comfortable on ladders or working from height
- The same spot keeps leaking after two or more DIY attempts
A professional repair costs more initially, but it protects your home from much costlier structural damage in the future.
FAQs — Questions About Fixing Roof Leaks
Q: Is it possible to repair a roof leak from inside the house? A: You can put a temporary patch on the underside of the roof decking from inside your attic. Use roofing tape or a small piece of sheet metal with roofing cement. But this is just a stop-gap solution — you still have to fix it the right way from outside.
Q: What is the best sealant for a leaky roof? A: For most DIY repairs, use roofing cement (also called plastic cement or asphalt cement) for shingles and flashing. For skylights and around frames, use exterior-grade silicone caulk. Don’t use regular interior caulk — it won’t last outdoors.
Q: How can I tell if my roof leak is serious? A: You might notice a sagging ceiling, mold, large water stains or soft/spongy spots on the decking — those are indicators of a significant leak. If you notice any of these, consult a professional immediately.
Q: Is it OK to use flex seal or spray foam on a roof leak? A: These products can act as very short-term emergency patches. But they’re not long-term solutions. Spray foam can actually hold moisture and cause rot. Proper roofing cement or sealant is always the better option.
Q: How long will a DIY roof patch last? A: If you do it right and use quality materials, a roofing cement patch can last 3–10 years depending on the conditions. With periodic inspection, a new vent boot or properly re-caulked flashing can last much longer.
Q: Is walking on my roof safe? A: Most asphalt shingle roofs are strong enough to support the weight of a person, provided you walk carefully on the lower half of individual shingles (not across their exposed edge). Do not walk on very old, brittle or wet shingles. If unsure, use roof jacks or a roof walk board to distribute your weight.
Q: Should I repair a roof leak before or after rain? A: Always before rain if possible. Roofing cement and sealants must dry and cure. If a storm is coming, a roofing tarp can act as a temporary fix to cover the damaged area until you can get the proper repair done.
Keep Your Roof Healthy Year-Round
The best roof repair is the one you never have to make.
Routine maintenance prevents minor issues from turning into costly disasters. Here’s a simple schedule to follow:
Every spring and fall:
- Inspect shingles from the ground using binoculars
- Clean out gutters
- Inspect flashing on chimney and vents
- Check the attic for new stains or light filtering through
After every major storm:
- Go around the house and check for debris on the roof
- Inspect for damaged or separated gutters
- Check for new ceiling stains inside
These fast checks can be done in under 30 minutes and can save you thousands in repairs.
You’ve Got This — Wrap-Up
Roof leaks are stressful. But most of them are fixable.
This 6 easy roof leak fix guide walked through the repairs that every homeowner is likely to face — and each one is doable in 15 minutes with a few basic tools and a small bag of supplies.
Cracked shingles, failing flashing, worn-out vent boots, clogged gutters, skylight seal failure and popped nail heads — these are the six most common causes of residential roof leaks. None of them require a roofing license to repair.
The key is acting fast. Water damage gets exponentially worse the longer it is left to sit. A 15-minute fix today can prevent a $5,000 replacement job next year.
Grab your caulking gun, put on your rubber-soled shoes and get up there. Your roof is counting on you.


