
3 Quick Roof Leak Fix Guide Repairs That Stop Drips Instantly
Meta Description: 3 Quick Roof Leak Fix Guide repairs that stop drips instantly — learn fast, proven methods to patch your roof before water damage gets worse.
3 Fast Roof Leak Fixes That Put a Halt to Drips Immediately
Rain is pouring. You hear that dreaded drip. A black stain spreads across your ceiling. Your stomach sinks.
Roof leaks do not care that it is 10 o’clock at night. They arrive on weekends, holidays, and the most demanding of days. And every minute you leave it waiting, water continues to damage.
The good news? You don’t always need a roofing contractor to halt a leak quickly. With the right tools — and when you take the right steps — you can manage many common leaks yourself, quickly and effectively.
This guide will take you through 3 fast roof leak repair fixes that can end drips nearly instantly. If it’s a cracked shingle, a broken flashing, or a clogged valley, you’ll know exactly what action to take.
Let’s get into it.
How Waiting to Fix a Roof Leak Makes It Worse
Before we dig into the fixes, it makes sense to know why speed is so important.
Water is sneaky. It doesn’t just drop straight down. It then travels along rafters, insulation and drywall before it drips down to your floor. By the time you notice a stain, the leak may have been happening for days — or longer.
If You Wait: Here’s what a deferred repair can cost you:
| Delay Time | Potential Damage |
|---|---|
| 1–2 days | Wet insulation, ceiling stains |
| 1 week | Mold begins to grow |
| 2–4 weeks | Structural wood rot starts |
| 2+ months | Foundation and electrical risk |
Acting fast saves money. A $15 tube of roofing sealant can save a $5,000 mold remediation job.
Now let’s fix that leak.
What You Must Have Before Climbing Anything
Safety first. Always.
Before you run out and get a ladder and go up on your roof, make sure conditions and the right gear are in place.
Safety Checklist
- Dry weather — you should never be working on a wet roof
- Non-slip rubber-soled shoes
- A flat step ladder or platform secured at the base
- A harness, if your roof has a steep pitch
- A friend nearby in case something goes wrong
Tool Kit for Preventing Roof Leaks
You don’t need a truck full of supplies. Here’s a simple list:
- Roofing nails and a hammer
- Roofing caulk or sealant (waterproof)
- Roofing cement or tar
- Replacement shingles (if needed)
- Pry bar
- Putty knife
- Utility knife
- Flashing tape or self-adhesive flashing
- Work gloves and safety glasses
Most of these things together are less than $30 at any hardware store.
How to Identify the Leak Before You Repair It
You cannot solve what you cannot discover. Finding the exact source of a roof leak is frequently the most challenging part.
Start From the Inside
Dig through your attic, flashlight in hand. Look for:
- Water streaks on wooden frames or roof beams
- Wet insulation
- Light coming through the roof deck
- Dark marks or mold growing on the sheathing
Trace the stain uphill. Water moves, so the leak source is often higher than where the stain is.
Move to the Outside
Once you know the general area, head up top. Look for:
- Missing or cracked shingles
- Lifted or bent flashing around chimneys, vents, and skylights
- Valleys — where two roof planes meet — clogged with debris
- Holes or cracks in sealant around any roof penetration
Mark the spot with chalk or tape so you can easily find it when you’re ready to repair.
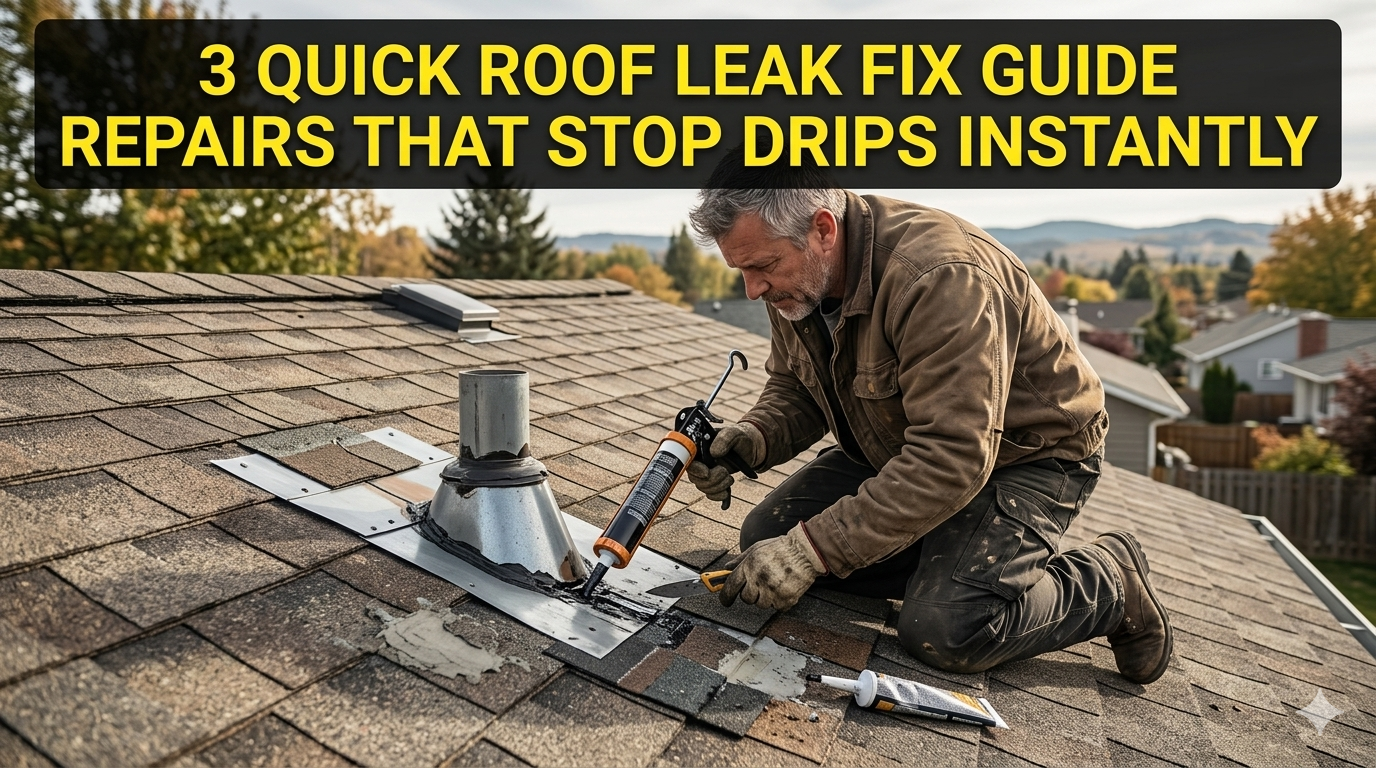
Repair #1 — Repairing a Cracked or Missing Shingle
Shingles are the first level of protection for your roof. When one fractures, curls or disappears, water takes an express route in.
This is the No. 1 cause of leaks in residential roofs — and one of the simplest problems to fix.
How to Know If a Shingle Is the Issue
Look for these signs:
- A broken shingle down the center
- A shingle that is curled up at either end
- A telltale gap left behind by a missing shingle
- Granules accumulating in your gutters (a sign the shingle is breaking down)
Step-by-Step: Fixing a Cracked Shingle
If a shingle is cracked but still intact, you can seal it rather than replace it entirely.
Step 1 — Use a putty knife to run a thick bead of roofing sealant or roofing cement underneath that crack. Press the shingle down firmly.
Step 2 — Then apply a second layer of sealant over the crack. Using the putty knife, spread it smooth.
Step 3 — Spread matching granules (available in your gutter or a hardware store) over the wet sealant. This protects the patch from UV damage.
Step 4 — Allow it to cure for a minimum of 24 hours before rain.
Step-by-Step: Replacing a Missing or Badly Damaged Shingle
Step 1 — Insert a pry bar under the damaged shingle. Carefully lift the edges of the shingles above it to expose the nails.
Step 2 — Remove the nails using the pry bar. Slide the old shingle out.
Step 3 — Insert a new shingle to fill the gap. Keep it even with the surrounding shingles.
Step 4 — Fasten it in place with four roofing nails — one into each corner, just below the tab slots.
Step 5 — Seal the overlap by applying roofing sealant beneath each of the tabs of the upper shingle.
Step 6 — Flatten everything out and allow it to set.
Pro Tip: Take one of your old shingles to the hardware store to get matched up for size, color and style. There are numerous types of asphalt shingles.
Shingle Repair at a Glance
| Problem | Solution | Time to Fix | Cost Estimate |
|---|---|---|---|
| Small crack | Roof sealant + granules | 20–30 minutes | $5–$15 |
| Curling shingle | Sealant under edges + nail | 15–20 minutes | $5–$10 |
| Missing shingle | Full replacement | 30–45 minutes | $10–$30 |
Repair #2 — Stopping Water Under Damaged or Lifted Flashing
Flashing is the thin sheet metal (typically aluminum or galvanized steel) that seals the seams where your roof connects with something else — a chimney, a vent pipe, a skylight or a wall.
Flashing leaks are extremely common. In fact, they’re the cause of a significant number — if not most — of roof leaks.
Why Flashing Fails
Flashing doesn’t last forever. Here’s what makes it go wrong:
- Rust and corrosion over time
- Caulk drying and cracking around the edges
- Wind lifting the metal away from the surface
- Improper installation from the start
Even a small gap in the flashing around your chimney will allow gallons of water to come inside during a heavy storm.
Types of Flashing Problems
Step flashing runs up the sides of chimneys and dormers. It’s installed in overlapping pieces. Water gets behind it if one piece lifts.
Counter flashing is set in chimney mortar, and it folds down over the step flashing. As the mortar cracks, the flashing pulls apart.
Pipe boot flashing seals around vent pipes. Over time, the rubber collar surrounding the pipe becomes brittle and cracks due to UV exposure.
Step-by-Step: How to Re-Seal Lifted or Cracked Flashing
This fix works for most flashing problems where the metal itself is still intact — it’s just pulled up or the sealant has failed.
Step 1 — Scrape off all the old, cracked sealant around the flashing edge using a putty knife.
Step 2 — Wipe the area with a dry rag. Clean off rust, debris or loose material.
Step 3 — Press the flashing back flat against the roof surface.
Step 4 — Add a thick bead of roofing caulk or flashing sealant along the full edge between the flashing and roof (or chimney).
Step 5 — Level it out with a putty knife and check for any gaps.
Step 6 — Reinforce with a layer of self-adhesive flashing tape over the top. This is a rubberized tape that sticks to nearly everything.
When You Should Completely Replace the Flashing
If the metal is badly rusted, bent, or cracked all the way through — patching won’t hold. Replacement is the answer in that case. This is a bigger job; you may need a roofer, but it’s doable even for experienced DIYers.
Quick Fix for Pipe Boot Flashing: If the rubber collar around a vent pipe is cracked, you can get a universal cover for the pipe boot at any hardware store; they cost between $15 and $25. It slips right over the old boot and seals instantly.
For a deeper look at flashing types and when to replace them entirely, the This Old House roofing guide is an excellent reference.
Flashing Repair Quick Reference
| Flashing Type | Common Issues | DIY Solution | Need Professional? |
|---|---|---|---|
| Step flashing | Lifted piece | Re-nail + sealant | Only if multiple pieces |
| Counter flashing | Mortar cracked | Re-caulk the joint | If mortar is severely damaged |
| Pipe boot | Cracked rubber collar | Replace boot cover | Rarely |
| Valley flashing | Holes or rust | Flashing tape patch | If damage is extensive |
Repair #3 — Finding and Patching a Roof Valley Leak
The valley is where two slopes of your roof meet and create a V-shape. It’s meant to redirect water from the roof rapidly. But once it becomes clogged with leaves, twigs or moss — or if the flashing underneath develops a hole — it becomes a freeway for water to enter your home.
How to Tell If the Valley Is the Problem
- Internal attic water stains along the ridge line
- Debris accumulation in the valley
- Dark streaks or moss in the V-shaped channel
- Damp patches in the ceiling below where two sections of roof meet
How to Unclog a Roof Valley: Step by Step
This is the easiest fix of the three — and also the most ignored.
Step 1 — Walk into the valley carefully. Never walk on the very center — the flashing can bend. Step on the shingles at both sides.
Step 2 — Pick off all debris by hand or use a soft brush. Do not use a pressure washer — it can push water under the shingles.
Step 3 — Inspect the center of the valley for any holes, rust spots or gaps in flashing.
Step 4 — Using a putty knife, spread roofing cement over small holes or rust spots. Spread it in all directions at least 2 inches beyond the damaged area.
Step 5 — Cut a piece of self-adhesive flashing tape and press it firmly on the patched area for added waterproofing.
Step 6 — Make sure water can flow freely down the valley, unobstructed.
Keeping the Valley Clean Long-Term
If debris continues to accumulate, one repair may not be sufficient. Here’s how to keep your valley clear:
- Zinc or copper strips installed near the ridge — rainwater reacts with the metal to kill moss
- Trim any overhanging tree branches that are dropping leaves into the valley
- Clean gutters twice a year to avoid backflow into valleys
- Use a roof-safe moss treatment annually or every other year
If you want more detailed step-by-step repair guides and product recommendations, visit Roof Leak Fix Guide — a trusted resource for homeowners dealing with roof leaks of all types.
Valley Leak Solutions at a Glance
| Problem | Immediate Fix | Long-Term Prevention |
|---|---|---|
| Debris clog | Hand-clear the valley | Trim trees, install leaf guards |
| Small hole in flashing | Roofing cement + tape | Annual inspection |
| Moss/algae growth | Scrub + zinc strip | Zinc/copper strip installation |
| Standing water | Clear clog, check slope | Improve drainage, check gutters |
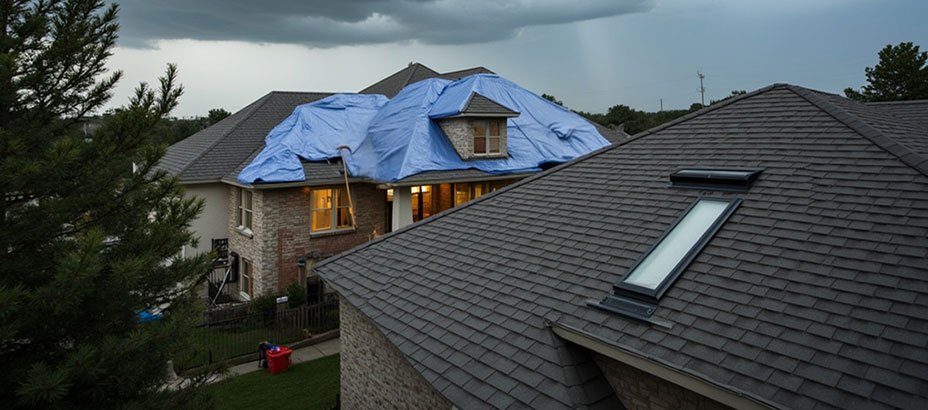
Emergency Fixes When It’s Raining Right Now
Sometimes you can’t safely get on the roof. It’s raining hard, and you need to seal the water out RIGHT NOW.
Here are fast, temporary options:
Roofing Tarp Method
In an emergency, a heavy-duty polyethylene tarp (at least 6 mil thick) can be your best friend.
- Spread it across the suspected leak area
- Stretch it over the ridge so wind doesn’t blow it off
- Secure it at the edges with wooden boards or sandbags
- Do NOT nail it down unless absolutely necessary — this will leave more holes
It’s a temporary stopgap, though. Have the actual repair completed within 48–72 hours.
Interior Catch and Redirect
If you haven’t figured out how to keep the water out yet:
- Place buckets under drips
- Protect flooring and furniture with plastic sheeting
- Push a pin into the top of a bulging ceiling bubble — this allows water to drain out in a slow, controlled trickle rather than a sudden burst
Roof Patch Tape (From Inside the Attic)
In some instances, you can install self-adhesive waterproof flashing tape on the underside of the roof deck from inside the attic. This is just a stopgap but can buy you a day or two.

Know When to Seek a Pro
DIY repairs are wonderful — but they’re not always sufficient.
Call a licensed roofer when:
- The leak is large or affects a wide area
- You identify soft, rotten wood in the roof deck
- Multiple shingles are missing or the roof is old (15+ years)
- You are uncomfortable working at height
- Mold is already visible
- The leak reappears after being repaired
A professional inspection following a major storm is always a good idea — even if you don’t see any visible damage.
How Long Do These Quick Fixes Last?
| Repair Type | Expected Lifespan of DIY Fix |
|---|---|
| Sealant over cracked shingle | 1–3 years |
| Replaced shingle (proper install) | 10–20 years |
| Re-caulked flashing | 2–5 years |
| Replaced flashing | 15–25 years |
| Valley patch with tape | 1–3 years |
| New pipe boot cover | 5–10 years |
Always check your repairs after the next major storm.
FAQs — Quick Roof Leak Repairs
Q: Is it possible to seal a roof leak from inside? Yes, temporarily. You can use waterproof tape to cover the underside of the roof deck inside your attic. But you still will need an exterior repair to fully stop the leak.
Q: If I can’t see the source of the leak, how do I know where it’s coming from? Begin in the attic and follow wet spots or stains up toward the ridge. Water flows along beams before dripping. Use a garden hose to run water over sections of the roof while someone watches inside — this can help locate the source.
Q: Are roofing cement and roofing sealant the same? Not exactly. Roofing cement is thicker, tar-based and great for bedding shingles and patching holes. Roofing sealant (caulk) is flexible; ideal for sealing joint creases and flashing edges. Both are useful to have.
Q: How long does it take roofing sealant to dry? Most roofing sealants skin over in 1–2 hours, but cure fully in 24–48 hours. During this time, avoid rain if at all possible.
Q: Is it OK to use regular caulk on roof repairs? No. Regular household caulk is not strongly enough made for outdoor roofing conditions. Use only roofing-specific caulk or sealant rated to stand up to weather and UV.
Q: What time of year is best for roof repairs? Late spring to early fall are best — dry weather, mild temperatures. Roofing materials such as caulk and cement require a temperature over 40°F to bond properly.
Q: How frequently should I inspect my roof? Two times a year, once in spring and once in fall. And check after any high wind or hail storm.
Q: Are these repairs safe for every type of roof? The steps for repairing shingles are for asphalt shingles, the most common type. Metal, tile and flat roofs all need a different approach. Always tailor your repair method to your roof type.
Conclusion
A roof that leaks doesn’t have to be a catastrophe.
With the proper tools, some know-how and quick action, you can catch most common leaks before they inflict serious damage. The 3 fast roof leak fix repairs explained in this guide — shingle patching, flashing sealing and valley clearing — account for most common residential roof leaks homeowners experience.
Keep in mind the main point: The quicker you respond, the cheaper it is.
Whether you make a $10 fix with a tube of roofing sealant or call in a pro for something more significant, do not ignore the warning signs. A little drip today is a big repair bill tomorrow.
Be safe on that roof, do your repairs in dry weather and inspect them after the next storm. Your house — and your bank account — will be grateful.


