11 Ultimate Roof Leak Fix Guide Maintenance Tips for Beginners
11 Ultimate Roof Leak Fix Guide Maintenance Tips for Beginners
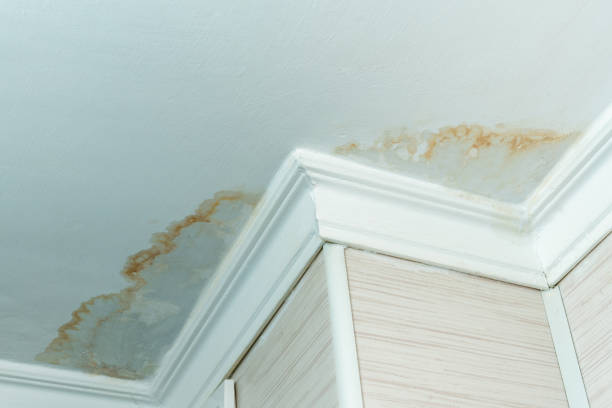
There’s a certain kind of frustration that comes with discovering a roof leak. It usually doesn’t happen on a sunny afternoon when you’re relaxed and prepared. It happens during a heavy rainstorm, or right after, when you notice a stain spreading across the ceiling or a slow, stubborn drip that refuses to be ignored. For beginners, this moment can feel overwhelming. Where do you even begin?
The truth is, roof maintenance and leak prevention aren’t just for professionals. With a bit of understanding, patience, and the right approach, even a beginner can handle basic fixes and prevent bigger problems down the line. This guide isn’t just about quick fixes—it’s about learning how roofs behave, how leaks form, and how you can stay one step ahead.
Below are 11 practical, experience-driven tips that go beyond theory. These are the kinds of lessons people usually learn the hard way—but you don’t have to.
understanding how roof leaks actually happen
Before fixing anything, it helps to understand why leaks occur in the first place. Roof leaks aren’t always about obvious holes. In fact, most leaks are subtle. They start with small issues—cracked shingles, loose flashing, clogged gutters—and gradually worsen.
Water is persistent. It follows gravity, but it also travels sideways, seeps through tiny gaps, and collects in unexpected places. A leak that appears in your living room might actually originate several feet away on the roof.
Think of your roof like a layered system. It’s not just shingles—it’s underlayment, flashing, vents, and structural elements working together. When one component fails, the whole system becomes vulnerable.
tip 1: start with a visual inspection from the ground
Climbing onto your roof isn’t always necessary, especially at the beginning. A simple ground-level inspection can reveal a lot.
Walk around your home and look up. Pay attention to:
- Missing or curled shingles
- Dark patches or uneven areas
- Debris buildup
- Sagging sections
Use binoculars if needed. This step helps you identify obvious issues without risking your safety. Beginners often skip this and jump straight into complicated fixes, but observation is your first and most valuable tool.
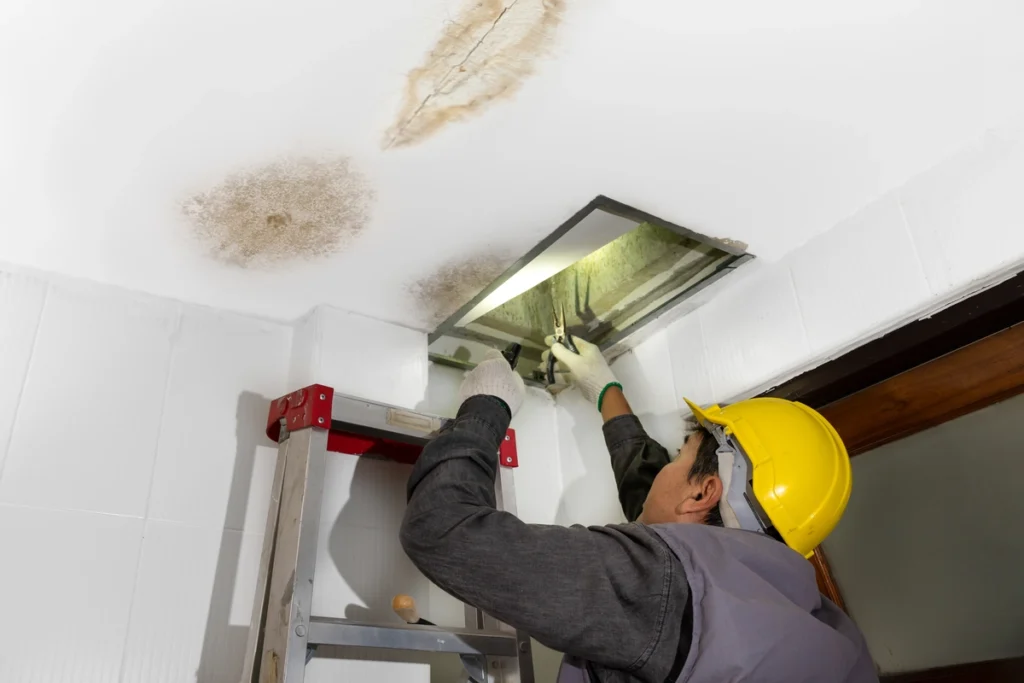
tip 2: check your attic before touching the roof
If your house has an attic, this is one of the best places to investigate a leak.
Go inside during daylight hours and look for:
- Sunlight peeking through small holes
- Damp insulation
- Mold or mildew smells
- Water stains on wood
This step gives you a clearer idea of where the leak is entering. Sometimes, the problem isn’t even visible from the outside yet.
A simple trick: turn off the lights and look for beams of light. If light can get in, water definitely can too.
tip 3: don’t underestimate clogged gutters
Many beginners assume roof leaks come from damaged shingles, but clogged gutters are one of the most common causes.
When gutters are blocked, water has nowhere to go. It backs up and seeps under the roof edges, eventually entering your home.
Regularly cleaning your gutters might seem like a small task, but it can prevent major headaches.
Create a simple schedule:
- Clean gutters every 2–3 months
- Check after heavy storms
- Remove leaves, dirt, and debris
Think of gutters as your roof’s drainage system. If it fails, everything else is at risk.
tip 4: learn the role of flashing
Flashing is one of the most overlooked parts of a roof, yet it plays a crucial role in preventing leaks.
It’s the thin metal installed around:
- Chimneys
- Skylights
- Roof valleys
- Vents
These are the most vulnerable areas where water tends to collect.
Over time, flashing can loosen, crack, or corrode. When that happens, water slips in through the gaps.
If you notice rust, lifting edges, or visible gaps, it’s a sign that the flashing needs attention. In many cases, resealing it with roofing cement is enough for beginners.
tip 5: use water testing to locate hidden leaks
Sometimes, leaks are tricky. You see the damage inside, but the source isn’t obvious.
That’s where water testing comes in.
Here’s a simple method:
- Have someone stay inside the house
- Use a garden hose on the roof
- Start spraying one section at a time
- Wait a few minutes before moving to the next section
This controlled approach helps pinpoint the exact entry point of water.
It’s slow, but effective—and much better than guessing.
tip 6: fix small issues before they grow
One of the biggest mistakes beginners make is ignoring minor problems.
A single cracked shingle might not seem urgent, but over time, it can lead to:
- Water infiltration
- Rotting wood
- Mold growth
- Structural damage
The earlier you fix something, the easier (and cheaper) it is.
Keep a basic repair mindset: if you see something off, address it immediately. Don’t wait for it to become visible inside your home.
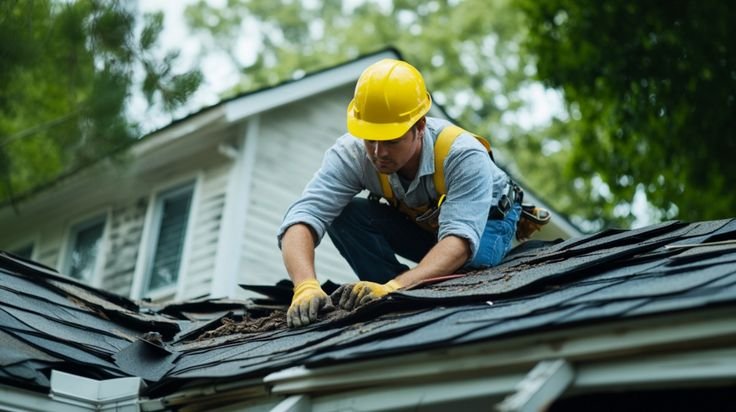
tip 7: understand basic shingle repair
You don’t need to be a professional roofer to replace a damaged shingle.
Here’s a simplified approach:
- Lift the surrounding shingles carefully
- Remove nails from the damaged piece
- Slide in a new shingle
- Secure it with roofing nails
- Seal with roofing cement
Take your time with this process. Precision matters more than speed.
Even a small repair done properly can extend your roof’s life significantly.
tip 8: seal around roof penetrations
Any object that passes through your roof—vents, pipes, antennas—creates a potential entry point for water.
These areas rely heavily on sealants, which degrade over time due to:
- Sun exposure
- Temperature changes
- Rain and moisture
Inspect these spots regularly and reapply sealant when needed.
This is one of the simplest yet most effective maintenance tasks you can do as a beginner.
tip 9: watch for early warning signs inside your home
Your house often gives subtle hints before a leak becomes obvious.
Look out for:
- Discoloration on ceilings
- Peeling paint
- Bubbling drywall
- Musty smells
These signs usually appear before actual dripping starts.
Catching them early allows you to act before serious damage occurs.
tip 10: avoid walking on your roof unnecessarily
It might be tempting to climb up and inspect everything closely, but walking on your roof can actually cause damage—especially if you’re inexperienced.
You can:
- Crack shingles
- Loosen materials
- Create new leak points
If you do need to go up, wear proper footwear and step carefully. Otherwise, rely on visual inspections and attic checks as much as possible.
tip 11: know when to call a professional
This might sound counterintuitive in a DIY guide, but it’s one of the most important lessons.
Not every problem should be handled alone.
Call a professional if:
- The leak is widespread
- Structural damage is visible
- You’re unsure about safety
- Repairs involve large sections of the roof
There’s no harm in asking for help. In fact, knowing your limits is part of being responsible.
practical maintenance routine for beginners
To make things easier, here’s a simple routine you can follow:
monthly:
- Visual inspection from the ground
- Check ceilings for stains
every 3 months:
- Clean gutters
- Inspect attic
every 6 months:
- Check flashing and sealants
- Look for loose shingles
after storms:
- Inspect for debris and damage
- Check for new leaks
Consistency matters more than complexity. A few minutes of inspection can save thousands in repairs.
lessons learned the hard way
Many homeowners only start paying attention to their roof after something goes wrong. The reality is, roofs rarely fail suddenly—they give warnings.
The challenge is noticing those warnings in time.
A small stain today might seem harmless, but left unchecked, it could mean replacing entire sections of your roof later.
Think of roof maintenance as prevention, not reaction.
It’s not about being perfect—it’s about being aware.
final thoughts
Fixing a roof leak isn’t just about stopping water from entering your home. It’s about understanding how your home protects you, and how you can maintain that protection.
For beginners, the key is to stay curious, observant, and proactive. You don’t need advanced tools or years of experience to make a difference. You just need to pay attention and act early.
Over time, what once felt complicated becomes second nature. And that moment of panic when you first notice a leak? It turns into a manageable problem you know how to handle.
frequently asked questions
- how can i tell if my roof leak is serious?
If the leak is spreading quickly, causing structural damage, or accompanied by mold, it’s serious. Small stains can still become major issues if ignored, so it’s best to investigate early. - can i fix a roof leak myself as a beginner?
Yes, many minor leaks can be fixed with basic tools and knowledge. However, large or complex issues should be handled by professionals. - how often should i inspect my roof?
At least once a month from the ground, and more thoroughly every few months or after storms. - what is the most common cause of roof leaks?
Clogged gutters, damaged shingles, and faulty flashing are among the most common causes. - is it safe to walk on my roof?
It can be risky, especially for beginners. If possible, avoid it or take proper safety precautions. - how long does a typical roof last?
It depends on the material, but most roofs last between 20 to 30 years with proper maintenance.
By following these tips and staying consistent, you’ll not only fix leaks—you’ll prevent them from happening in the first place.