
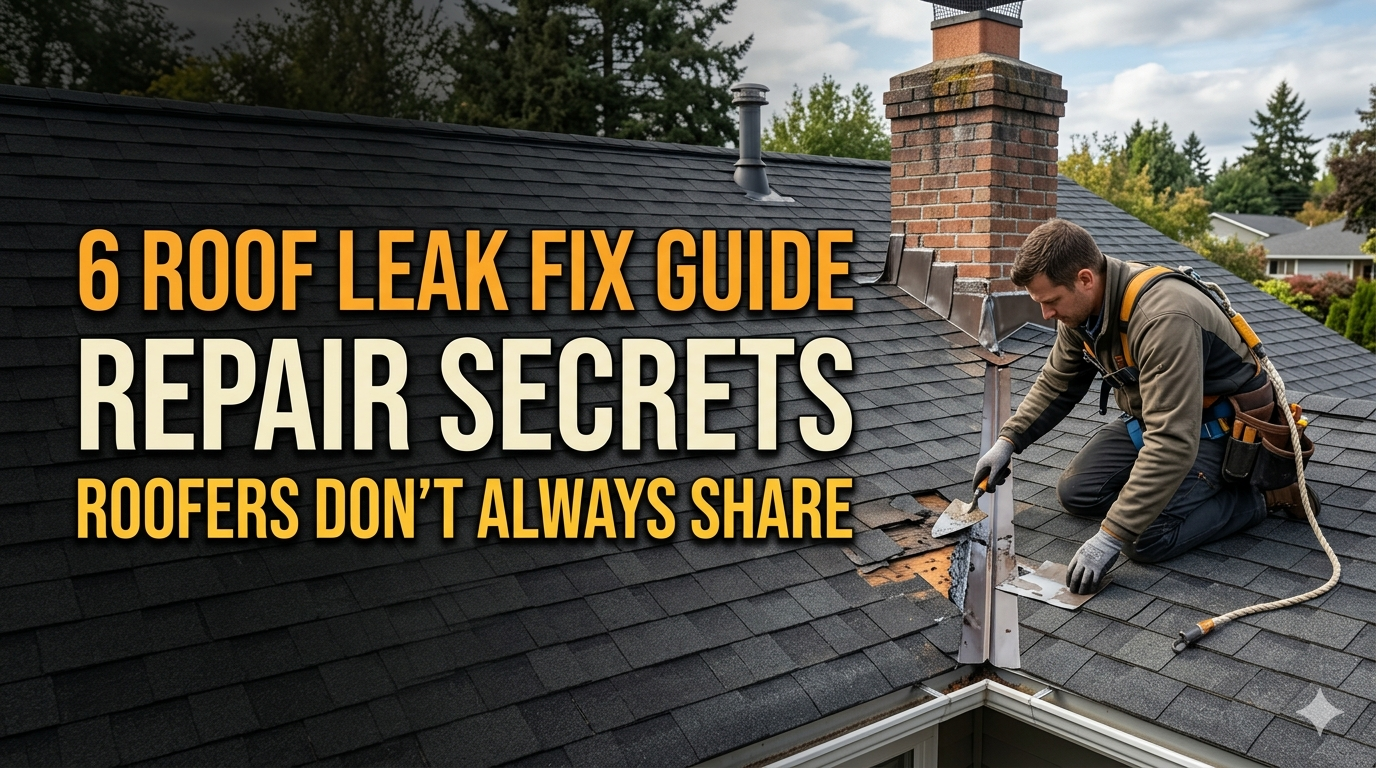
6 Roof Leak Fix Guide Repair Secrets Roofers Don’t Always Share
6 Roof Leak Fix Guide Repair Secrets Roofers Don’t Always Share
I’ve spent more years than I care to count crawling around on roofs, both my own and plenty of neighbors’ places here in the suburbs where the houses are older and the weather likes to test everything. You know how it goes – one rainy afternoon you notice that brown stain spreading across the ceiling in the upstairs bedroom, or maybe water starts dripping into a bucket you’ve got set up in the hallway. Panic sets in. Most folks immediately think they need to call a roofer and brace for a bill that could buy a decent used car. But here’s the thing I’ve learned the hard way: a lot of those leaks aren’t the catastrophe the pros make them out to be. Roofers have their reasons for keeping some tricks close to the vest. They’ve got businesses to run, after all. But if you’re handy enough to change your own oil or patch a drywall hole, you can handle most of this stuff yourself and save a bundle.
What I’m about to lay out here isn’t the usual fluffy advice you find in those big-box store pamphlets. These are the six real-deal secrets that the guys who do this for a living don’t always volunteer when they show up with their clipboards and estimates. I’ve pieced them together from fixing my own messes, helping buddies out after storms, and yes, occasionally picking the brains of roofers who owed me a favor after I bailed them out on a weekend job. We’re talking practical steps, the exact tools that actually work without breaking the bank, and the little details that separate a patch that lasts five years from one that fails in the next downpour.
Before we dive in, a quick reality check. Safety first, always. Roofs are slippery when wet, heights are no joke, and if your house is two stories or higher, or if you’ve got steep pitch, think twice about going up there alone. I’ve seen grown men slide off a wet asphalt shingle like it was ice. Get a good ladder, wear shoes with real grip, and if you’re not steady on your feet, call someone. Also, these fixes assume you’re dealing with standard asphalt shingle roofs common in most neighborhoods. Tile, metal, or flat roofs have their own quirks, and I’ll touch on those where it matters. If your leak is pouring in during a storm right now, start with the emergency tarp method I’ll mention later and buy yourself time.
The biggest mindset shift you need is this: water doesn’t leak straight down. It travels. That stain in your ceiling might be three feet away from the actual hole in the roof. Ignore that, and you’ll chase your tail forever. Roofers know this, but they sometimes skip explaining it because it makes the job sound more mysterious – and billable. Ready? Let’s get into the first secret that changes everything.
Secret One: The Water Stain on Your Ceiling Lies – Always Hunt Uphill and Sideways First
This one drives homeowners crazy, and roofers love watching them waste time staring directly above the drip. Gravity is sneaky. Rain hits the roof, finds a gap, then runs along the underside of the sheathing or felt paper until it finds the lowest point to drop through – usually right onto your light fixture or insulation. So that wet spot in the living room? The real problem is probably several feet higher up the slope, or even off to the side near a valley or chimney.
I learned this the painful way back in 2018 when my own garage started leaking after a big wind storm. I spent two weekends crawling around right over the stain, replacing shingles that looked fine, only to have it drip again the next rain. Finally, on a dry day, I climbed up and started thinking like water. I looked uphill about ten feet and found a lifted flashing around an old satellite dish mount I’d forgotten about. One tube of sealant later, problem solved. Roofers don’t always point this out because once you understand it, you can often fix it without their full crew.

Here’s how to do it yourself. First, get into the attic if you can. Bring a strong flashlight and a notepad. Look for dark water stains on the rafters, wet insulation, or mold starting to form. Mark the spots with bright tape or a marker right on the wood. Note how far they are from the edges. Then head outside. Climb up safely and start your search uphill from those marks. Focus on these usual suspects: missing or cracked shingles, gaps where shingles meet the ridge vent, areas around plumbing vents, chimneys, skylights, or anywhere the roof changes pitch.
If you can’t get in the attic – say it’s finished space or too tight – do the two-person garden hose test. This is pure gold and something a lot of pros use but won’t demonstrate for free. One person goes inside with a phone or radio. The other slowly sprays sections of the roof starting from the bottom and working up. Soak one small area at a time for a couple minutes and wait. The person inside calls out when they see water. Mark that spot on the roof with chalk or tape. It takes patience, but it pinpoints the entry in under an hour most times.
Once you’ve found the spot, inspect close. For asphalt shingles, look for granules missing in a pattern or nails that have popped up. On tile roofs, check for cracked or shifted pieces. Metal roofs often leak at seams or screw holes where the rubber washers have deteriorated. Don’t just slap sealant on yet. Clean the area thoroughly – use a broom or leaf blower to get debris out, then wipe with a rag and some mineral spirits if it’s oily.
For a quick repair on shingles, slide a flat pry bar under the damaged ones above to loosen the nails without breaking them. Remove the bad shingle carefully. Cut a patch from new matching shingle material – most home centers sell individual pieces or you can harvest from a spare bundle. Slide it in, nail it down with roofing nails (galvanized, 1-1/4 inch), and cover the nail heads plus all edges with a thick bead of roofing cement. I like the black plastic kind in the tube; it stays flexible longer than the cheap stuff.
If it’s a larger area, say three or four shingles, consider a full patch job. Cut out the damaged section in a neat rectangle, making sure to go under the row above for overlap. Install new underlayment felt first if it’s torn, then layer the new shingles in the same pattern as the existing ones. Overlap each row by at least five inches. Seal everything generously. This kind of repair has held up on my buddy’s house through three hurricane seasons now.
Common mistake I see all the time: people nail right through the middle of the shingle instead of the tar strip. That creates new holes. Always nail in the shaded area under the next shingle. Another tip roofers keep quiet – on hot days, shingles get soft and you can actually press them down to reseal without replacing. Just walk on them carefully in the heat of the afternoon and they often stick back down on their own adhesive.
For tile or slate, the process is similar but gentler. Lift tiles with a pry tool made for the job (they sell them cheap online), replace any broken ones, and use special tile adhesive or mortar if needed. Metal roofs? Check the screws – replace any with rubber washers that look cracked, and add a dab of lap sealant at every seam.
Do this right and that leak is gone. I’ve fixed dozens this way and only called a pro once when the whole valley was rotten. Takes maybe half a day once you know the drill, and costs under fifty bucks in materials. The secret here is patience and thinking like water, not like a panicked homeowner staring at the ceiling.
Secret Two: Your Plumbing Vent Boots Crack Long Before the Shingles Do – And Swapping Them Is Stupid Simple
If I had a dollar for every time a roofer quoted a full roof replacement only to find out later it was just a dried-out vent boot, I’d have my own beach house. These little rubber or plastic collars around your bathroom and kitchen exhaust pipes are the weak link on almost every roof built since the 1980s. Sun bakes them, they crack, water sneaks in right at the pipe, and it runs down inside the walls or attic. Homeowners blame the shingles. Roofers sometimes do too, because replacing a boot is a fifteen-minute job they can’t charge big money for.
I caught this on my own house a few years back. Water was appearing near the master bath ceiling after every rain, but no stains directly under the shingles. Went up, wiggled the vent pipe – sure enough, the rubber boot had split all the way around. Replaced it for twelve bucks at the hardware store and it’s been bone dry since.
Here’s exactly how to do it. First, confirm it’s the boot. From the attic, look for wet spots right around where the vent pipe comes through. Outside, inspect the boot – look for cracks, gaps, or where it’s pulled away from the pipe. If the pipe itself is loose, that can cause issues too.
Tools you need: flat pry bar, utility knife, pliers, caulk gun, new boot (measure your pipe diameter – usually 2 or 3 inch for standard vents), roofing nails or screws, and roofing cement. Get the kind that matches your roof color if possible, though black works fine under shingles.
Step one: carefully lift the shingles around the boot using the pry bar. Don’t force it – work from the bottom up so you don’t tear the felt. Slide the old boot off the pipe. It might be nailed or screwed down underneath. Cut away any old sealant.
Clean the area around the pipe base really well. Any old gunk left will prevent the new boot from sealing. Slide the new boot over the pipe. It should fit snug – some have a flexible top that stretches. Pull it down so the base flange sits flat on the roof.
Now nail or screw the flange down every six inches or so around the edge. Use the existing holes if you can. Then, lift the surrounding shingles back over the flange and nail them down too. The key – and this is what separates a good fix from a leaking one – is to apply a thick layer of roofing cement under the lifted shingles and all around the base of the boot. Smooth it out so water can’t get underneath.
Finally, run a bead of sealant where the boot meets the pipe itself. Some folks use silicone here, but I stick with roofing cement because it stays flexible in temperature swings. Let it cure for a day before testing with the hose.
If your roof is metal, you’ll use a different boot style with a metal base – same idea, but seal the seams with specific metal roof sealant. For tile roofs, the boot might sit in a mortar bed; you’ll need to re-mortar around it carefully.
Why don’t roofers always mention this first? Because once you know how easy it is, you realize half the “major” leaks they diagnose are just these. I’ve shown three different neighbors this trick and saved them each at least a thousand dollars. One guy even did it on his commercial building’s vents and stopped leaks that had plagued him for years.
Watch out for these pitfalls: don’t use cheap no-name boots from the dollar store – get the heavy rubber ones rated for UV. And always overlap the shingles properly so the boot flange is covered by at least one full row above it. If the pipe is rusted or damaged, replace that section too while you’re up there – cheap insurance.
This fix has a crazy high success rate. I’ve done it in rain, snow, and blistering heat, and it holds. Takes under an hour, costs less than twenty bucks, and gives you that satisfying “I fixed it myself” feeling that lasts longer than any warranty the pros offer.
Secret Three: Flashing Around Chimneys and Walls Is the Real Villain – Seal It Right and Skip the Expensive Tear-Off
Chimneys, dormers, walls where the roof meets the house – these transition points are where ninety percent of hidden leaks actually start. The flashing – that metal or rubber sheeting that seals the joint – gets corroded, pulled loose by wind, or the sealant dries out. Water runs behind it and into your attic or walls. Roofers know this better than anyone, but they’ll often push a full re-roof because repairing flashing properly takes skill and time they’d rather charge premium for.
I fixed a chimney leak on an old Victorian-style house for a friend last fall. The roofer wanted eighteen grand for a new roof. We went up, found the step flashing had separated from the brick by half an inch in spots, reapplied everything, and it’s been tight through two winters already.
The secret is understanding counter-flashing and step flashing. Most leaks here happen because the original install wasn’t overlapped correctly or the mortar around the chimney cracked.
Start by inspecting. From the roof, look for rust on the metal, gaps, or sealant that’s cracked and peeling. Inside the attic, stains running down the chimney chase are a dead giveaway.
To repair: First, clean out all old caulk and debris. Use a wire brush and then solvent. If the metal flashing is rusted through, cut out the bad section and replace with new aluminum or copper flashing – copper lasts forever but costs more.
For step flashing (the pieces that go up the chimney side under each shingle row), you’ll need to lift the shingles row by row. Slide new flashing pieces underneath, overlapping each by at least four inches. Nail them into the roof deck, not the chimney. Then tuck the top edge into the mortar joints of the brick – this is counter-flashing. Rake out old mortar, insert the metal, and repoint with fresh mortar or use a good exterior sealant rated for masonry.
Around the base, apply roofing cement liberally where the flashing meets the shingles. Some pros use self-adhering membrane under the flashing for extra insurance – that’s a trick I picked up from a commercial roofer friend. Roll it out sticky-side down, overlap seams by six inches, then install flashing on top.
For walls or dormers, same principle: the flashing should extend at least six inches up the wall and be covered by siding or counter-flashing.
Test it after curing – hose test again. If water still comes in, you might need to remove more shingles and add ice-and-water shield membrane underneath for extra protection in cold climates.
Common rookie error: sealing everything with silicone caulk. It looks good but cracks in a year or two because it doesn’t stay flexible with roof movement. Stick to roofing-grade products. Another mistake is nailing flashing into the chimney itself – that cracks the mortar and creates new paths for water.
On tile roofs, flashing often sits under tiles; you’ll lift a few courses carefully. Metal roofs use special soldered or screwed flashing with sealant.
This repair can take a full afternoon if the chimney is big, but materials run maybe a hundred bucks. I’ve seen it save houses from major interior damage more times than I can count. Roofers don’t push this because a proper flashing job looks simple after it’s done, and they’d rather sell the whole package. But done right, it outlasts most shingles.
Secret Four: The Garden Hose Test Is Only the Beginning – Pros Use Pressure and Timing Tricks You Can Steal
Most guides stop at “use a hose to find the leak.” Real roofers take it further because basic spraying misses intermittent or pressure-driven leaks. They use controlled pressure, timing with wind direction, and sometimes even dye in the water to trace paths. You can do the same without fancy equipment.
I use this advanced version all the time now. Start with the basic two-person setup I mentioned earlier. But instead of just spraying, have your helper use a spray nozzle on a gentle mist at first, then build to a harder stream that mimics driving rain. Test sections for five full minutes each – leaks sometimes take time to travel.
Key trick: test on windy days or simulate wind by having someone fan the spray. Water behaves differently with wind pushing it under shingles. Also, test uphill sections separately because runoff from higher areas can mask lower leaks.
For really stubborn ones, add a little food coloring or leak-detection dye to the water. It shows up inside on the stains or insulation, telling you exactly which path it took. Cheap bottles from the hardware store work fine.
Inside, while testing, use a bright light and mirror on a stick to inspect dark corners. Mark every possible entry with tape.
Once located, the repair depends on what you find. But the real secret roofers don’t share is combining this test with a moisture meter. You can buy a cheap pin-type one for thirty bucks. Poke it into suspect wood or insulation before and after testing to confirm wet spots.
I once helped a neighbor whose leak only appeared after heavy prolonged rain. Basic hose test missed it because we didn’t soak long enough. Added the dye and timed it for ten minutes – water showed up in the attic near a valley flashing that looked fine from above. Fixed it with new membrane and sealant.
Do this on a dry day, obviously. And document everything with photos – before, during, after. Helps if you ever sell the house or need to show insurance.
This method turns guessing into certainty. Takes longer but saves replacing the wrong sections. Pros use drones and thermal cameras for big jobs, but for a house, hose plus dye plus meter is all you need.
Secret Five: Roofing Cement and Tape Aren’t Just Temporary – Applied the Pro Way, They Last Years
Roofers will tell you any patch with cement or tape is “temporary” so you’ll hire them for a permanent fix. Truth is, when you prep the surface right and layer properly, these materials hold up through seasons most people never expect.
I’ve got patches on my shed roof that are six years old and still watertight after multiple storms. The secret is surface prep and multiple layers.
For small holes or cracks: clean thoroughly, dry completely (use a heat gun or hairdryer if needed). Apply a base layer of roofing cement thick as peanut butter. Press a piece of roofing fabric or mesh into it for reinforcement. Top with another thick layer, feathering the edges so water runs off.
For larger areas, use peel-and-stick roofing tape or membrane. The good stuff is self-adhering and comes in rolls. Cut to size, remove backing, press firmly with a roller. Overlap seams by at least three inches. Then cover the entire patch with cement or a UV-rated coating to protect from sun.
On metal roofs, use the specific lap sealant made for your panel type – not generic cement.
The pro trick: always work on a warm day so materials flow better. And apply in thin layers, letting each cure slightly before the next. Thick single blobs crack.
I’ve used this on vent bases, valley seams, and even around satellite mounts. Lasts way longer than the “temporary” label suggests because modern tapes are polymer-based and flex with the roof.
Cost is minimal – a big tube of cement is under ten bucks, tape around twenty. Beats paying hundreds for a service call.
Just remember to re-inspect every spring. Touch up as needed. This isn’t set-it-and-forget-it, but it’s reliable.
Secret Six: Half the Time It’s Not the Roof at All – Check Interior Sources and Condensation Before Climbing
This is the one that really burns roofers when you figure it out yourself. You call them for a “roof leak,” they come out, find nothing obvious, and still charge for the visit. Meanwhile, the real culprit is a clogged gutter overflowing into a wall, a plumbing vent inside the attic, or winter condensation from poor ventilation.
I’ve been there. Neighbor swore his roof was leaking. Roofer wanted big money. I went up, found the roof perfect. Then checked the attic – massive condensation on the underside from inadequate soffit vents and no ridge vent. Added vents and baffles, problem gone.
How to check: First, rule out the roof with the hose test. If no leak appears, look inside. Wet spots near exterior walls? Could be gutters or downspouts leaking. Check for ice dams in winter – those cause water to back up under shingles but start with poor insulation.
For condensation: look for widespread dampness without a single entry point. Mold patterns on the ceiling side, not rafters. Fix by adding insulation, vapor barriers, and ventilation.
Plumbing leaks inside walls can mimic roof issues. Turn off water and watch for drips.
Attic plumbing vents without proper boots, or bathroom exhaust fans venting into the attic instead of outside – common in older homes.
The secret roofers don’t volunteer? They’ll sometimes diagnose a roof issue to keep the job simple. But smart homeowners check all this first.
Tools: moisture meter, flashlight, ladder for gutters. Fix gutters by cleaning and resealing joints with gutter sealant. Add ventilation with cheap baffles and ridge vent material.
This saves unnecessary roof work entirely. I’ve talked three people out of full replacements this way.
Wrapping It Up: When to Call a Pro and How to Stay Ahead
You now have the six secrets that level the playing field. Most leaks can be handled with these methods if you take your time and follow the steps. But there are limits. If the decking is rotten, multiple valleys failing, or you’ve got a flat roof with ponding water, call a licensed pro. Same if you’re uncomfortable on heights or the leak keeps returning after your best efforts.
Prevention is the real long game. Clean gutters twice a year. Trim trees away from the roof. Inspect flashing and boots every spring. Keep the attic ventilated. Walk the roof after big storms looking for shifted shingles.
I’ve saved thousands over the years doing this myself. My neighbors have too once I showed them. Roofing companies do great work when you need it, but they don’t always share these details because it’s not in their interest. Knowledge is power here.
Start small. Pick one secret that matches your situation. Test, repair, test again. You’ll be amazed how much control you get back over your own home. And the next time it rains, instead of worrying, you’ll just smile knowing you’ve got this.


