

10 Smart Roof Leak Fix Guide Repair Ideas Most People Ignore
Meta Description: Roof leak fix guide tips most people skip — discover 10 smart, proven repair ideas to stop water damage fast and protect your home year-round.
10 Smart Roof Leak Fix Guide Repair Ideas Most People Ignore
Water stains on your ceiling. Damp walls. That musty smell after rain. Sound familiar?
One of the most distressing problems a homeowner can face is a leaking roof. And the worst part? Most people either don’t do anything about it until it gets worse — or they take the wrong approaches and end up paying for nothing.
The truth is, a lot of roof leaks can be fully repaired if you know what to look for and what they need. The problem is, most guides simply cover the basics. They say to replace shingles or call a roofer. That’s helpful — but incomplete.
But this roof leak repair guide is not like that. It details 10 smart repair ideas that most homeowners totally miss. They are practical, proven and won’t leave you broke.
Whether you’re a first-time homeowner or someone who’s been battling an annoying drip for years, this guide is for you.
Why Roof Leaks Are Sneakier Than You Realized
The place where you think a roof is leaking rarely is.
That water mark in your hall? The real way in could be 10 feet away — up on the roof, behind a vent, or far back in a valley. Water runs along rafters and beams before it drips down.
This is the reason many quick fixes backfire. People patch the wrong spot.
The secret is learning how water travels — and then going after the real source. That’s what this guide is here for.
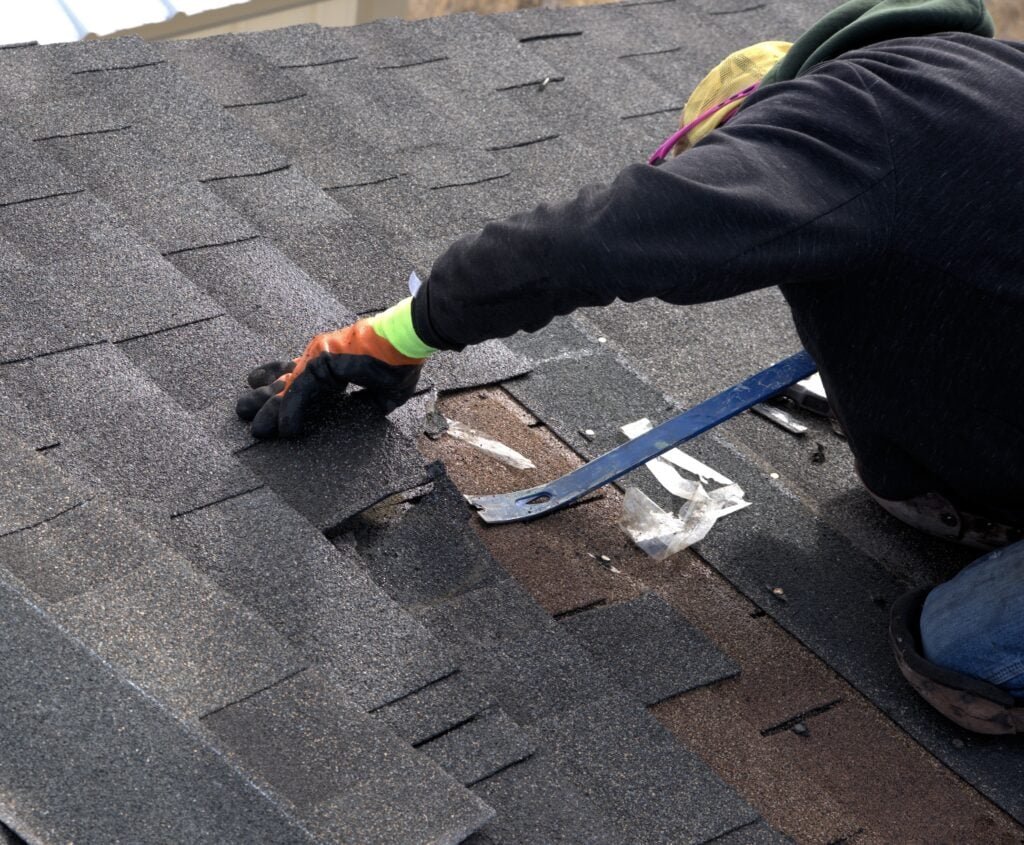
Tip #1 — Before Anything Else, Check the Pipe Boots
Most folks start by examining shingles. Big mistake.
Pipe boots (also known as pipe flashings) are the rubber or metal collars that cover pipes protruding from your roof. They fill the space between the pipe and roofing material.
Here’s the deal: rubber pipe boots harden and crack over time. A broken pipe boot can let in gallons of water with each rainstorm — even if your shingles look great.
How to Spot a Bad Pipe Boot
- Check for cracks or separation in the rubber collar
- See if the boot has come loose from the pipe
- Look for rust on metal boots
- Look for nails that have popped up holding it down
The Fix
You do not have to buy a new boot every time. A rubber pipe boot repair kit (you can find them at almost any hardware store, usually for under $20) can seal it back up in a jiffy. It slides over the old boot and creates a watertight bond.
This single repair cures thousands of roof leaks annually — and yet it’s one of the most neglected areas on the roof.
Tip #2 — Resealing Step Flashing at Walls and Dormers
Here is something most homeowners aren’t even aware exists: step flashing.
Step flashing consists of a series of small, L-shaped pieces of metal that align with the edges where your roof meets a wall or dormer. Each piece overlaps the previous one in order to channel water away.
Over time, this flashing can rust, bend, or pull away from the wall. When it does, water slips in right behind.
Why This Gets Ignored
Step flashing goes under siding and shingles. It is invisible from the ground. And most roof inspections bypass it unless the inspector is actively looking.
What You Can Do
- Gently peel back the lower edge of the siding just below the roof line
- Check for bent or corroded flashing, or pieces that are missing
- Re-seal any cracks using roofing caulk or flashing sealant
- Replace any pieces that are entirely rusted through
This is a fix that doesn’t cost much and prevents a lot of damage.
Tip #3 — Don’t Neglect the Roof Valley
The roof valley is the V-shaped channel formed by the intersection of two slopes. Think of it like a highway for rainwater. Every drop that hits close to it runs down through the valley.
Because of that, valleys bear the brunt from rain, ice, and debris. But most homeowners do not check them until there’s a major problem.
Common Valley Problems
| Problem | What It Looks Like | Likely Cause |
|---|---|---|
| Open gaps | Visible daylight or cracks | Worn or missing flashing |
| Cracks in sealant | Dark lines, crumbling edges | Age and UV exposure |
| Debris buildup | Leaves, moss, or dirt piled up | Poor drainage |
| Rusted valley flashing | Brown staining along the channel | Old metal flashing |
The Simple Fix
Clean the valley first. Remove all debris. Then look under the metal flashing. If it is intact, reseal the edges with roofing cement or flashing tape. If it’s rusted or cracked, replacing the valley flashing is a weekend’s work for a confident DIYer.
Tip #4 — Making Sure Nail Pops Never Become Big Leaks
This is one of the sneakier reasons roofs leak — and hardly anyone mentions it.
Nail pops occur when roofing nails gradually rise up through the shingles. This is caused by temperature changes, wood expansion, and simple aging.
A nail pops up and there’s a small hole that goes right through the shingle. Water gets in. Slowly. Quietly. Until you end up with a large, wet stain on your ceiling months later.
How to Find Nail Pops
Walk your roof (safely!) and look for:
- Small bumps or raised spots underneath shingles
- Shingles with a slight lift in one area
- Shiny nail heads peeking out from beneath shingle edges
How to Fix Them
- Nail it back down securely
- Use a dab of roofing cement to cover the nail head
- Press the shingle down flat and seal the edge with additional cement
- If the shingle is cracked, replace it
Cost to fix: Almost nothing. Cost if left unaddressed: Hundreds or thousands of dollars.
Tip #5 — Skylights Are an Undetected Leak Factory
Love your skylight? Your roof might not.
One of the foremost causes of roof leaks — especially old ones — are skylights. The issue is usually not with the skylight itself. It’s the flashing around it.
The sealant around a skylight deteriorates with time, cracking and separating. Water then seeps in around the frame and drips down into your ceiling or walls.
How to Tell if Your Skylight Is the Problem
- Water stains immediately beneath or close to the skylight
- Condensation between the glass panes (sign of seal failure)
- Visible gaps or cracked caulk around the frame
The Fix
- Clean around the entire frame
- Remove old, cracked sealant completely
- Apply fresh silicone roofing sealant all the way around the frame
- For older skylights, consider replacing the flashing kit altogether
Don’t caulk over old caulk. Old sealant will fail to bond and the leak will reappear within months.
Tip #6 — Check Your Attic Ventilation (Yes, Seriously)
This one throws a lot of people for a loop.
Bad attic ventilation doesn’t only lead to heat buildup — it creates condensation leaks. When hot, humid air from within your home rises into the attic and meets a cold surface, it condenses into water droplets.
Those droplets drip down. And from below, it looks just like a roof leak.
Signs It’s a Ventilation Problem
- Leaks appear in winter or on cold days (not rainy ones)
- Water stains close to the top of the ceiling
- Frost or ice buildup in the attic
- Mold growing on roof deck boards
What to Do
- Make sure your insulation isn’t blocking your soffit vents
- Install a ridge vent if you don’t have one
- Ensure bathroom and kitchen exhaust fans vent outside the attic, not into it
- If moisture is severe, consider adding a powered attic ventilator
Fixing ventilation is one of the smartest long-term investments you can make for your roof.
Tip #7 — Chimney Flashing Is Almost Always the Problem
Got a chimney? Then you have a potential leak waiting to happen.
The chimney flashing is the metal that seals the joint between your chimney and the roof. It consists of two layers: the base flashing (which bends up against the chimney) and the counter flashing (which is embedded into the chimney mortar).
When these layers separate — or when the mortar cracks — water pours right in.
A Quick Chimney Leak Checklist
- Look for gaps between the flashing and the chimney bricks
- Check if the counter flashing has pulled out of the mortar joints
- Look for rust stains running down from the chimney
- Inspect the mortar joints on the chimney itself for cracks
Repair Options
For small gaps, roofing sealant or elastomeric caulk can seal things up. For wider separations, you may need to re-embed the counter flashing using mortar or hydraulic cement.
Don’t use regular caulk here. Only use products specifically rated for masonry and roofing.
Tip #8 — Treating and Removing Roof Moss Before It Destroys Shingles
Moss looks harmless. It’s not.
When moss takes up residence on your roof, it holds moisture against the shingles 24/7. This gradually breaks down the shingle material and lifts the edges. Water then slides right underneath — straight into your roof deck.
The Moss Problem at a Glance
If left untreated, moss can reduce the lifespan of asphalt shingles by 5–10 years.
How to Get Rid of Roof Moss
- Brush it off gently using a soft-bristle roof brush (don’t pressure wash — it damages shingles)
- Apply a moss killer — look for products containing zinc sulfate or potassium salts of fatty acids
- Install zinc or copper strips near the ridge — when it rains, these metals wash down and naturally prevent moss regrowth
Prevention Tips
- Trim overhanging branches to let sunlight reach the roof
- Clean gutters regularly so moisture doesn’t back up
- Keep the roof surface clear of leaves and debris
This is a repair no one pays attention to until they’re replacing whole sections of roof.
Tip #9 — Fixing Missing or Cracked Drip Edge Flashing
Here’s another one that hardly anybody talks about: the drip edge.
A drip edge is a thin strip of metal installed along the edges of your roof — at the eaves and rakes. Its role is to channel water away from the fascia and into the gutter.
Without a proper drip edge (or with a damaged one), water runs down behind the gutter and soaks into the fascia board and soffit. Over time, this leads to rot, mold, and leaks into the walls.
Signs of Drip Edge Problems
- Rotting fascia boards
- Water stains on the soffit (the underside of the roof overhang)
- Gutters pulling away from the house
- Water running down the side of the house during rain
How to Fix It
Replacing the drip edge flashing is one of the simplest roofing repairs. Metal drip edge strips cost just a few dollars per linear foot. You slip them under the first row of shingles and nail them to the roof deck.
If you’re re-roofing any section, always install fresh drip edge. It’s cheap insurance.

Tip #10 — Temporary Repairs With Roof Tape and Peel-and-Stick Flashing
Sometimes a storm hits and you need a quick fix before the pros can get there.
Self-adhesive flashing tape (also known as peel-and-stick flashing or butyl tape) is one of the most underappreciated tools in a homeowner’s toolkit. It creates an instant waterproof barrier over cracks, gaps, and damaged areas.
When to Use Roof Tape
- Emergency repairs after storm damage
- Temporarily sealing around vents or skylights
- Patching small cracks in metal flashing
- Covering exposed nail holes
Tips for Getting It Right
- Surface must be clean and dry for the tape to bond
- Use a roller or your hand to press it firmly into place
- Choose tape rated for UV exposure if it’ll be in direct sunlight
- Don’t rely on it as a permanent fix — plan for a full repair within a few months
Brands such as Grace Ice & Water Shield, Henry FlashBand, and 3M All Weather Flashing Tape are reputable choices widely available online and at hardware stores.
For more detailed repair walkthroughs and product recommendations, visit Roof Leak Fix Guide — a dedicated resource for homeowners dealing with all types of roof leaks.
A Quick Comparison: DIY vs. Professional Roof Repairs
| Repair Type | DIY Friendly? | Avg. DIY Cost | Professional Cost |
|---|---|---|---|
| Pipe boot replacement | Yes | $15–$40 | $150–$300 |
| Step flashing reseal | Moderate | $20–$60 | $200–$500 |
| Valley flashing repair | Moderate | $50–$150 | $300–$700 |
| Skylight resealing | Yes | $10–$30 | $150–$400 |
| Chimney flashing repair | No (most times) | N/A | $400–$1,500 |
| Moss treatment | Yes | $20–$80 | $200–$600 |
| Drip edge replacement | Yes | $30–$100 | $200–$500 |
How to Find Where a Roof Leak Is Actually Coming From
You need to discover the source before you fix anything.
Here’s a simple process:
Step 1 — Go into the attic on a rainy day. Bring a flashlight. Check for water trails, wet insulation, or staining on the wood.
Step 2 — Trace the water uphill. Water comes in higher than where it drips. Follow the trail upward.
Step 3 — Look for light from outside. Any pinhole of daylight you can see in the attic is a possible entry point for water.
Step 4 — Use a garden hose. On a dry day, have someone run a hose over different sections of the roof while you watch from inside the attic. Start low and work your way up.
Step 5 — Check all the usual suspects. Pipe boots, flashing, valleys, vents, skylights — in that order.
According to the Insurance Information Institute, water damage and freezing is one of the most common and costly homeowner insurance claims — making early roof leak detection more important than ever.
FAQs — Roof Leak Fix Guide
Q: How can I temporarily stop a roof leak from inside? Place a bucket under where it drips. Then, locate the water trail in the attic and slide a piece of plywood under the point where it is leaking. Use roofing tape or a tarp to cover the entry area until repairs can be made.
Q: Can I fix a roof leak myself or do I need a roofer? Many small repairs — like replacing pipe boots, reapplying caulk around skylights, or patching nail holes — are entirely DIY-friendly. For chimney flashing, large sections of damaged shingles, or anything that calls for a complete replacement, hire a licensed roofer.
Q: What do roof leak repairs cost? Small repairs can cost as little as $10–$50 for materials. Professional repairs generally range from $150 to $1,500 depending on the cause and extent of damage. Full roof replacements average $8,000–$20,000 depending on size and material.
Q: Why does my roof only leak in heavy rain and not light rain? Small cracks or nail holes might handle light rain but overflow during heavy downpours. Check valleys, pipe boots, and flashing — these areas are most likely to get overloaded during heavy rainfall.
Q: How long does a roof repair last? A good repair using the right materials should last 5–10 years or longer. Poor-quality caulk or improper application can fail within 1–2 years. Always use roofing-grade materials rated for outdoor and UV exposure.
Q: What is the most common cause of roof leaks? Flashing failures (around chimneys, vents, and skylights) are the single most common cause of roof leaks — more common than damaged shingles.
Q: Is roof moss actually harmful? Yes. Moss holds moisture against shingles and slowly lifts them from the edges. Over the years, it causes serious shingle deterioration and can rot out the roof deck beneath.
Wrapping It All Up
Roof leaks don’t always originate where you expect them to — and they seldom repair themselves.
The 10 ideas in this roof leak fix guide address all the areas most homeowners and even some contractors miss. Pipe boots. Step flashing. Nail pops. Drip edge. Moss buildup. Skylight seals. These are the stealthy culprits behind thousands of costly water damage claims every year.
The good news? Most are also easy and inexpensive to fix if caught early enough.
Start with a thorough inspection. Use the attic-first approach. Go through the usual suspects in order. And when you discover the problem, use the right materials for the job — not whatever caulk happens to be lying around in your junk drawer.
Your roof is the first line of defense for your home. A little attention now saves a lot of heartache later.
Found this guide helpful? Pass it along to a neighbor — roof leaks are one of those issues everyone deals with but nobody ever talks about enough.


