8 Proven Roof Leak Fix Guide Steps That Saved My Roof
8 Proven Roof Leak Fix Guide Steps That Saved My Roof
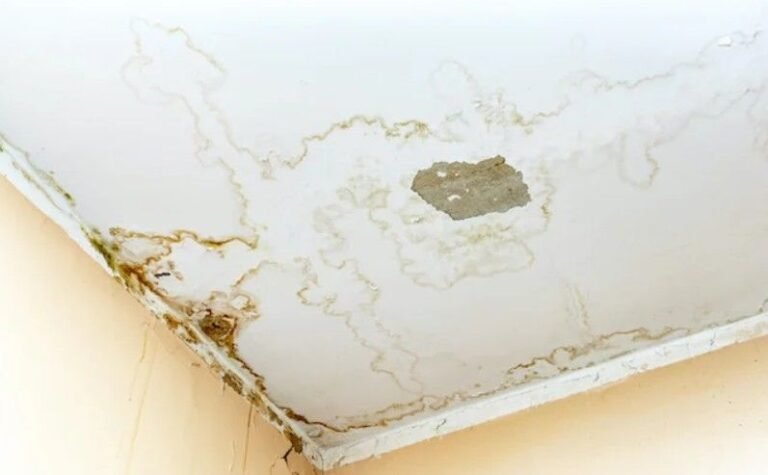
There’s something uniquely unsettling about hearing water drip inside your home when it’s raining outside. It’s not just the sound—it’s what it represents. Damage. Expense. Disruption. I still remember the first time I noticed a faint stain spreading across my ceiling. At first, I ignored it. A small patch, nothing urgent. But as days passed and the next rain came, that patch darkened, stretched, and eventually betrayed me with a steady drip.
That moment pushed me into action. What followed was not a quick fix but a journey—one that involved trial, error, learning, and ultimately, success. These eight proven steps didn’t just fix my roof; they saved it. Along the way, I learned practical lessons, made a few mistakes, and discovered that roof leaks are rarely as simple as they seem.
This guide is not just a checklist. It’s a story-backed, experience-driven approach to fixing roof leaks effectively and preventing them from returning.
step 1 understanding the true source of the leak
The biggest mistake I made early on was assuming the leak was directly above the visible damage. It’s a natural assumption—but a misleading one. Water travels. It sneaks along beams, under layers, and through insulation before revealing itself.
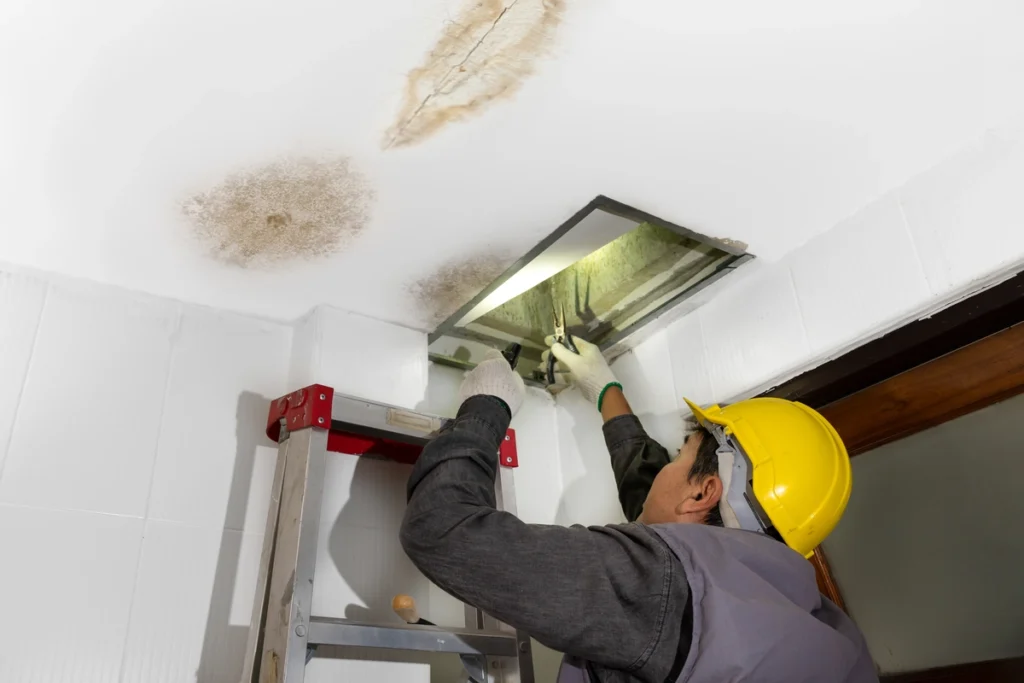
I started by tracing the leak from inside. I went into the attic during daylight and turned off the lights. Any small beam of light shining through was a clue. Then I checked for damp insulation, mold patches, or dark streaks along wooden beams. These subtle indicators pointed me toward the actual entry point.
Outside, I inspected the roof with patience. Instead of focusing only on the obvious area, I looked uphill from the leak spot. Roof leaks often originate higher than where they appear inside. Cracked shingles, lifted flashing, or clogged valleys all became suspects.
The turning point came when I realized that finding the leak is more about detective work than repair work. Until you identify the real source, any fix is temporary at best.
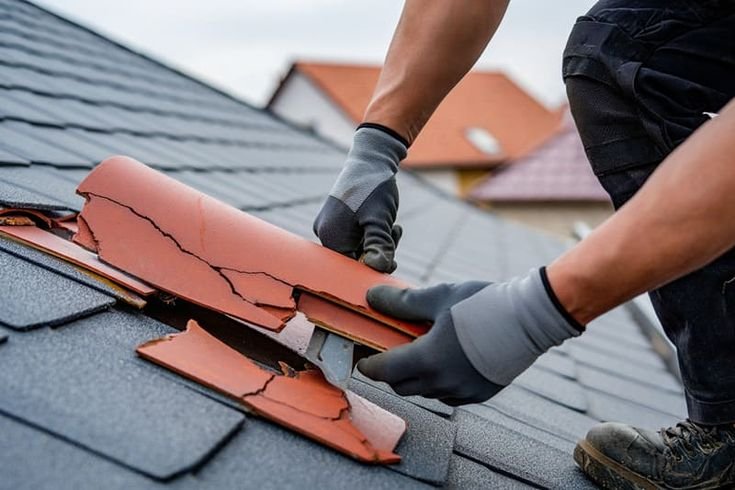
step 2 inspecting shingles and surface damage
Once I had a general idea of where the leak might be coming from, I focused on the shingles. This step taught me how much damage can go unnoticed from the ground.
Some shingles were visibly cracked. Others were curled at the edges, allowing water to slip underneath. A few had lost their granules, making them vulnerable to further deterioration. I also found one missing shingle that I had completely overlooked before.
I learned to gently lift shingles and check underneath. Moisture, rot, or soft decking beneath them indicated prolonged leakage. It was a reminder that surface damage often hides deeper issues.
Replacing damaged shingles wasn’t difficult, but identifying all of them required careful attention. I worked section by section, ensuring nothing was missed.
step 3 checking flashing and roof joints
Flashing is one of those elements you don’t think about—until it fails. Around chimneys, vents, skylights, and roof edges, flashing acts as a barrier against water intrusion. In my case, it was the weakest link.
The flashing around a vent pipe had slightly lifted. It wasn’t dramatic, but it was enough. Water had been seeping in during heavy rain and slowly working its way inside.
I removed the affected area, cleaned it thoroughly, and resealed it properly. In some cases, I replaced old flashing entirely. This step made a noticeable difference.
Roof joints are especially vulnerable. Any place where two surfaces meet is a potential entry point for water. Paying extra attention here prevented future issues that might have gone unnoticed.
step 4 sealing leaks with the right materials
At first, I used whatever sealant I had available. That was a mistake. Not all sealants are designed for roofing, and some degrade quickly under sunlight and weather exposure.
After doing proper research, I switched to roofing-specific sealants. These are designed to expand and contract with temperature changes, ensuring long-term durability.
Applying sealant isn’t just about filling gaps. It requires cleaning the surface, drying it completely, and applying the sealant evenly. I learned to avoid overusing it, as excess can trap moisture instead of preventing it.
In areas like flashing and small cracks, the right sealant became my best ally. It’s a small step, but it plays a critical role in ensuring that repairs last.
step 5 fixing roof valleys and drainage paths
Roof valleys are where two slopes meet, and they naturally channel water downward. Because of this, they are highly prone to leaks.
In my case, debris had accumulated in one of the valleys. Leaves, dirt, and small twigs had created a blockage. Water was pooling instead of flowing, eventually finding its way under the shingles.
I cleared the debris and installed proper valley flashing where needed. This improved water flow significantly. I also made it a habit to check valleys regularly, especially after storms.
Good drainage is essential. A roof isn’t just a barrier; it’s a system designed to direct water away efficiently. Any disruption in that system increases the risk of leaks.
step 6 repairing underlying structural damage
Fixing the surface alone isn’t enough if the underlying structure has been compromised. When I removed damaged shingles, I discovered sections of the decking that had softened due to prolonged exposure to moisture.
This was a wake-up call. Ignoring structural damage would only lead to bigger problems later.
I replaced the affected sections of decking, ensuring they were solid and properly secured. I also checked nearby areas for signs of weakness. It’s better to address these issues early rather than waiting for them to worsen.
This step required more effort, but it reinforced the importance of thoroughness. A roof is only as strong as its weakest layer.
step 7 testing repairs before declaring success
After completing the repairs, I was tempted to call it a day. But experience taught me otherwise. A repair isn’t truly complete until it’s tested.
I simulated rainfall using a garden hose. Starting from the lowest point and gradually moving upward, I checked for any signs of leakage inside. This controlled approach helped me identify any missed spots.
At first, I found a small area that still needed sealing. Fixing it immediately saved me from future trouble.
Testing provided peace of mind. It confirmed that the work was effective and that I could trust the repairs during actual rainstorms.
step 8 creating a maintenance routine to prevent future leaks
Fixing the leak was only part of the journey. Preventing future leaks became my new priority.
I established a simple maintenance routine. Twice a year, I inspect the roof for damage. After heavy storms, I check for debris accumulation. I also clean gutters regularly to ensure proper drainage.
These small habits make a big difference. Roof maintenance doesn’t require constant attention, but it does require consistency.
I also learned to act quickly. Even minor issues can escalate if ignored. Addressing them early saves time, money, and stress.
lessons learned along the way
Looking back, the process taught me more than just how to fix a roof leak. It changed how I approach home maintenance in general.
Patience is essential. Rushing leads to missed details. Observation matters. Small signs often point to bigger problems. And most importantly, understanding the system is more valuable than applying quick fixes.
There were moments of frustration, especially when the first repair didn’t fully solve the problem. But each challenge brought new insights. In the end, the experience was not just about fixing a roof—it was about gaining confidence in handling home repairs.
common mistakes to avoid
One of the most common mistakes is ignoring early warning signs. A small stain or occasional drip may seem harmless, but it’s often the beginning of a bigger issue.
Another mistake is using temporary fixes as permanent solutions. Quick patches may hold for a while, but they rarely address the root cause.
Working without proper safety measures is also risky. Roof repairs can be dangerous, and taking precautions is essential.
Finally, neglecting maintenance after repairs can undo all the hard work. A well-maintained roof is less likely to develop leaks in the first place.
practical tips that made a difference
Using a moisture meter helped me identify hidden damp areas. Keeping a simple checklist ensured I didn’t overlook any steps. Taking photos during inspections allowed me to track changes over time.
I also found it helpful to work during dry weather. Wet surfaces make repairs less effective and more challenging.
Having the right tools and materials on hand saved time and effort. It’s worth investing in quality products for long-term results.
why these steps work
Each step addresses a specific aspect of roof leaks. Identifying the source ensures accuracy. Inspecting shingles and flashing targets common problem areas. Sealing and repairing structural damage provide durability. Testing confirms effectiveness. Maintenance prevents recurrence.
Together, these steps create a comprehensive approach. They don’t just fix the current leak—they strengthen the roof against future issues.
the emotional side of fixing a roof leak
It might sound unusual, but fixing my roof brought a sense of accomplishment. What started as a stressful situation turned into a learning experience.
There’s a certain satisfaction in solving a problem with your own hands. It builds confidence and encourages you to take on other challenges.
Of course, not every repair needs to be a solo effort. There are times when professional help is necessary. Knowing when to seek assistance is just as important as knowing how to fix things yourself.
final thoughts
Roof leaks can feel overwhelming, especially when they catch you off guard. But with the right approach, they are manageable.
These eight steps guided me through the process and ultimately saved my roof. They are practical, proven, and adaptable to different situations.
The key is to stay attentive, act promptly, and focus on long-term solutions rather than quick fixes. A well-maintained roof not only protects your home but also provides peace of mind.
frequently asked questions
- how do i know if my roof leak is serious
A leak is serious if it persists, spreads, or causes visible damage like mold, sagging ceilings, or structural weakening. Even small leaks should be addressed quickly to prevent escalation. - can i fix a roof leak myself or should i hire a professional
Minor leaks can often be fixed with basic tools and materials. However, extensive damage, structural issues, or safety concerns may require professional assistance. - what is the most common cause of roof leaks
Damaged shingles, faulty flashing, and clogged drainage systems are among the most common causes. Regular inspections can help identify these issues early. - how long do roof repairs typically last
The longevity of repairs depends on the quality of materials and workmanship. Properly done repairs with high-quality materials can last for years. - how often should i inspect my roof
It’s recommended to inspect your roof at least twice a year and after major storms. Regular checks help catch problems before they worsen. - what should i do if my roof leaks during heavy rain
If a leak occurs during heavy rain, contain the water using buckets and protect your belongings. Once the weather clears, inspect the roof and address the issue promptly.
This journey taught me that roof leaks are not just problems to fix—they are opportunities to understand and improve the integrity of your home.