
8 Essential Roof Leak Fix Guide Repair Tips for Beginners
8 Essential Roof Leak Fix Guide Repair Tips for Beginners
There’s something uniquely frustrating about discovering a roof leak. It rarely happens on a sunny afternoon when you’re relaxed and ready to fix things. Instead, it usually shows up during heavy rain, late at night, or when you’re already dealing with something else. Water stains creeping across the ceiling, that faint dripping sound, or worse, water pooling on the floor—these are the moments that turn a small issue into an urgent problem.
If you’re new to home maintenance, the idea of climbing onto your roof and fixing a leak can feel intimidating. But here’s the reality: not every roof leak requires a professional. Many small to moderate leaks can be handled safely and effectively with the right approach, tools, and mindset. The key is not just fixing the problem, but understanding it.
This guide walks you through eight essential repair tips that beginners can follow. It’s not just a list—it’s a practical, experience-based walkthrough designed to help you think like someone who has done this before.
—
Understanding what causes roof leaks in the first place
Before you even pick up a tool, it helps to know why leaks happen. Roofs aren’t just a single surface—they’re systems made up of layers: shingles or tiles, underlayment, flashing, vents, and structural supports. When any one of these components fails, water finds a way in.
Common causes include:
• Cracked or missing shingles
• Damaged flashing around chimneys or vents
• Clogged gutters causing water backup
• Poor sealing around roof penetrations
• Age-related wear and tear
• Storm damage from wind or hail
Think of your roof like a shield. When a small crack appears, water doesn’t politely stay outside—it exploits every weakness.
The goal of any repair is not just to patch the visible leak, but to restore the integrity of that shield.
—
Tip 1: Start with a careful inspection from the inside
One of the biggest mistakes beginners make is rushing straight to the roof. It’s tempting, but often inefficient. Start inside your home instead.
Look for:
• Water stains on ceilings or walls
• Peeling paint or bubbling plaster
• Damp insulation in the attic
• Mold or mildew smells
Follow the trail. Water rarely drips straight down—it travels along beams and surfaces. The spot where you see water inside might not be directly below the leak.
A useful trick is to inspect during or right after rainfall. Fresh leaks are easier to trace. Use a flashlight in the attic and look for shiny or damp areas.
Take notes or even sketch what you see. This helps when you move to the next step.
—
Tip 2: Inspect the roof safely and strategically
Now it’s time to go outside—but safety comes first. Roof work is not just about skill; it’s about awareness.
Before climbing:
• Use a stable ladder placed on level ground
• Wear shoes with good grip
• Avoid working in wet or windy conditions
• Consider using a safety harness if the roof is steep
Once you’re up there, don’t just wander randomly. Focus on areas above the interior damage you observed.
Look for:
• Broken, curled, or missing shingles
• Rusted or lifted flashing
• Debris buildup in valleys
• Cracks around vents or skylights
Move slowly and deliberately. A roof isn’t just something you stand on—it’s something you protect while repairing.
—
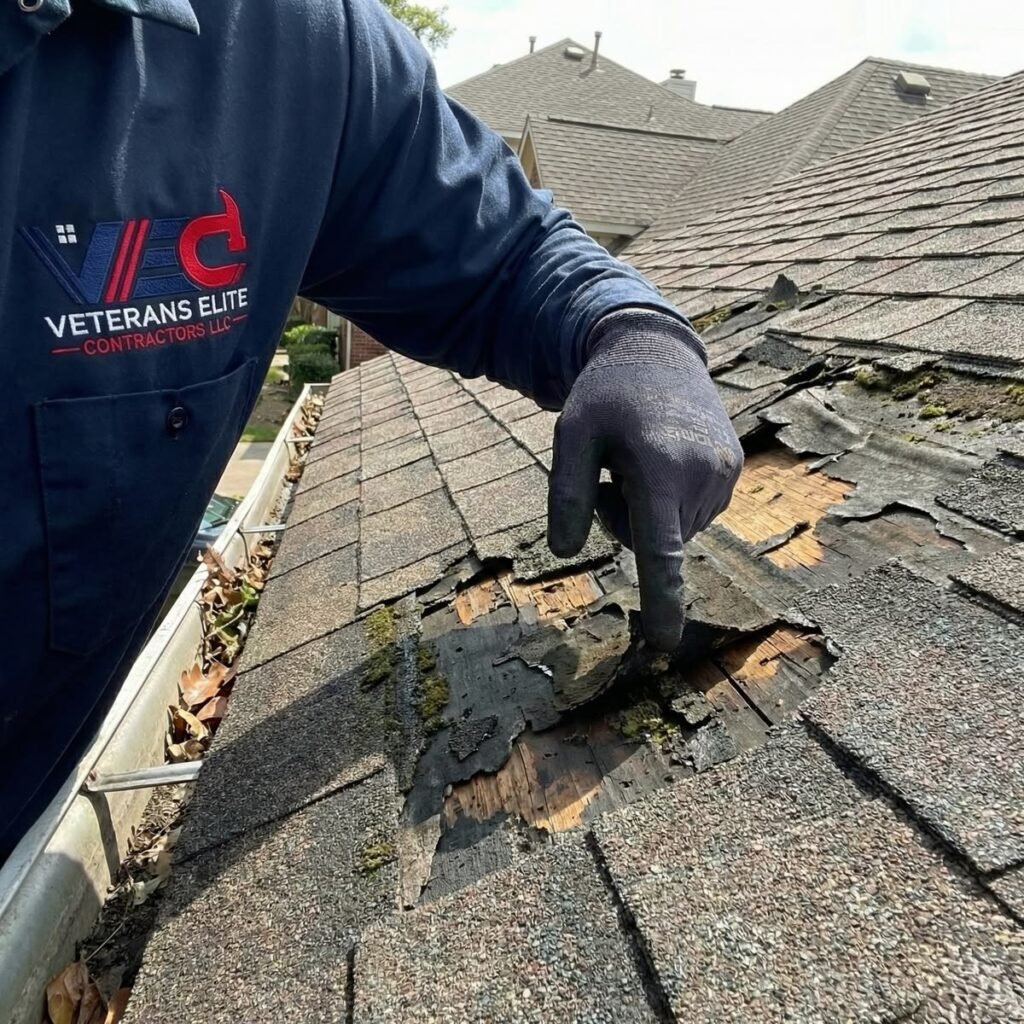
Tip 3: Learn to identify problem areas like a pro
Beginners often miss subtle signs. With a little attention, you can start noticing patterns that professionals rely on.
Key trouble spots include:
Roof valleys
These are where two roof slopes meet. Water naturally flows here, making them vulnerable. If debris collects, water can seep underneath shingles.
Flashing areas
Flashing is the thin metal installed around chimneys, vents, and joints. If it’s loose or corroded, leaks are almost guaranteed.
Roof penetrations
Anything that sticks through the roof—vents, pipes, skylights—is a potential entry point for water.
Edges and eaves
Improper drainage or ice buildup can cause water to back up under shingles.
By training your eye to recognize these zones, you’ll fix leaks faster and prevent future ones.
—
Tip 4: Use the right materials for lasting repairs
It’s easy to think any sealant or patch will do. That’s where many repairs fail.
For beginners, these are your essentials:
• Roofing cement or sealant
• Replacement shingles or tiles
• Roofing nails
• Flashing (if needed)
• A pry bar and hammer
Avoid shortcuts like using general-purpose glue or tape. Roofs face extreme conditions—heat, cold, rain, and wind. Materials must be designed specifically for roofing.
When replacing shingles:
- Lift the damaged shingle carefully
- Remove nails without damaging surrounding shingles
- Slide in the new shingle
- Secure it with nails and seal the edges
Precision matters more than speed.
—
Tip 5: Don’t ignore temporary fixes—but don’t rely on them
Sometimes you need a quick solution, especially during ongoing rain. Temporary fixes can prevent further damage, but they’re not permanent.
Examples include:
• Applying a tarp over the affected area
• Using roofing tape or sealant for immediate coverage
These methods are useful when:
• Weather conditions prevent proper repair
• You’re waiting for materials or help
• The leak is urgent and worsening
However, always plan a permanent repair as soon as possible. Temporary solutions degrade quickly and can give a false sense of security.
—
Tip 6: Address the root cause, not just the symptom
This is where many DIY repairs fall short. You might seal a crack, only to see the leak return weeks later.
Why? Because the underlying issue wasn’t fixed.
For example:
• A clogged gutter may cause water to overflow and seep into the roof
• Poor ventilation can lead to moisture buildup
• Damaged underlayment may allow water to spread unseen
After fixing the visible leak, take a step back and ask:
“What allowed this to happen?”
Preventive thinking is what turns a beginner into someone confident in their repairs.
—
Tip 7: Maintain your roof regularly to prevent future leaks
Fixing a leak is only part of the story. Keeping your roof in good condition reduces the chances of facing the same issue again.
Simple maintenance habits include:
• Cleaning gutters every few months
• Removing leaves and debris from the roof
• Inspecting after storms
• Checking for loose or damaged shingles
• Trimming overhanging branches
Think of maintenance as routine care, like servicing a vehicle. Small efforts now prevent major problems later.
—

Tip 8: Know when to call a professional
There’s no shame in recognizing your limits. Some situations require experience and specialized equipment.
Consider professional help if:
• The leak is widespread or severe
• Structural damage is suspected
• The roof is very steep or high
• You’re unsure about the repair process
• The problem persists after multiple attempts
Trying to handle complex issues without proper knowledge can lead to more damage—and higher costs in the long run.
A good rule of thumb: if the repair feels beyond your comfort level, it probably is.
—
A beginner’s mindset: patience over perfection
Roof repair isn’t about being perfect the first time. It’s about being careful, observant, and willing to learn.
You might:
• Take longer than expected
• Make small mistakes
• Need to redo a section
That’s normal.
What matters is that you approach the task with patience and respect for the process. Over time, your confidence will grow, and what once felt intimidating will become manageable.
—
Practical checklist before starting your repair
Before you begin, run through this quick checklist:
• Have I identified the leak source from inside?
• Is the weather safe for roof work?
• Do I have all necessary tools and materials?
• Am I wearing proper footwear and safety gear?
• Do I have a plan for both temporary and permanent fixes?
A few minutes of preparation can save hours of frustration.
—
Common beginner mistakes to avoid
Learning what not to do is just as important.
Avoid these pitfalls:
• Rushing the inspection process
• Using incorrect materials
• Ignoring safety precautions
• Overlooking nearby damage
• Assuming the first fix will solve everything
Every mistake is a lesson—but avoiding them is even better.
—
Real-life scenario: a simple leak repair walkthrough
Imagine this: You notice a brown stain forming on your ceiling after a heavy rain. You check the attic and find damp insulation near a beam.
You climb onto the roof and spot a cracked shingle near that area.
Here’s what you do:
- Carefully remove the damaged shingle
- Inspect the underlayment for damage
- Replace the shingle with a new one
- Secure it properly and seal edges
- Check surrounding shingles for additional issues
You monitor the area during the next rain—and the leak is gone.
This is a basic example, but it shows how methodical steps lead to effective results.
—
Why confidence matters in DIY repairs
Confidence doesn’t mean recklessness. It means trusting your ability to follow a process and make informed decisions.
Each repair you complete builds:
• Skill
• Awareness
• Problem-solving ability
Over time, you’ll spend less time guessing and more time doing.
—
FAQs
- How do I know if my roof leak is serious?
If the leak covers a large area, causes structural damage, or continues despite repairs, it’s likely serious. Persistent leaks or sagging ceilings are signs you should seek professional help.
- Can I fix a roof leak without replacing shingles?
Yes, minor leaks can sometimes be fixed using sealant or flashing repair. However, damaged shingles should be replaced for a long-term solution.
- Is it safe to repair a roof by myself?
It can be safe if you follow proper precautions—stable ladder use, good weather conditions, and appropriate footwear. Avoid working alone if possible.
- How long does a typical roof repair last?
A proper repair using quality materials can last several years. Temporary fixes may only last a few weeks or months.
- What is the best time to repair a roof leak?
Dry, calm weather is ideal. Avoid repairing during rain, high winds, or extreme heat.
- How much does a beginner roof repair usually cost?
Costs vary depending on the damage, but small DIY repairs are generally affordable, often limited to the price of materials and basic tools.
—
Final thoughts
Fixing a roof leak as a beginner might feel overwhelming at first, but it’s entirely doable with the right approach. The key is not just technical skill, but awareness—understanding where to look, how to act, and when to step back.
A roof protects everything beneath it. Learning to maintain and repair it isn’t just a practical skill—it’s an investment in your home and your confidence as a homeowner.
Take your time, stay safe, and treat each repair as a learning experience. Over time, what once seemed like a challenge will feel like second nature.


