3 Quick Roof Leak Fix Guide Basics I Learned After My First Leak
Meta Description: 3 Quick Roof Leak Fix Guide basics every homeowner needs — stop water damage fast with these simple, proven steps I learned the hard way.
3 Quick Roof Leak Fix Guide Basics I Came Up With After My 1st Leak
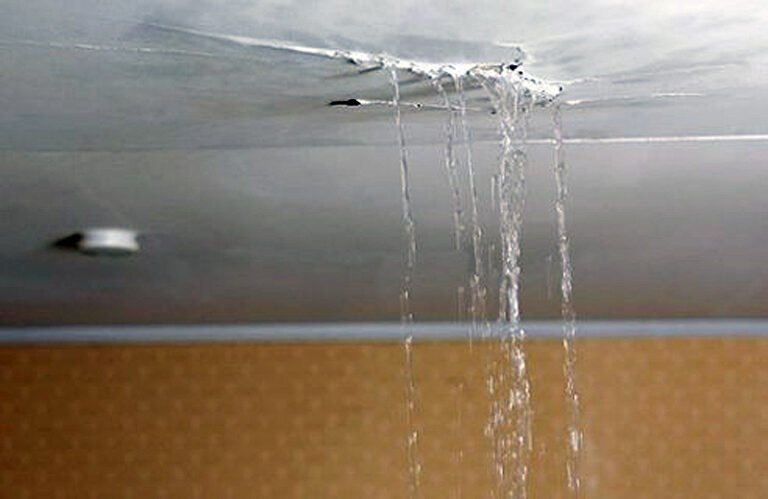
It was a Tuesday night. Rain was hammering the roof. Then I heard it — a soft, incessant drip from the ceiling. My stomach dropped.
I had no idea what to do.
I fetched a bucket and held it under the drip, then spent the next hour frantically Googling. What I discovered was bewildering — videos replete with roofing jargon, articles addressed to contractors, and advice that expected me to already know what “valley flashing” is.
That night, I learned an important lesson: Most homeowners are completely unprepared for their first roof leak.
This is the guide I wished for then. It lays the foundation of what the 3 quick roof leak fix guide covered that saved my house — and my bank account — before a professional could come out. Whether you’re facing a small drip or a steady stream, these basics will help you spring into action, prevent further damage, and find out exactly what to do next.
Let’s get into it.
Why a Roof Leak Is Worse Than It Seems
When most people see a water stain they think, “I’ll take care of this later.”
That’s a costly mistake.
A tiny leak can saturate insulation, rot wooden beams, breed mold, and ruin drywall — all in a matter of days. Water damage is among the most common and costly home insurance claims in the United States, according to the Insurance Information Institute.
The faster you react, the less damage you suffer. That is why it is so important to know the necessary quick roof leak fix basics. You do not need to be a professional roofer but should at least understand three main things: how to find a leak, how to stop it temporarily, and how to protect the indoor part of your home while you wait for a proper fix.
What Causes Most Roof Leaks — First Check These Weak Points
Before starting to repair something, it would be useful to know why roofs leak at all. It would not only help find the source but also explain the cause and make the next steps much easier to undertake.
| Cause | How It Happens |
|---|---|
| Damaged or missing shingles | Wind, age, or impact breaks the seal |
| Cracked flashing | Metal strips around chimneys and vents rust or shift |
| Clogged gutters | Water backs up and seeps under shingles |
| Worn pipe boots | Rubber seals around pipes crack over time |
| Skylights | Poor installation or aging seals let water in |
| Ice dams | Frozen water forces ice under shingles in cold climates |
| Valley leaks | Where two roof slopes meet, water can pool and push through |
The 3 Quick Roof Leak Fix Guide Basics
Basic #1 — Find Where the Water Is Actually Coming From
This sounds simple. It isn’t.
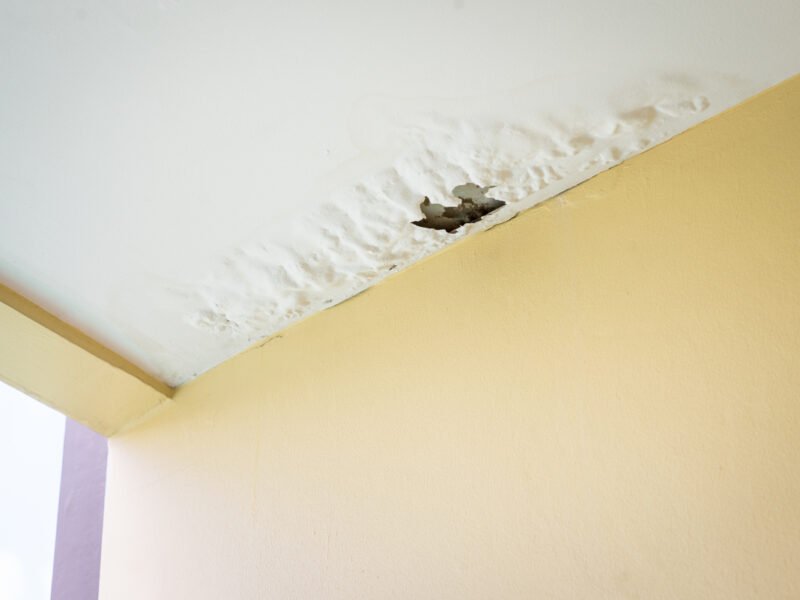
Water is sneaky. It doesn’t simply drop straight down. It drapes on beams, trickles through pipes, and collects in insulation before appearing on your ceiling. The spot where you see the water stain is rarely where the leak originates.
Start from the Inside
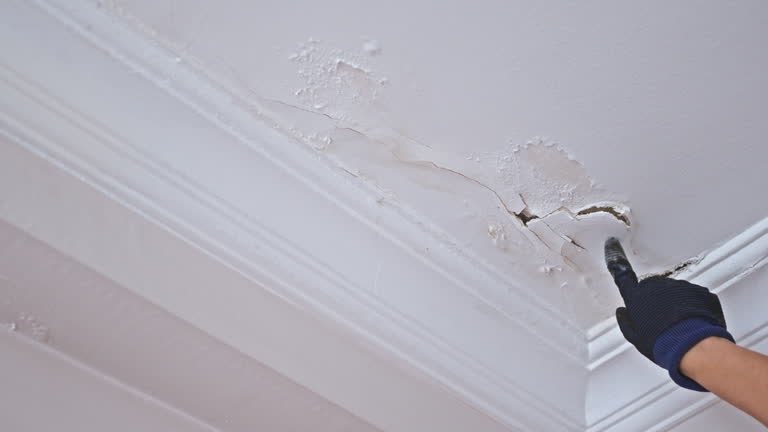
Climb into your attic with a flashlight. Look for:
- Water stains on the wood (yellowish or dark brown spots)
- Damp insulation (it’ll feel damp or smell musty)
- Mold or mildew growing on beams or the underside of the roof decking
- Any cracks or gaps with daylight seeping through
Follow the trail upward and toward the outside walls. The real entry point is typically further up than where the water drips down.
Mark the Spot
Once the general entry zone is established, mark it from within using chalk or tape. This helps when you or a roofer needs to go up top and repair it.
Work Your Way Outside
If you can get safely onto the roof (or look from a ladder), inspect the areas you flagged. Look closely at:
- Curled, cracked, or missing shingles
- Any flashing that appears lifted, rusty, or detached
- Pipe boots that appear cracked or shrunk around the base
- Places where debris has accumulated
Pro tip: If you can, conduct your inspection after a heavy rain. Damp regions are more prominently visible.
The Garden Hose Test
If you can’t locate the source immediately, try this approach: Have someone remain inside the attic while you slowly run a garden hose over sections of the roof. Start low and move up. When the person inside spots dripping, you’ve hit your zone.
It’s a slow process, but it is effective.
Basic #2 — Plug the Leak Quickly With Temporary Fixes
Once you’ve located the problem area, your next task is to halt or slow down the water before it can do more damage.
You do not need a contractor for this step. All you need is the proper materials and a bit of confidence.
Fix #1: Roofing Tar or Caulk
Roofing tar (also known as roof cement or flashing cement) is your best friend for a quick exterior repair. It is thick, waterproof, and adheres to nearly everything.
Here’s how to use it:
- Clean the damaged area — removing dirt, debris, and loose shingle pieces
- Wipe the surface dry (a rag works well)
- Smear roofing tar liberally over the crack, hole, or raised flashing
- Press down any loose material and seal the edges
This is effective on small cracks in flashing, gaps around pipe boots, and areas where shingles have separated slightly.
Caution: Roofing tar is a temporary, not a permanent solution. But it can last for weeks, or even months, while you arrange a proper fix.
Fix #2: Roof Repair Tape (Butyl Tape)
Roof repair tape is strong, self-adhesive waterproof tape made for exactly this kind of situation. You can find it in every hardware store.
To apply it:
- Clean and dry the area as best you can
- Remove the backing and press the tape firmly over the damaged area
- Overlap the tape at least 2 inches on all sides of the problem spot
- Press strongly from the center outward to remove air bubbles
Good for cracked flashing, small punctures, or areas where shingles have pulled away at the edges.
Fix #3: Tarp It
If the affected area is large or you can’t pinpoint the exact entry point, a tarp is your best bet.
Here’s how to do it safely:
- Buy a heavy-duty polyethylene tarp that is big enough to span the damaged area and several feet on either side
- Place it over the ridge of the roof and let it hang down on either side
- Secure it with sandbags, bricks, or wooden boards along the edges
- Never nail a tarp directly into the roof — this creates new holes
A tarp can keep your home protected for days or weeks in heavy rain. It’s not pretty, but it gets the job done.
A Quick Comparison of Temporary Fix Options
| Method | Best For | Cost | Ease of Use | Lifespan |
|---|---|---|---|---|
| Roofing Tar | Cracks, gaps, flashing | $8–$15 | Easy | 1–6 months |
| Butyl Repair Tape | Small punctures, edges | $10–$20 | Very Easy | 2–12 months |
| Emergency Tarp | Large damage, unknown source | $15–$40 | Moderate | Days to weeks |
For more detailed product recommendations and step-by-step repair walkthroughs, visit Roof Leak Fix Guide — a helpful resource built for homeowners dealing with exactly these situations.
Basic #3 — Safeguard the Inside of Your Home Right Now
While you’re attempting to address the roof, water might already be inside your home. The third basic of this quick roof leak fix guide is all about indoors — damage control.
This part is just as vital as repairing the roof.
Catch the Water
Put buckets, bins, or towels under dripping areas. Check back often and empty them before they overflow.
If the ceiling is bulging, that means water has pooled above the drywall. Use a screwdriver to make a small hole in the center of the bulge. This releases the water in a controlled way — rather than allowing the entire ceiling to collapse.
Yes, it sounds scary. But a small hole in drywall is far simpler and less expensive to repair than a fallen ceiling.
Move Your Belongings
Move furniture, electronics, rugs, and anything of value out of the affected space. Water can travel quickly across floors and destroy things you wouldn’t expect.
Dry Everything Out
Once dripping slows or stops, begin drying the area as soon as possible. Use:
- Box fans to help with air movement
- Dehumidifiers for removing moisture from the air
- Dry towels to soak up surface water
The sooner you dry things out, the less chance for mold to grow. In warm, damp conditions, mold can develop within 24–48 hours.
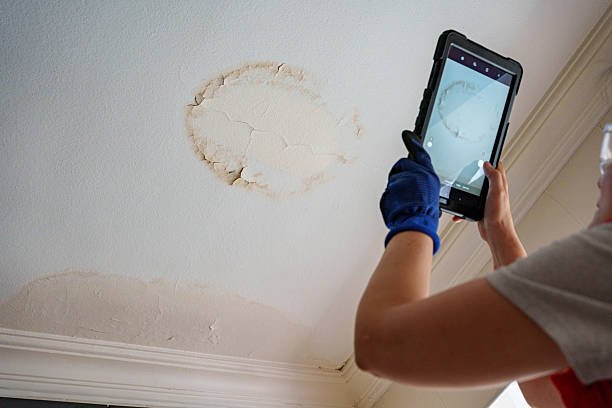
Document the Damage
Before you tidy up, take pictures and video of everything — the ceiling stain, the damaged section, the standing water, the wet insulation. This documentation can prove invaluable if you end up filing a homeowner’s insurance claim.
Safety First: What to Avoid When You Have a Roof Leak
It’s easy to panic and make the situation worse. Here’s what to avoid:
- Do not go on the roof during rain or wind. Wet roofs are dangerously slippery. Wait for dry conditions.
- Don’t ignore the leak. Even a little drip can cost thousands in structural damage.
- Don’t use duct tape as a repair. It does not adhere well to roofing materials and breaks down quickly.
- Do not drill or saw near the leak area until you know what’s behind the wall or ceiling.
- Don’t presume that a single patch will suffice. Check the area again after the next rain.
When to Call a Professional Roofer
Temporary fixes are great — but they’re not forever. Here’s when you should stop DIYing and call in a pro:
- The leak keeps recurring after being patched
- You notice extensive water damage or mold growth
- The roof deck feels soft or spongy
- Multiple shingles are missing or severely damaged
- The leak is close to electrical wiring or your breaker box
- You’re not comfortable with safely accessing the roof
A licensed roofer can evaluate the damage and provide you with an accurate estimate of repair or replacement. It is always a good idea to get at least two or three quotes before committing to any major work.
How to Protect Your Roof from Leaks Before They Happen
The best quick roof leak fix? Avoiding a leak in the first place.
Here are habits that go a long way:
Annual Roof Checkups
Take a walk around the perimeter of your home every year and look at the roofline. Use binoculars instead of climbing up. Look for:
- Missing or curling shingles
- Discolored or dark patches
- Sagging areas
- Debris buildup in valleys
Keep Gutters Clear
Clogged gutters are a leading cause of roof leaks. Clean them at least twice a year — once in spring, and once in late fall after leaves have dropped. Ensure downspouts are channeling water away from the foundation.
Trim Overhanging Branches
Tree limbs that overhang your roof shed debris, hold moisture, and can scrape or puncture shingles in windstorms. Keep them trimmed back.
Check Your Attic Ventilation
Heat and moisture build up in a poorly ventilated attic, which reduces your roof’s life from within. Make sure your attic vents are clear and functioning properly.
Re-seal Flashing Every Few Years
Flashing around chimneys, skylights, and vents is one of the most common leak locations. A tube of roofing caulk applied every couple of years goes a long way.
Roof Leak Fix Cost: What to Expect
Understanding cost helps you know when to DIY and when to hire out.
| Repair Type | DIY Cost | Professional Cost |
|---|---|---|
| Patch with roofing tar | $10–$20 | $150–$400 |
| Replace a few shingles | $30–$80 | $200–$600 |
| Fix cracked flashing | $15–$30 | $200–$500 |
| Replace pipe boot | $10–$25 | $150–$300 |
| Full section replacement | $100–$300 | $1,000–$3,500+ |
The takeaway: early, minor fixes are extraordinarily cheaper than allowing a leak to go unchecked.
FAQs About Roof Leak Fixes
Q: How can I tell if my roof is leaking or if it’s condensation? Condensation usually manifests in a broader, more even pattern. A leak will normally show up as a specific stain, drip, or trail that worsens during or after rain. Inspect your attic — active leaking generally leaves wet wood or insulation.
Q: Is there a way to repair a roof leak from the inside? Roofing tar, applied to the underside of the roof deck, can temporarily slow water entry from within. But this is a short-term action. The actual fix needs to happen from the outside.
Q: How long will a temporary roof patch last? It depends on the method and conditions. Roofing tar can last several months. Butyl tape can hold for up to a year. A well-secured tarp can keep your home dry for a few weeks. None of these are a substitute for a real repair.
Q: Are small roof leaks covered by homeowner’s insurance? It varies by policy and the cause. Sudden damage from a storm is normally covered. Slow leaks from poor maintenance usually aren’t. Always document damage and contact your insurer as early as you can.
Q: How soon does mold grow after a roof leak? Mold can start growing in as little as 24 to 48 hours in warm, damp conditions. That’s why it’s important to dry out the affected area as quickly as possible.
Q: Should I fix a roof leak myself or always call a pro? For small, accessible areas such as a cracked pipe boot or a small section of lifted flashing, a confident DIYer can make a temporary fix. For anything structural, extensive, or close to electrical wiring, you should call a licensed roofer.
Putting It All Together
My first roof leak was stressful and costly — mostly because I didn’t know what to do.
But it also taught me everything that is in this guide.
Find the leak, create a temporary fix to stop the water, and safeguard your home’s interior — these are basic steps even the most novice homeowners can follow. You don’t need special skills. You don’t need expensive tools. All that is required is to act as quickly and calmly as possible.
An early roof leak is an easy fix. A roof leak ignored is a big disaster.
Bookmark this guide. Share it with a neighbor. And the next time it rains and a drip appears out of nowhere, you’ll know exactly what to do.
Did this guide help you deal with a leak? Every roof scenario is slightly different — when in doubt, always get a professional inspection to ensure your home remains safe and dry.